
Question

How do I make the Packages on Shop For Rates be Searchable by their Description? 2024 R1

  • May 20, 2026
  • 2 replies
  • 38 views

Forum|alt.badge.img

Hi! I am still new to customizations and am learning the no-code options every chance I get, but I’m stuck on this one. 
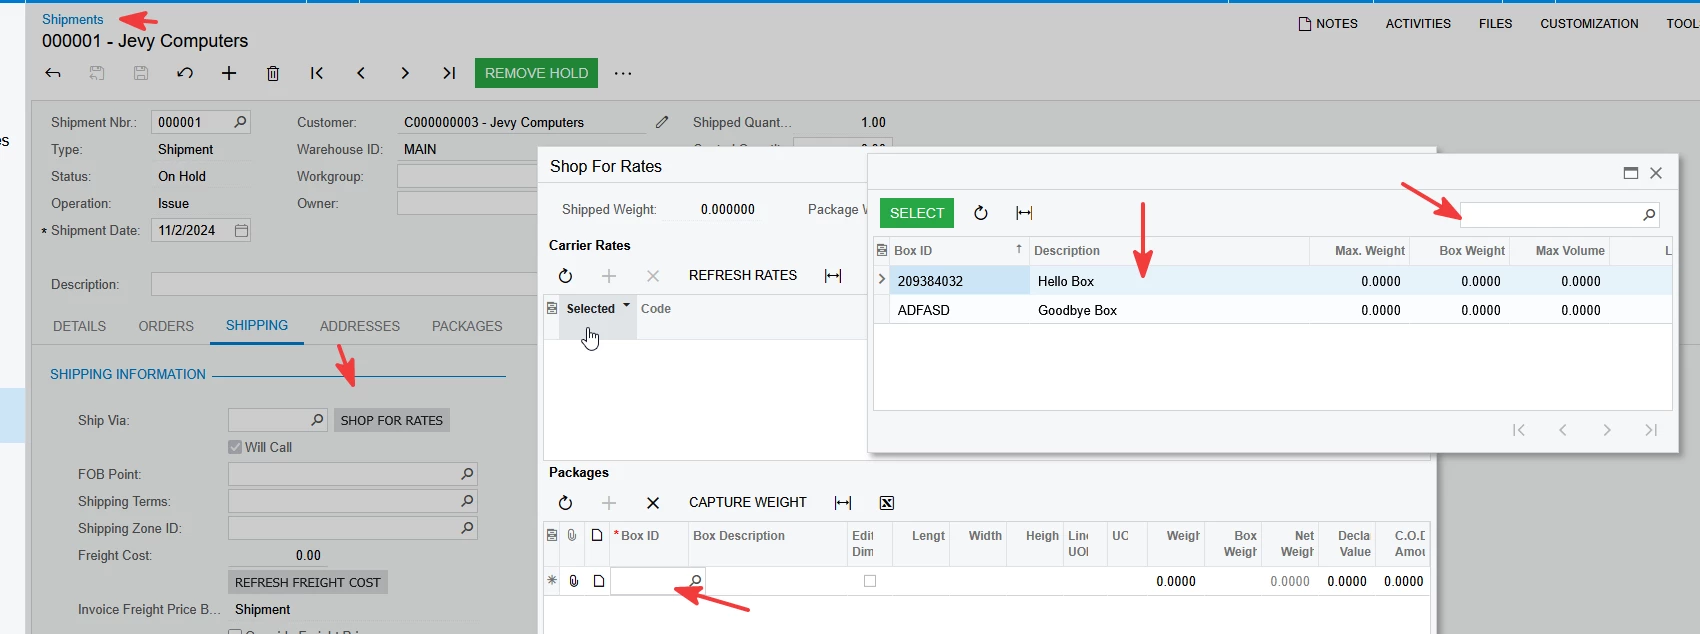
Shipments → Shop for Rates → Add Package → Search Box


I was able to do the same thing in the Packages tab by setting FilterByAllFields to be true, but there doesn’t seem to be an equivalent in this part of the Form. Any help would be appreciated! 
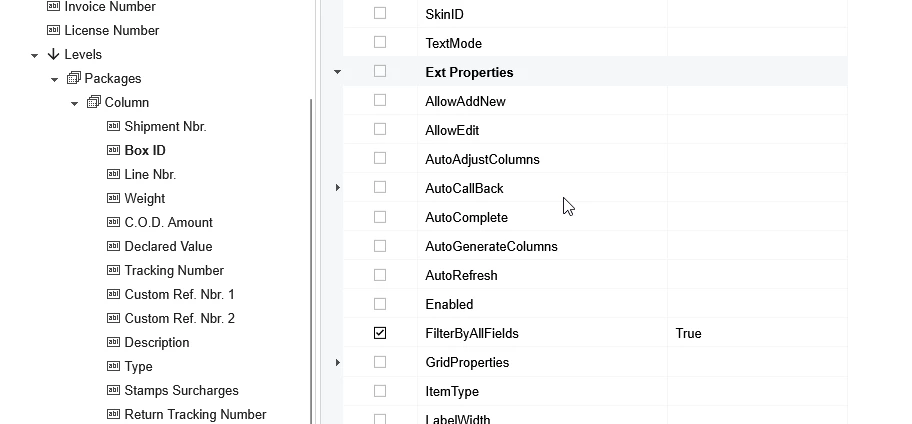
 

Process that worked for Packages Tab


2 replies

VardanV
Varsity I
Forum|alt.badge.img+1
  • Varsity I
  • May 21, 2026

Hi,

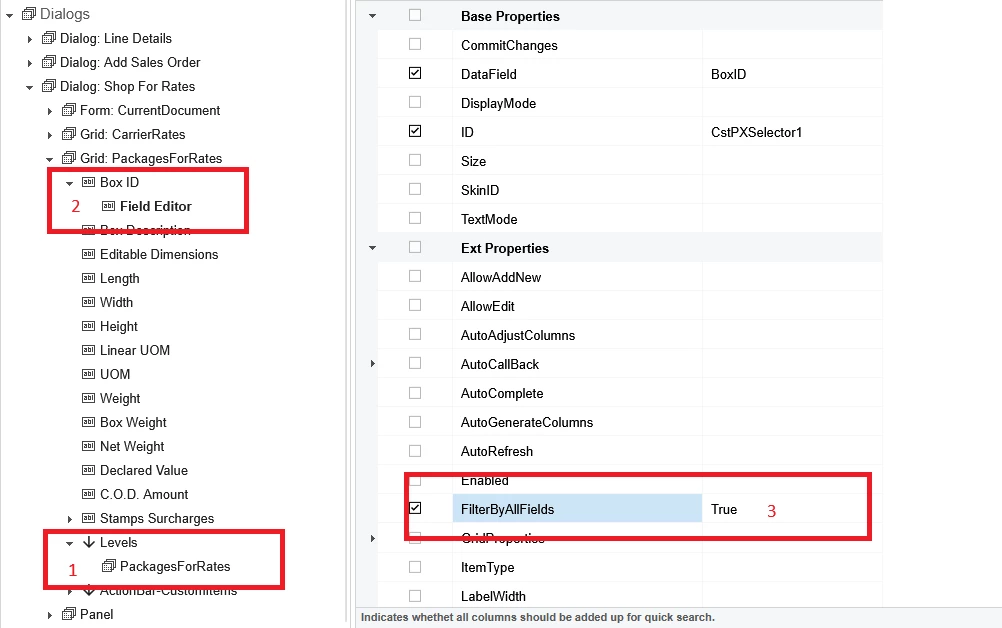
You need to add the Box ID field to the Levels section. Then expand the Box ID field, open the Field Editor, and set the FilterByAllFields property to True.


Forum|alt.badge.img

Tried to save some response time by asking Gemini for clarification. Your answer got me there with some help so thank you. Posting the response I got to save some electricity and water from someone else doing it: 


Instead, to "add a field to the Levels section," you have to highlight the level target on the left so Acumatica knows where to look, and then use the Add Data Fields tab on the right pane to generate it.

Here is the exact step-by-step process to get Box ID to show up in that grid layout:

Step 1: Select the Grid Level

  1. In the left-hand tree view of the Screen Editor, navigate to your Dialog: Shop For Rates > Grid: PackagesForRates.

  2. Expand the Levels folder.

  3. Left-click on PackagesForRates (this matches the red box 1 in your forum screenshot). Highlight it so it's active.

Step 2: Add the Field from the Right Pane

  1. Keeping PackagesForRates highlighted on the left, move your mouse over to the far right-hand panel.

  2. Next to the Properties tab, click on the Add Data Fields tab.

  3. Scroll through the list of fields provided by the underlying Data Access Class (DAC) and locate BoxID (or Box ID).

  4. Check the box next to BoxID.

  5. Click the Create Controls button at the top of that right pane.

Once you click Create Controls, Acumatica will automatically insert the Box ID node into the left tree structure (it will appear as a sibling element above the Levels folder, exactly where red box 2 is pointing).

Step 3: Enable FilterByAllFields

  1. Now that Box ID is visible in your left tree view, click the small arrow to expand it.

  2. Click on Field Editor underneath it.

  3. Switch the right-hand panel back from Add Data Fields to the Properties tab.

  4. Scroll down to the Ext Properties section, find FilterByAllFields, and double-click or change it to True (matching red box 3).

  5. Click the Save icon at the top of the Screen Editor and publish your customization project.

This will force the selector dropdown for the Box ID inside that specific rates dialog grid to parse and search against the box descriptions rather than just matching exact IDs.