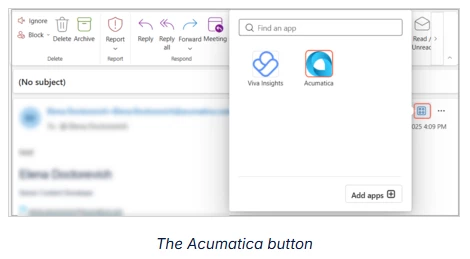



Hello,
Exciting news for our VAR/Partners and customer admins who will be installing the Acumatica Outlook Add-In for the first time. We’ve built a customization package to streamline many manual steps that had to be previously taken to install and set up the Outlook Add-In.
This script automates the Microsoft Entra registration and the Acumatica-side connection, so your admin only needs to run it once and then your users are ready to install the add-in!
Before you start:
- An Entra (Azure AD) administrator must run the setup. The package creates and consents to the app registration in your Microsoft tenant, which requires admin rights. A standard Acumatica admin without Entra privileges won’t be able to complete it. Before running, please review the manual steps included to assure you are comfortable running this script. These steps can be found in the Solution section of this link.
-
Download the Customization Script here.
-
Note- this is still dependent on your Acumatica instance being properly licensed for use of the Outlook Add-In. Questions? Please talk to your VAR/Partner.
-
Step 1: Run the setup (Entra admin)
- Import and publish the customization package,
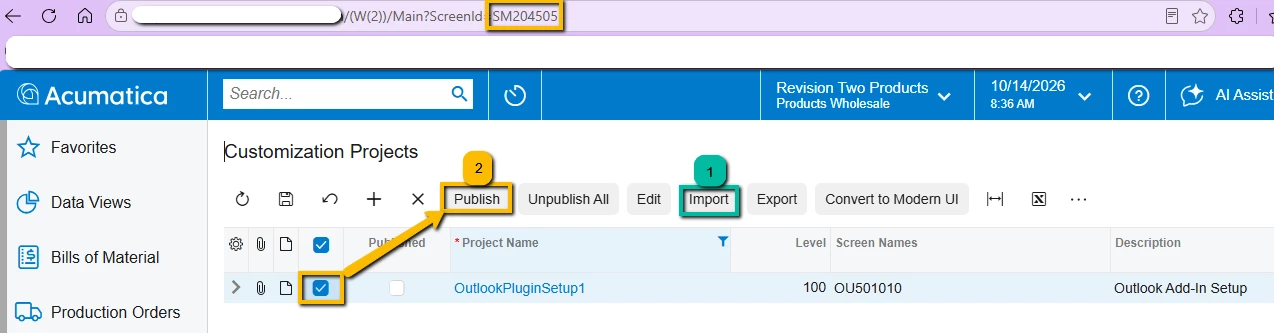
- then run the setup from OU501010, assuring you are using an account that has Entra admin rights. (The Registration Output field has additional instructions within:)
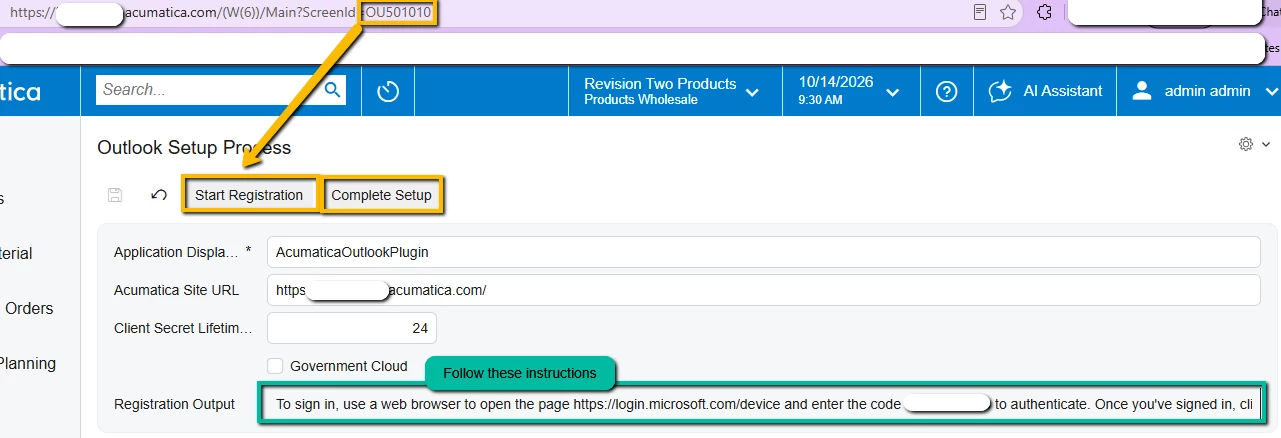
Step 2: Verify the connection
Open the OpenID Providers screen (SM303020) and confirm that the Outlook connection is now registered there.
Step 3: Users download their manifest
Each user goes to the top-right corner in Acumatica, selects My Profile, opens Email Settings, and clicks Get Outlook Add-In Manifest.
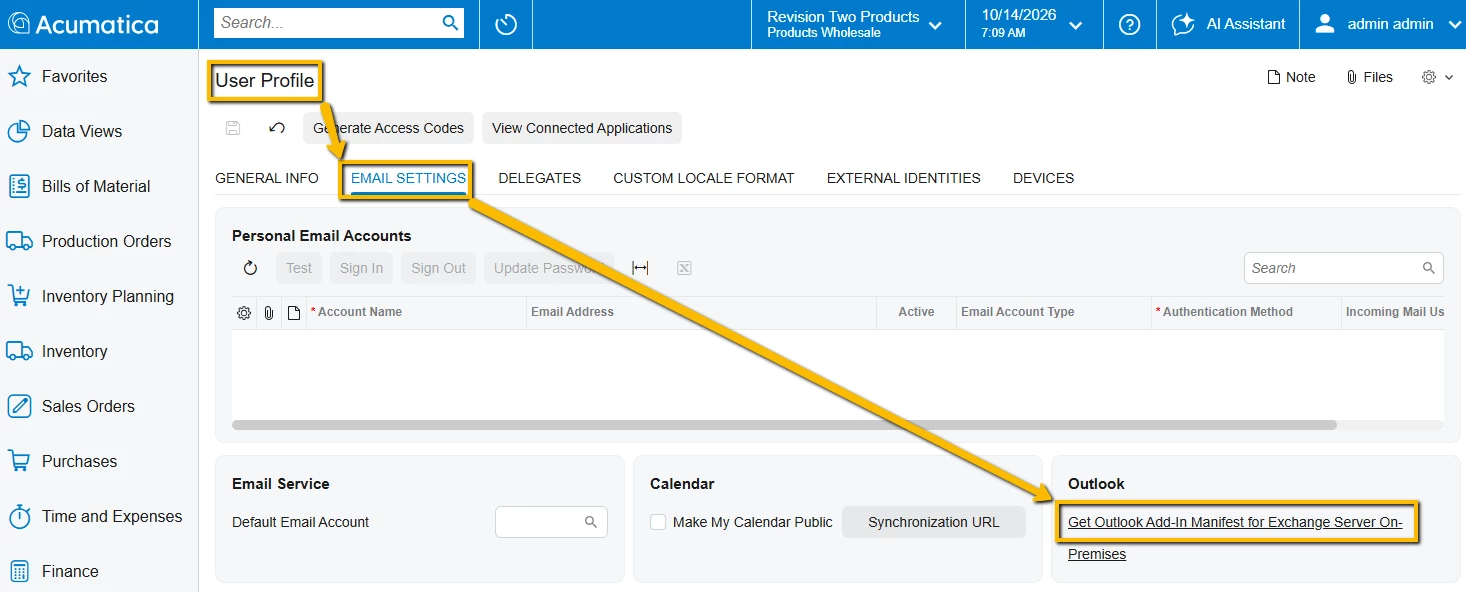
Step 4: Users install the add-in in Outlook on the web
- Sign in to Outlook on the web and open the Add-Ins for Outlook dialog.
- In the navigation pane, select My add-ins.
- Under Custom Add-ins, select Add a custom add-in, then Add from File.
- Browse to the manifest file you downloaded and click Open.
- In the warning dialog, click Install.
- Close the Add-Ins for Outlook dialog.
That’s it. The add-in is available to the user right away.