Question

Publish new form to Acumatica

  • March 5, 2026
  • 6 replies
  • 52 views

Forum|alt.badge.img

Hello, 

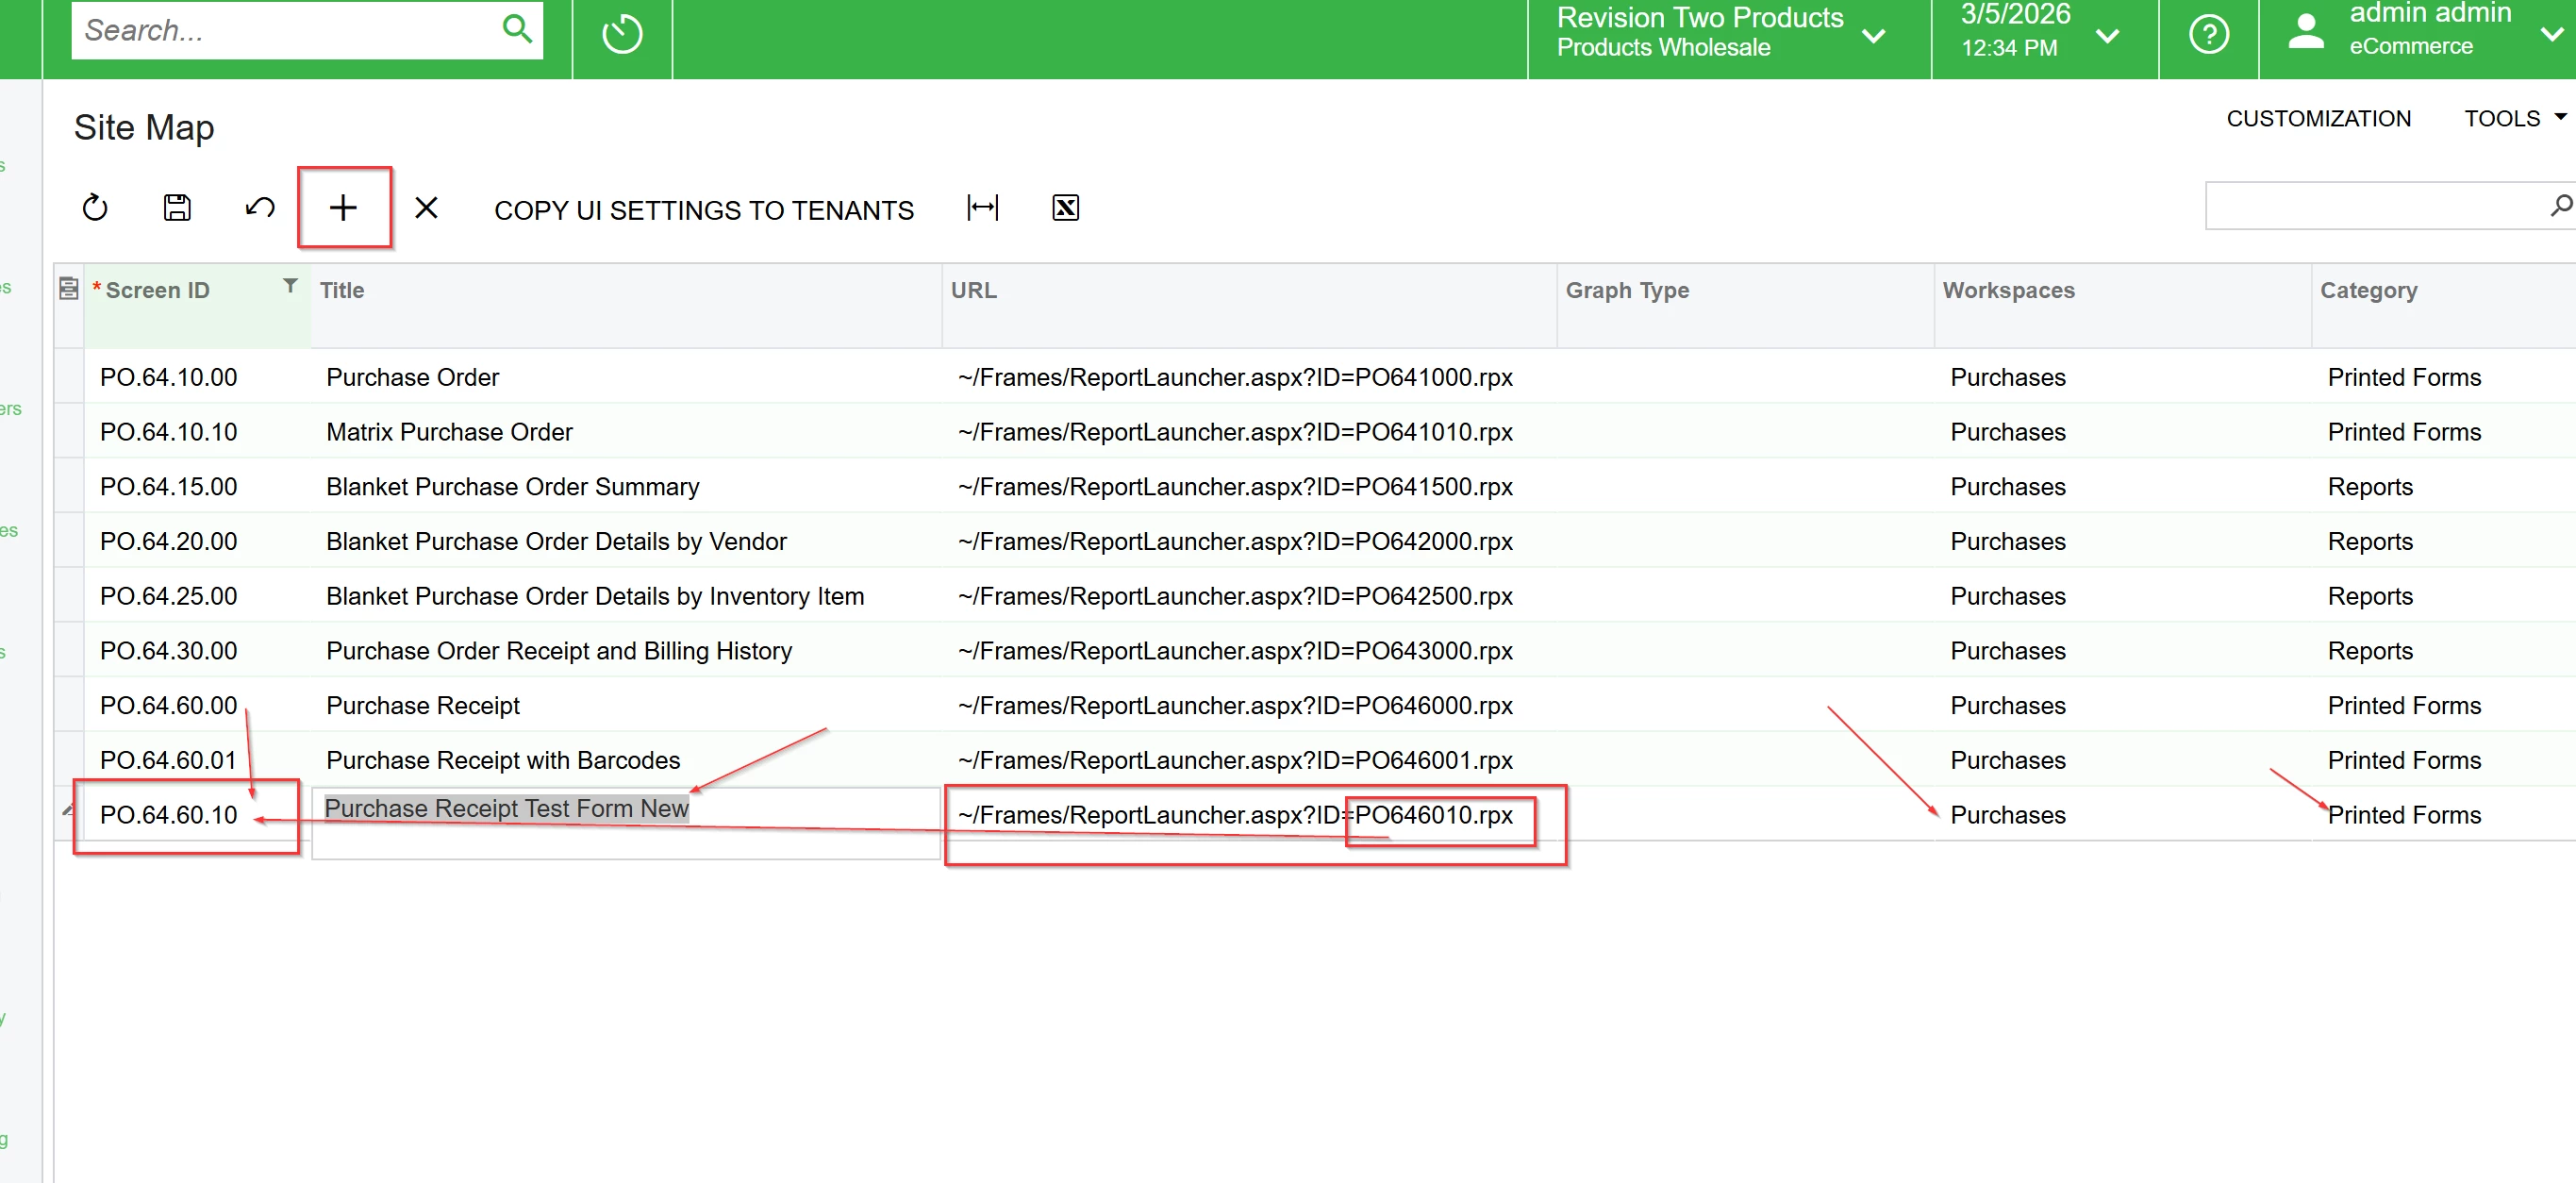
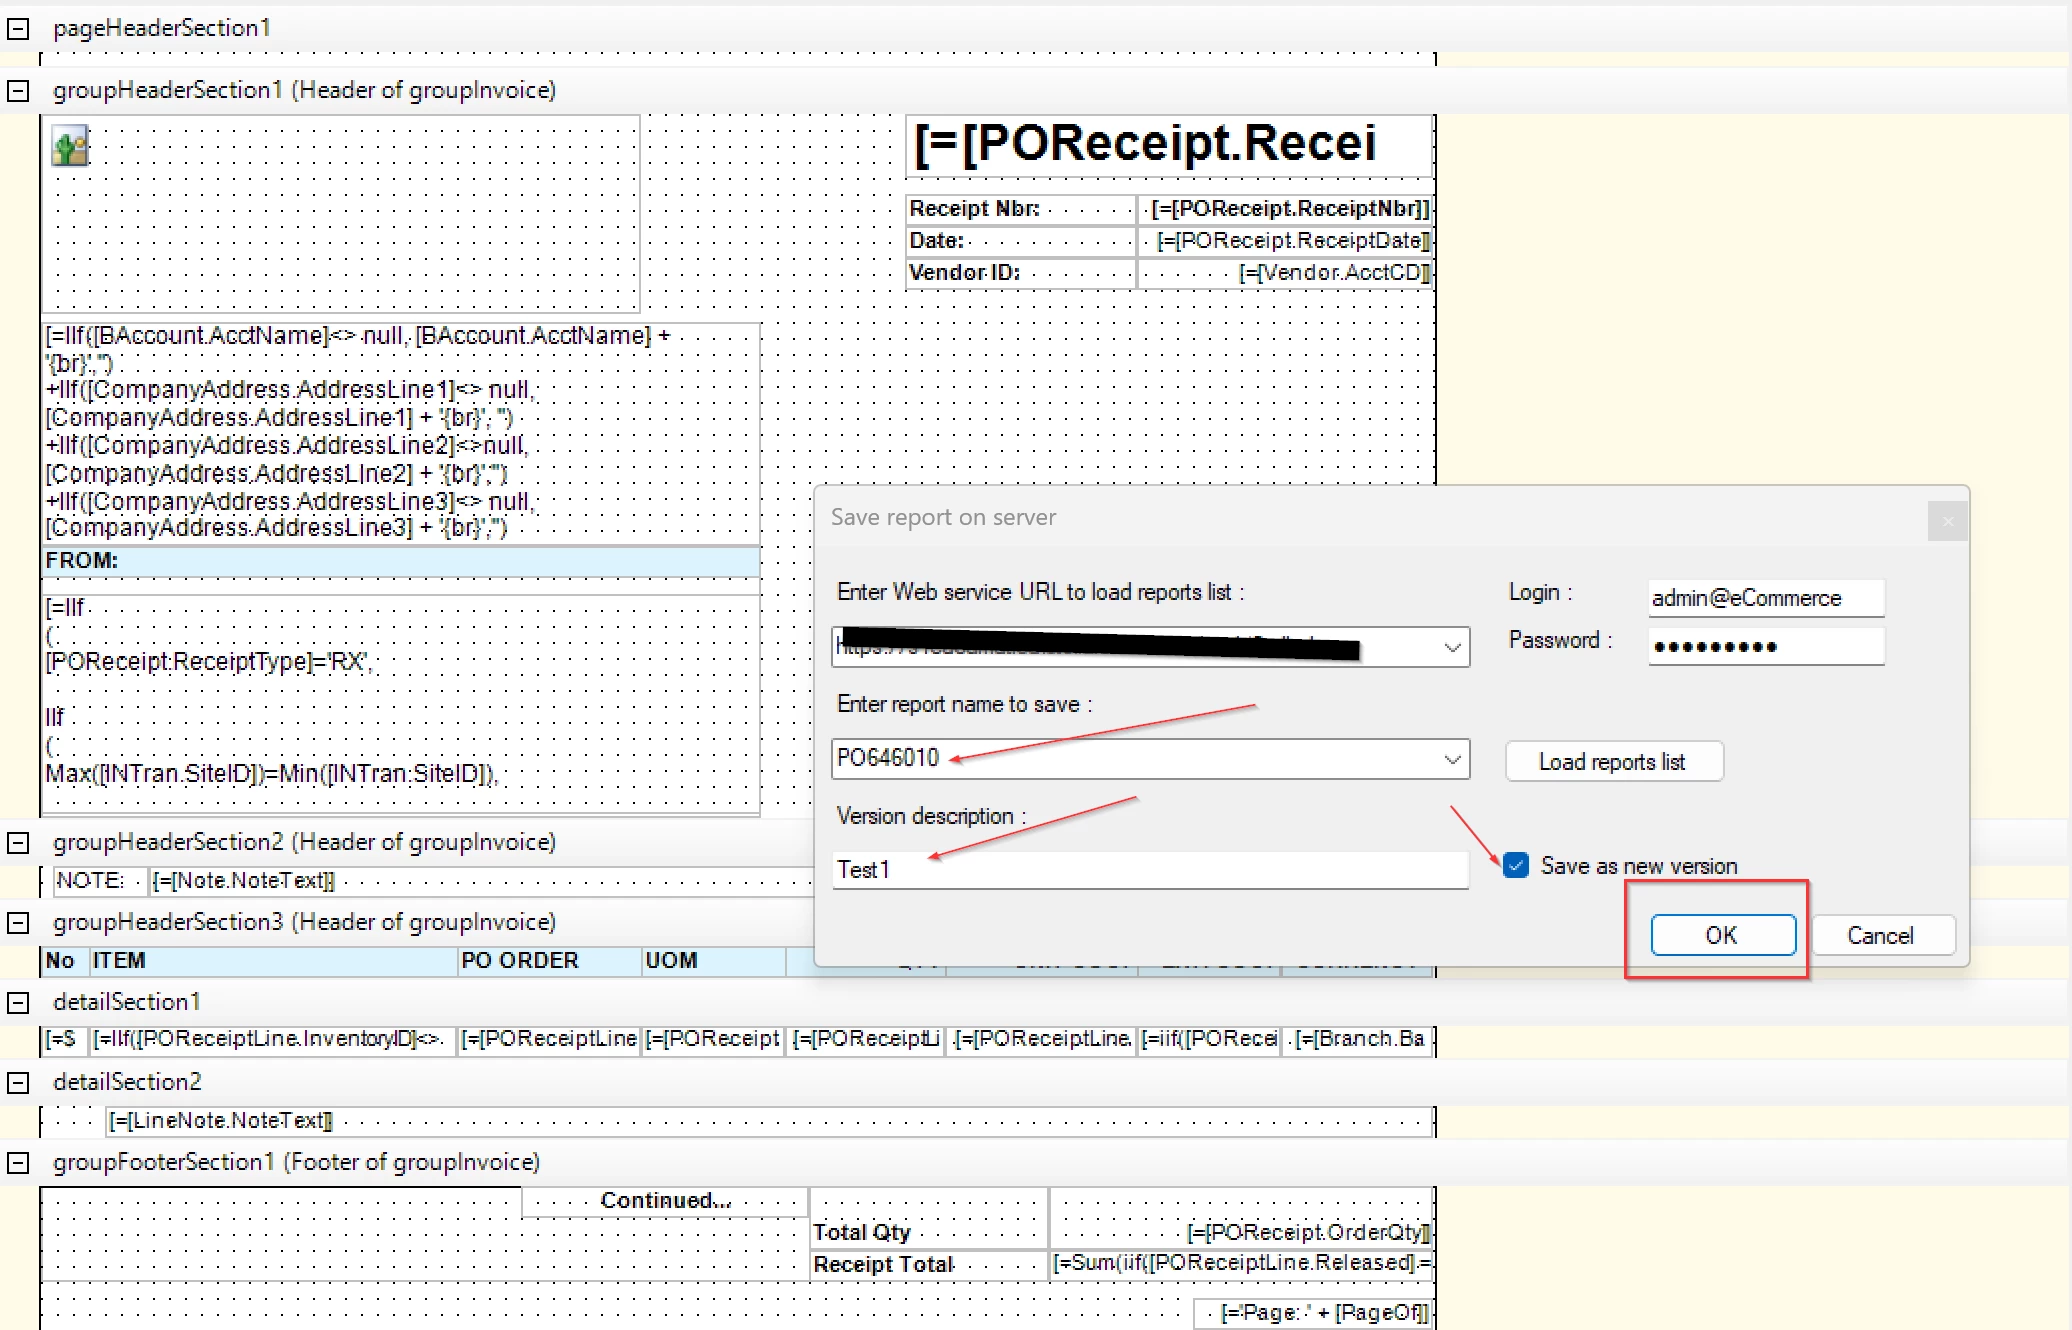
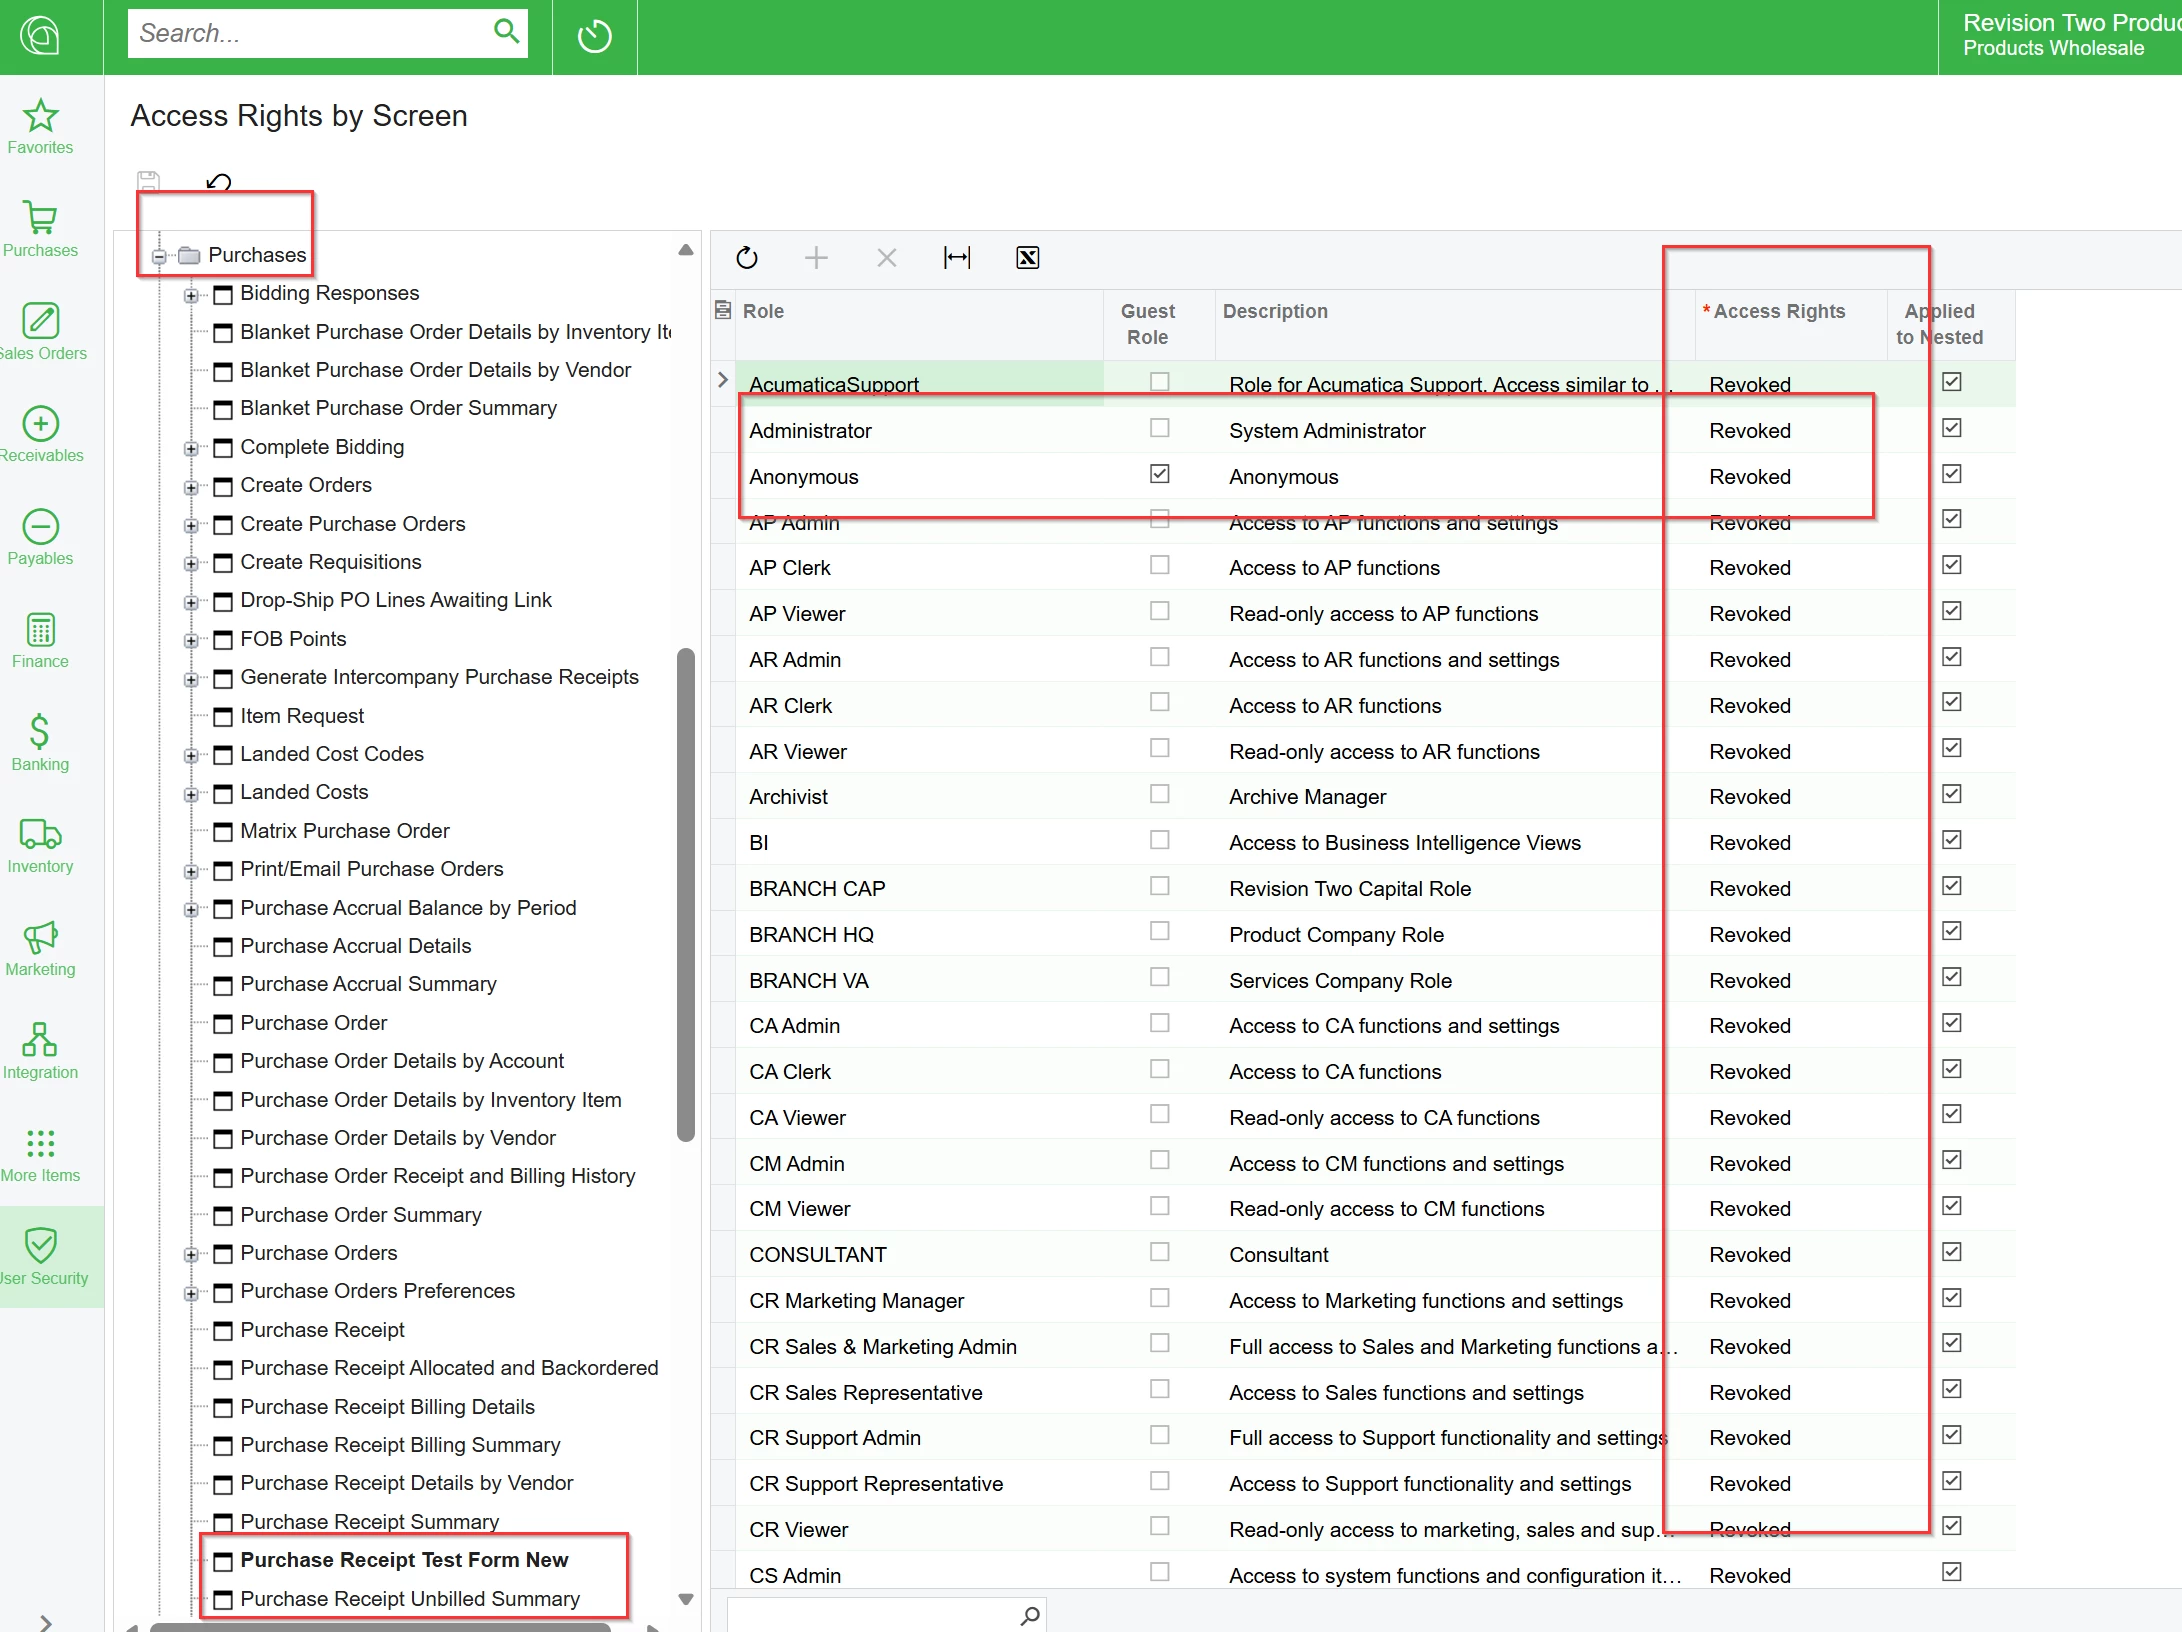
I created a new form in Acumatica and I’m trying to publish it for use. I saw a guide on using the Site Map to publish it but then there are further steps that I’m not sure of. Does anyone have a 5th grade level explanation on publishing a brand new form? 

I saved the .RPX file so I can upload it as well.


Brent

6 replies

BenjaminCrisman
Acumatica Employee
Forum|alt.badge.img+4

@bbondura If you’re referring to adding a new or custom report to the site, then from within Report Designer you can just click File > Save to Server and then click OK.

The report is now on the server and just needs to be added to the site map. So navigate to the site map, click the + to add a new line and give it a new screen ID, Title, and then for the URL you’ll need to use:

~/Frames/ReportLauncher.aspx?ID=AR641500.rpx, except change out the reportID (AR641500) for your reportID and then click Save.

The report is now on the site map but the default access for new screens is Revoked for everyone. So click Tools > Access Rights… and if you added a workspace to the site map line then you’ll find your report in that workspace, if you left the workspace field blank, then it’s in the Hidden folder at the bottom of the Access Rights by Screen form.

Locate your report and set proper access for who needs to see it and that’s all you need to do!


rkenna
Captain II
Forum|alt.badge.img+1
  • Captain II
  • March 5, 2026

Hi ​@bbondura,

Create the Screen (which sets revoked for all roles) > Save the Report to the Screen > Give Access to the Screen

On the Site Map, find where you want to save it, and base it off the area. Example, PO Receipt Test Form New that I did.

Add a new Row>Give it a Screen ID > Title > Copy one of the Frames/ReportLauncher… URLs from another screen > Change the Report ID at the end of the URL to the ScreenID > Give it a WorkSpace and a Category
 

Then, on the report, save to Server with the ID that you put at the end of the URL above (the Screen ID) > Give it a Version Description, then Save as New Version.


Lastly, on Access Rights by screen > Find the screen you created (the workspace and name you saved in step 1) > Give access rights to the Admin and any other roles you’d like”


Cheers,

RJ


rkenna
Captain II
Forum|alt.badge.img+1
  • Captain II
  • March 6, 2026

Hi ​@bbondura, did you get your new form added in?


Forum|alt.badge.img
  • Author
  • Jr Varsity III
  • March 6, 2026

Hello,

Not yet. I will be trying to work on that today. If not today, this weekend. I have a meeting on Tuesday to go over the form with an employee so I want to make sure it’s loaded in by then. 


Thank you for the guide! That should help a ton.


Brent


rkenna
Captain II
Forum|alt.badge.img+1
  • Captain II
  • March 6, 2026

Awesome ​@bbondura, keep me posted if you run into any issues. It can be tricky the first time for sure.

Cheers,

RJ


Forum|alt.badge.img
  • Author
  • Jr Varsity III
  • March 6, 2026

Got it all set up. Seems that I get an error when trying to view it. 

I’m sure it’s something dumb I did in the report. There currently isn’t any variables in the form yet. That might be throwing it off. 

 I’ll have to dig in. Thank you for getting me this far!