Answer

How to remove 'Enter Record Note' from printing on Invoices

  • December 4, 2023
  • 3 replies
  • 67 views

Forum|alt.badge.img

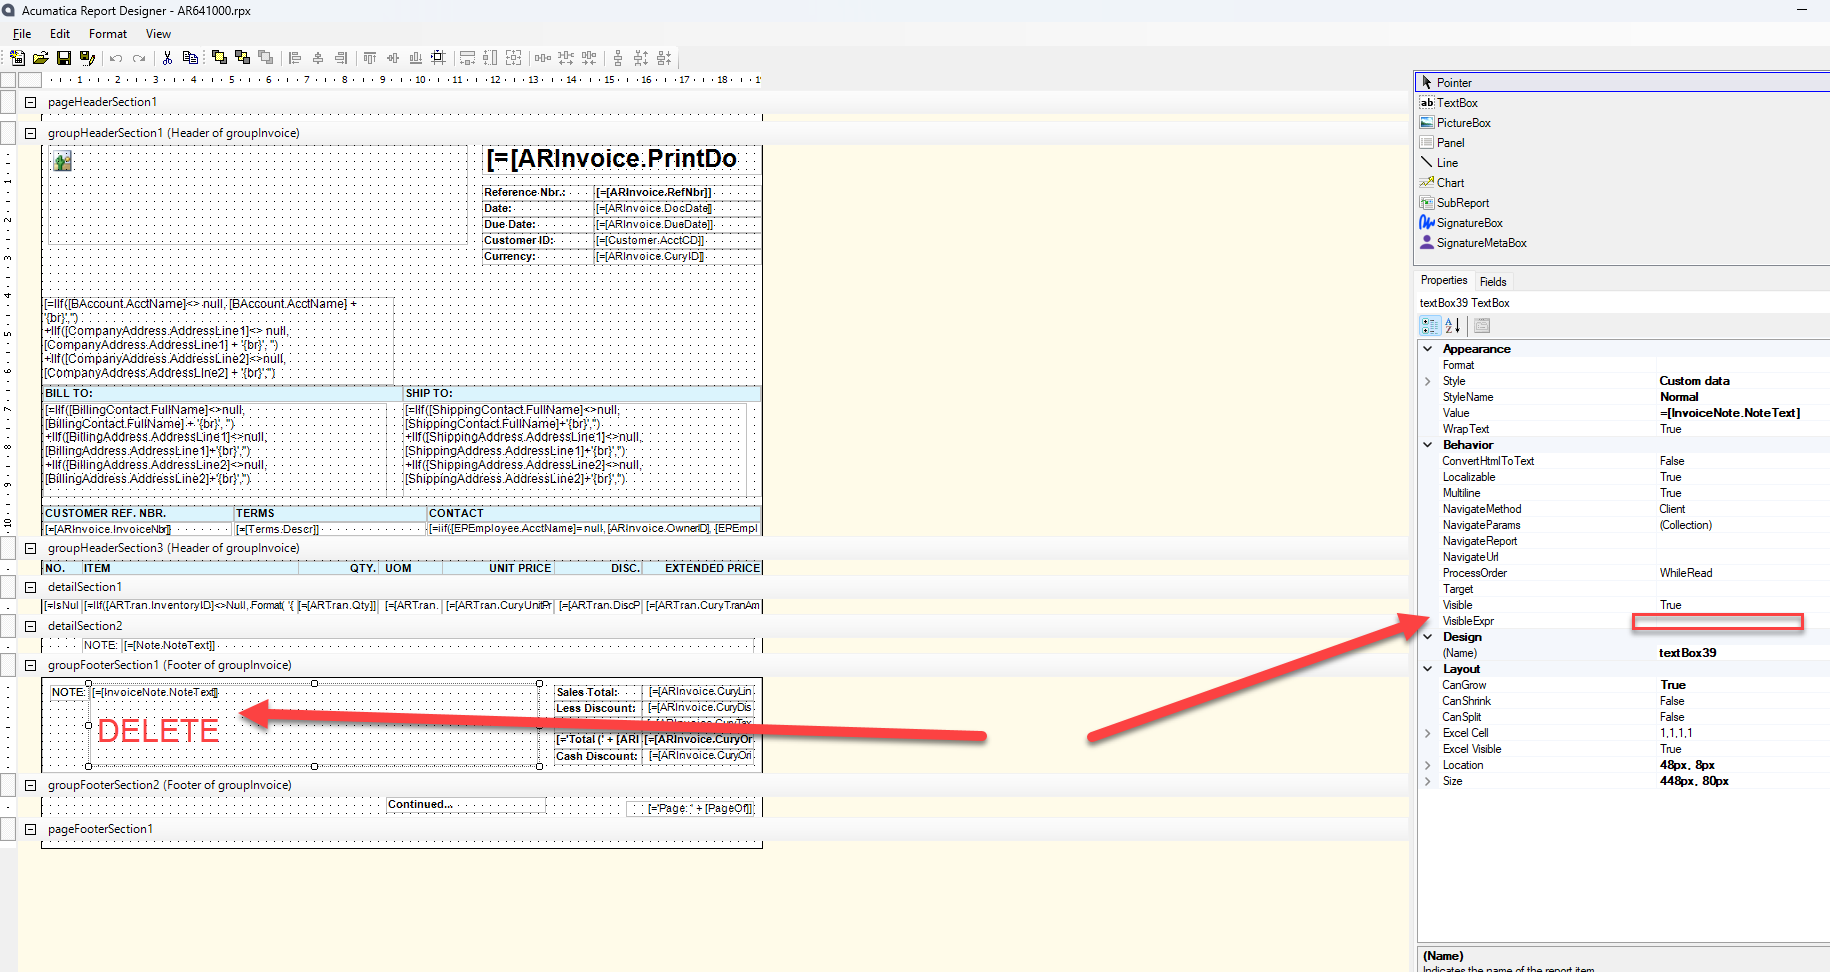
Currently we have it set up that you can add ‘enter record note’ to an invoice. 

This is something we want to keep - however we need to remove these from printing on the invoice.

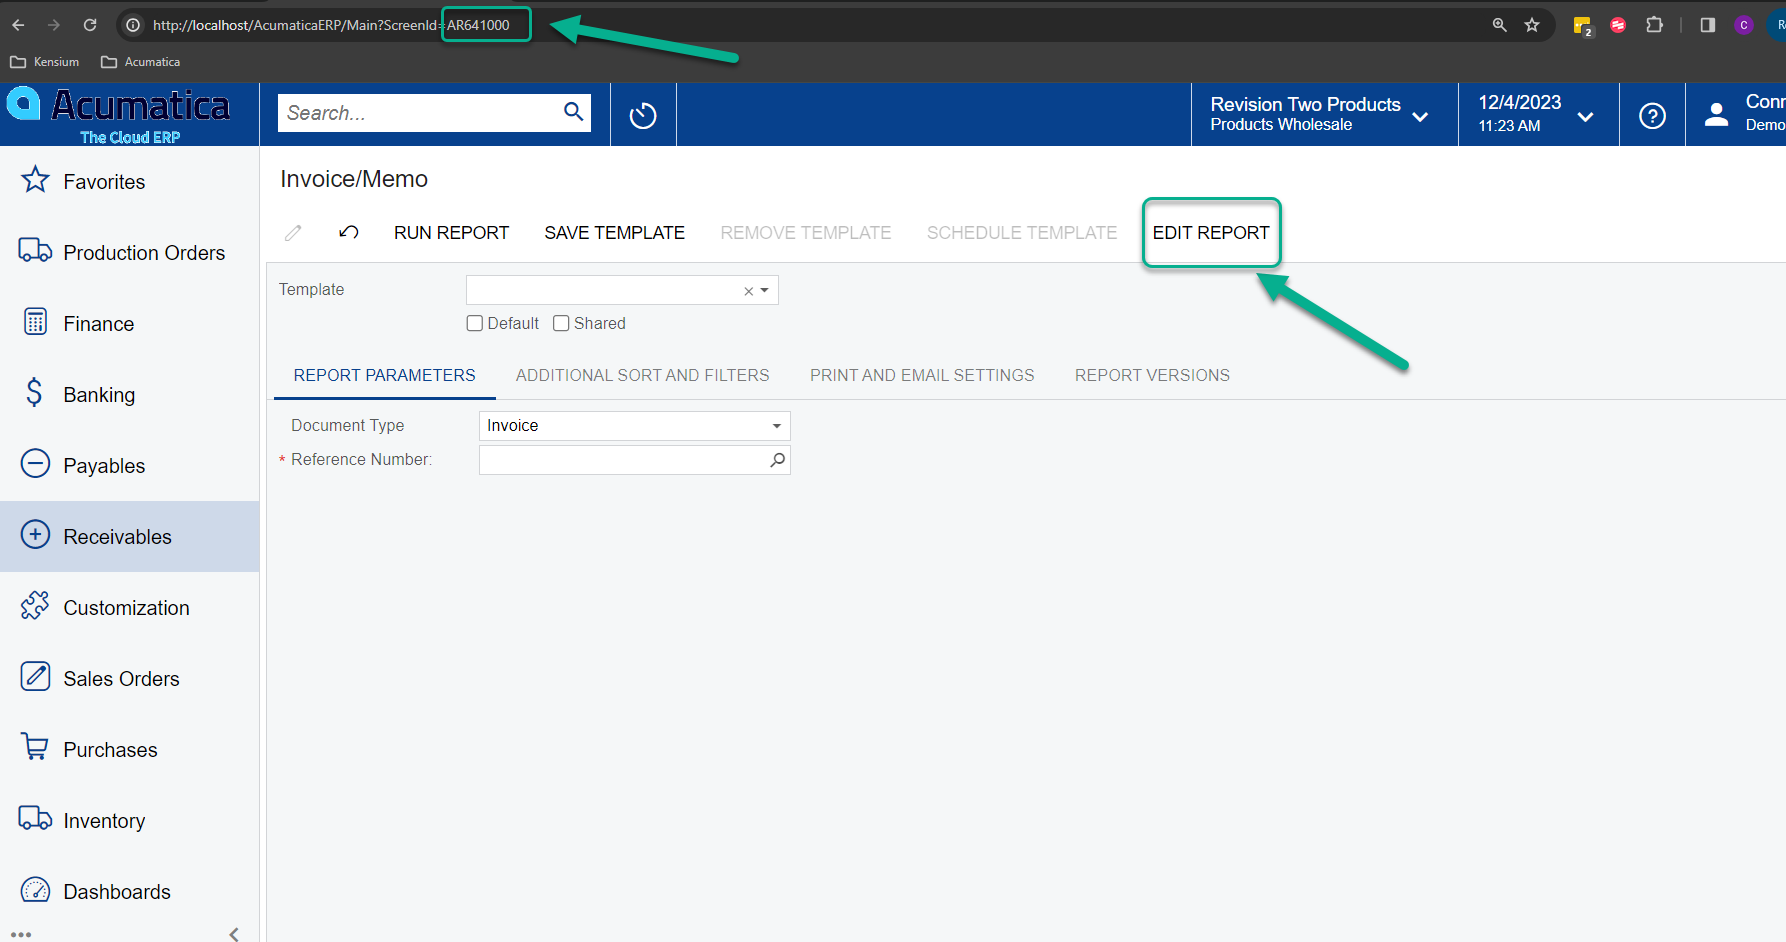
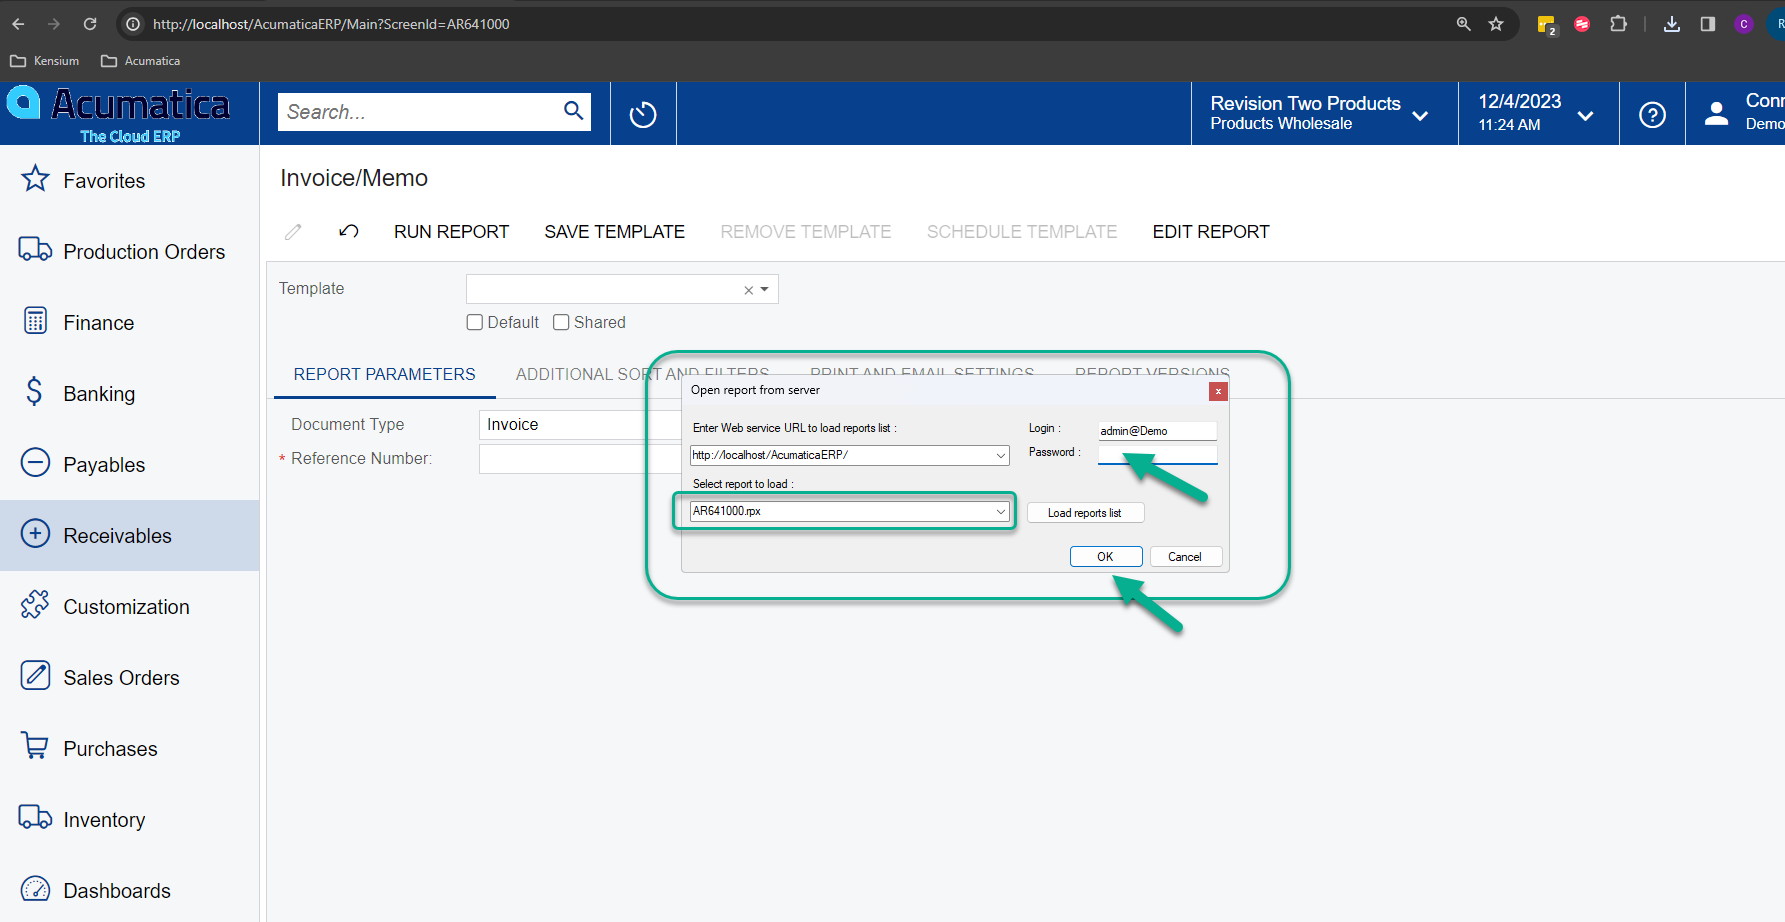
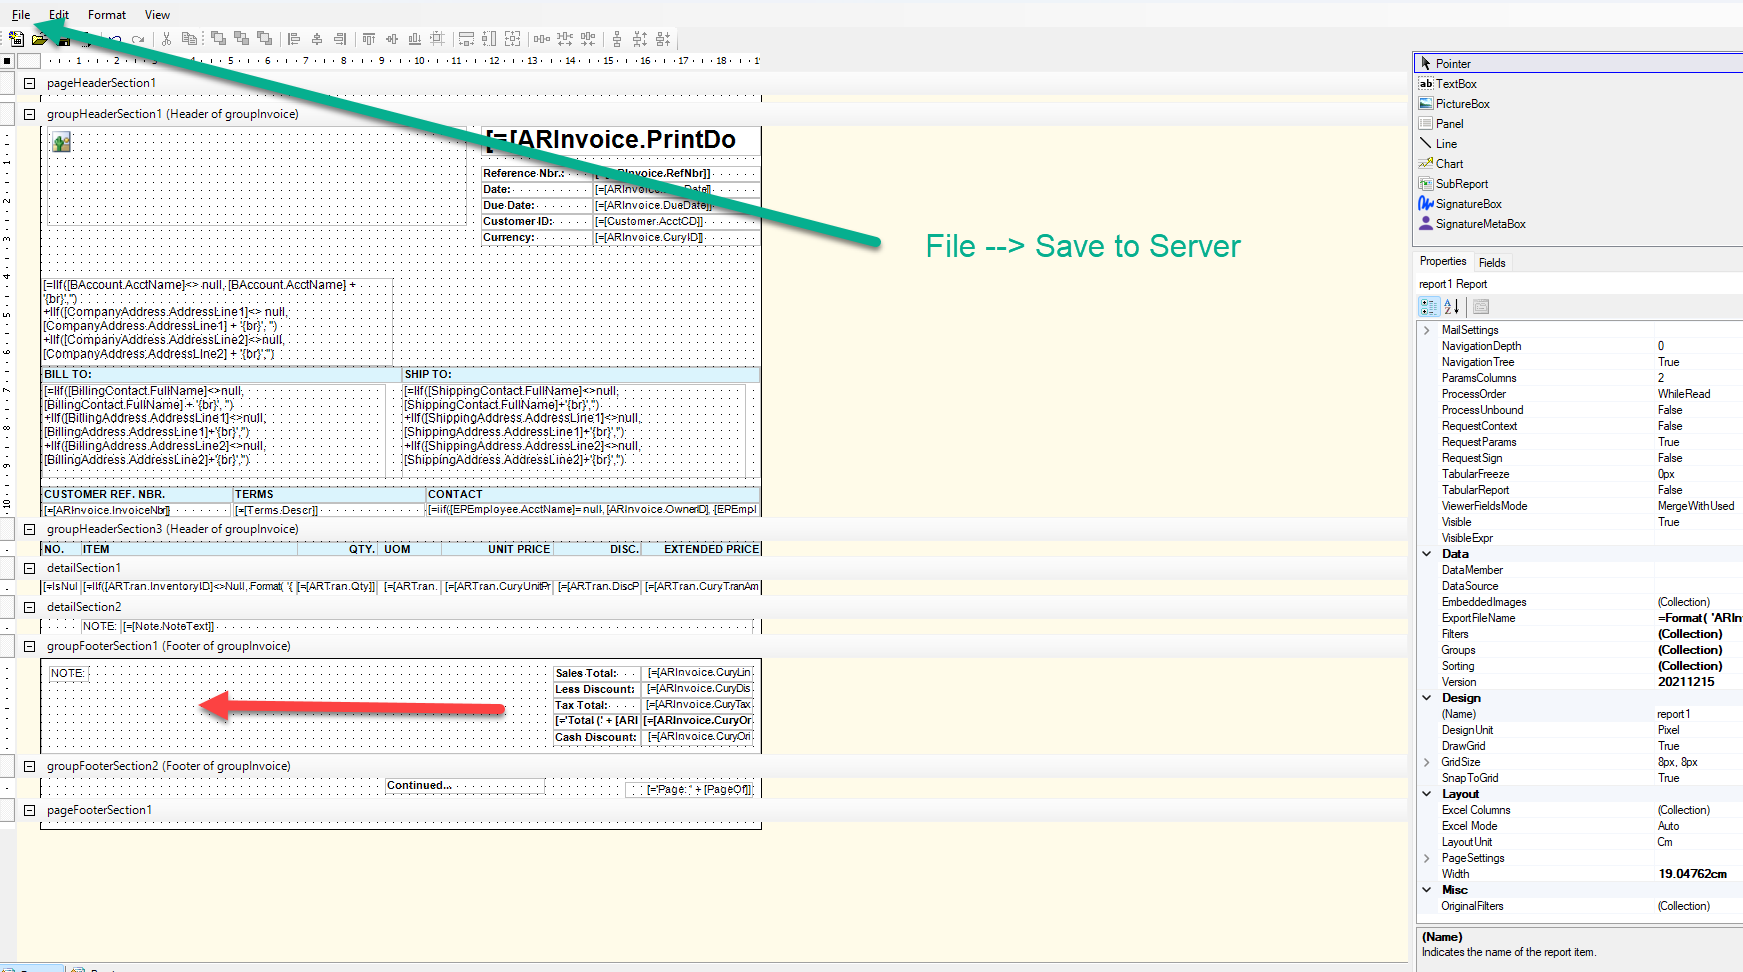
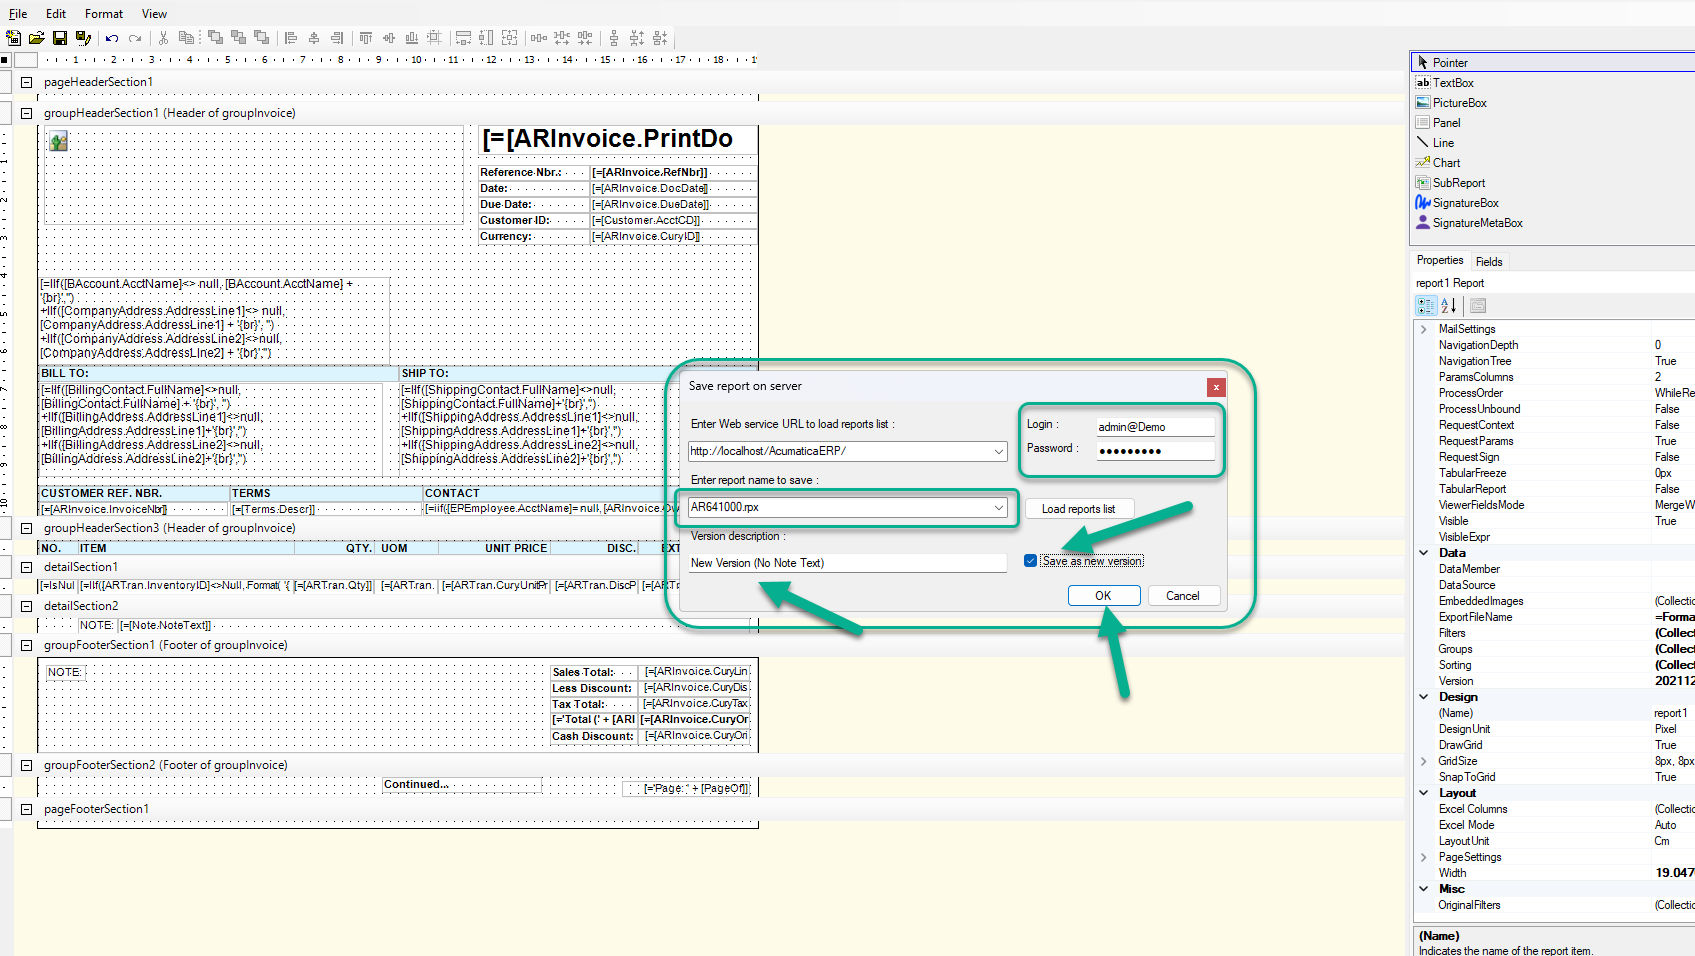
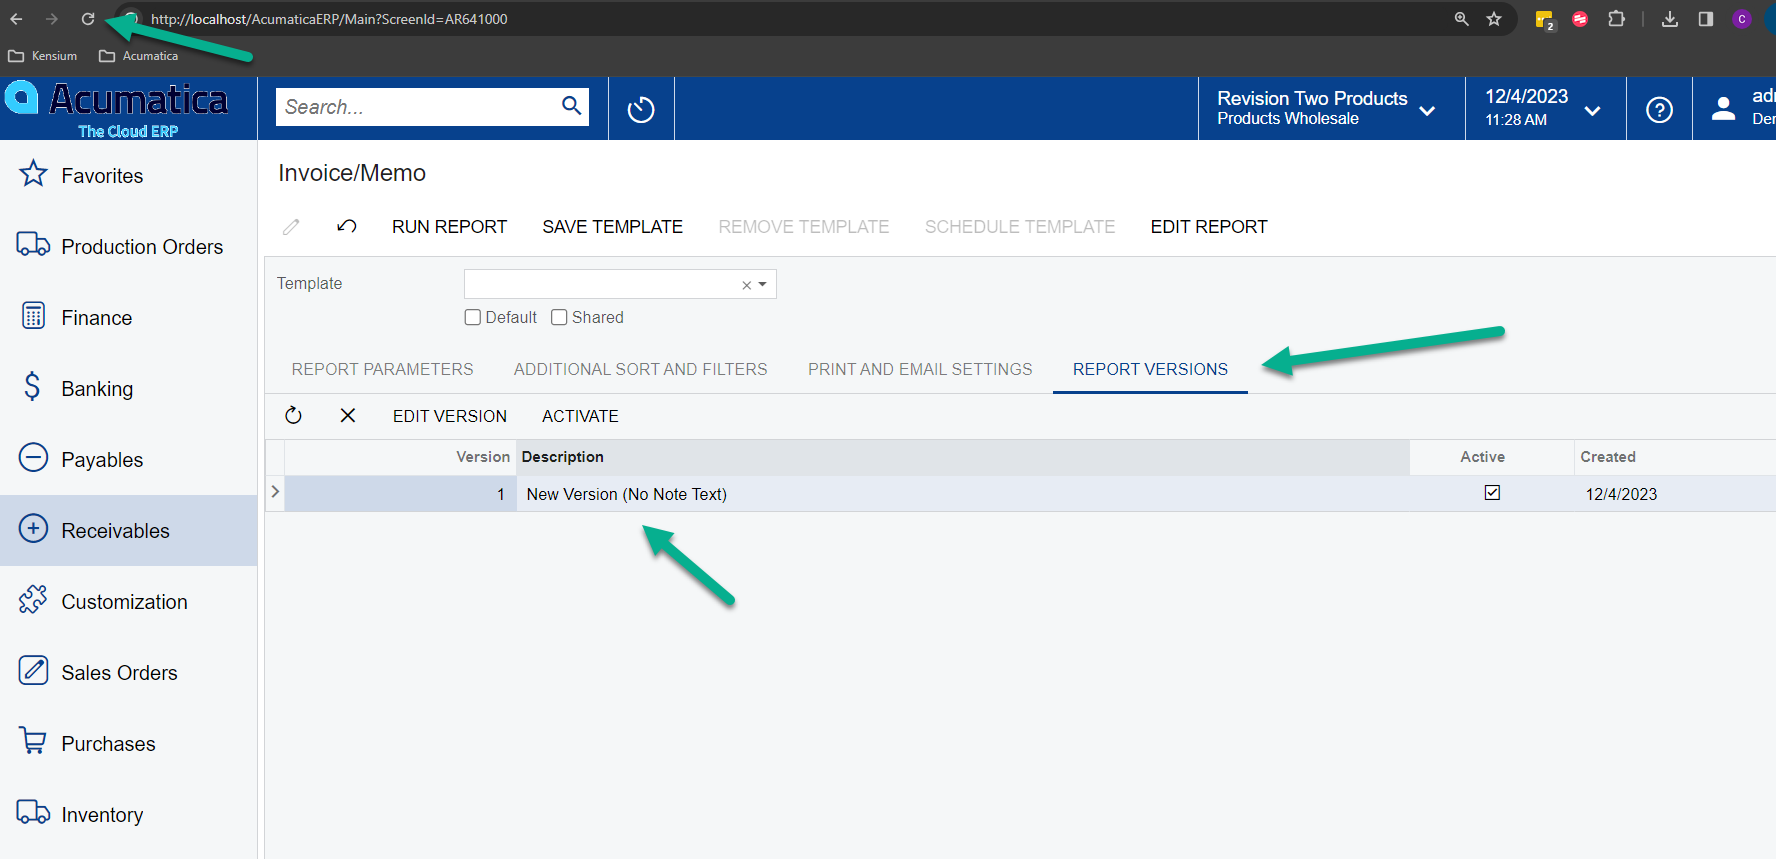
There is some reference to this being possible using Report Designer.

How would one go about completing this change?


Thanks

Best answer by Connor Morse

Hi @dylantheriault , If you want to remove the Note that is attached to the Invoice (or any other document that it may apply to). Open the report in Acumatica Report Designer and either DELETE the note text box, or apply a visible expression to the field if you want it to print based on certain criteria.

Are you familiar with opening, editing, and saving reports in Acumatica Report Designer? If not, I can pass along addition reference to assist. 


3 replies

Connor Morse
Jr Varsity III
Forum|alt.badge.img+1
  • Jr Varsity III
  • Answer
  • December 4, 2023

Hi @dylantheriault , If you want to remove the Note that is attached to the Invoice (or any other document that it may apply to). Open the report in Acumatica Report Designer and either DELETE the note text box, or apply a visible expression to the field if you want it to print based on certain criteria.

Are you familiar with opening, editing, and saving reports in Acumatica Report Designer? If not, I can pass along addition reference to assist. 


Forum|alt.badge.img

Thank you for the reply - this is very helpful.


Additional references would be great. 


Thanks


Connor Morse
Jr Varsity III
Forum|alt.badge.img+1
  • Jr Varsity III
  • December 4, 2023

@dylantheriault  - Sure, see below. This walkthrough is assuming you already have the Report Designer installed on your computer, and the User has been granted the “Report Designer” access role. 

1. Grant user access to Report Designer role.
2. Navigate to the Report and click Edit Report. Report will download and you will open it with the Report Designer program installed on your computer. 
3. URL, Report ID, and Login ID will automatically prefill. Enter the user password and click OK.
4. Make the needed adjustment to the report (ex. delete the textbox) and click File → Save to Server
5. Enter a Version Description and select “Save as new version” so you do not overwrite the existing version in case you need to revert back. Click Ok to save.
6. View the new report version that was saved and Run Report.

Hope this helps!