Hi,

This issue was discussed in this topic here - “Created looped method in customization Project”

I describe what I am trying to achieve : 

I need to define a code which will be always executed, without any user actions,

One important moment - is should work if Acumatica IIS process is running, so even if we have not authorized in Acumatica the code inside package that was imported to Acumatica customization must work. The logic is very simple - it will just generate files in specific directory all time.

It was advised to perform to following steps in order to achieve the required result 

  • Create a new processing screen
  • Written a logic in processing screen graph
  • schedule this screen for every 10/20/30 minutes

I need to clarify some moments

The first one : during creating new screen - is it enough to generate new one screen without adding anything here (fields, other elements) at stat step (I do not need to use anything from this entity, no new fields, I just need to create independent code as mentioned above). If it is enough - good
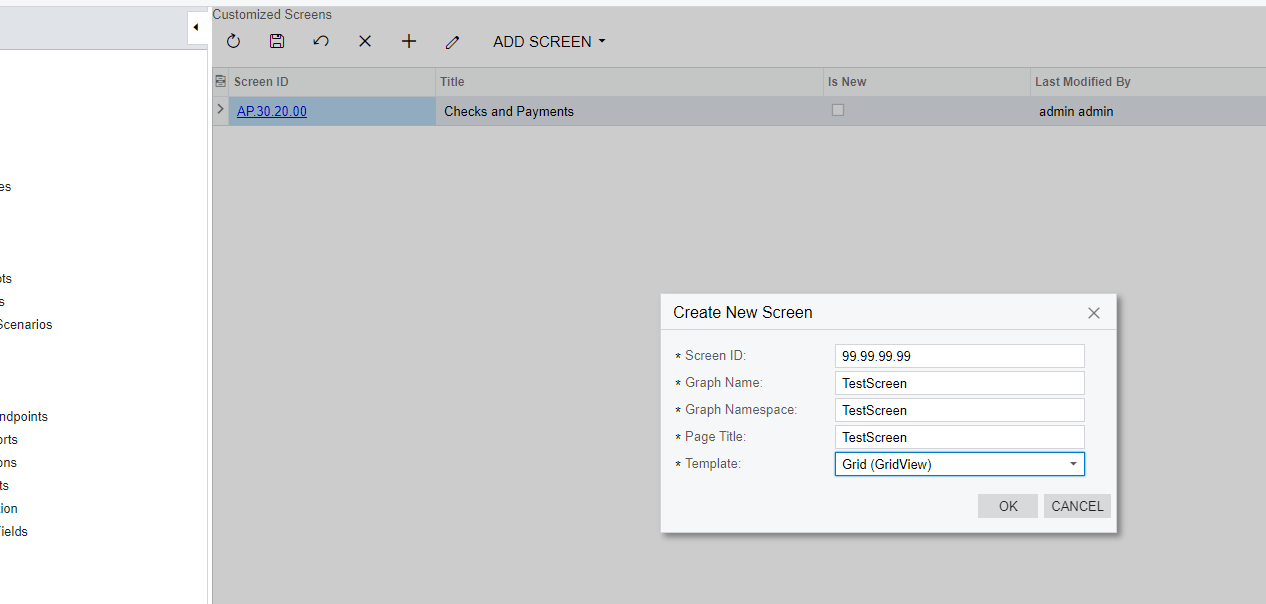
Second moment 

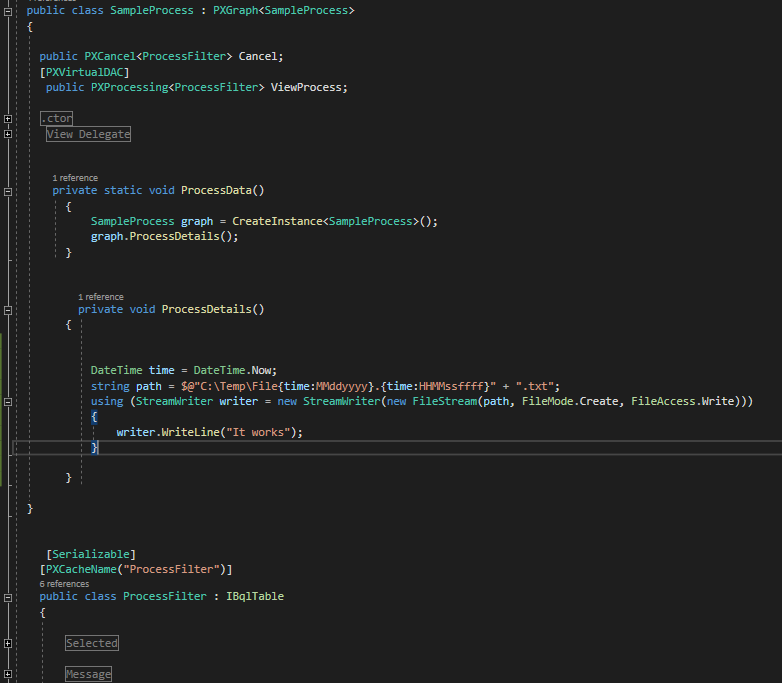
I was provided by sample of code that I can modify 
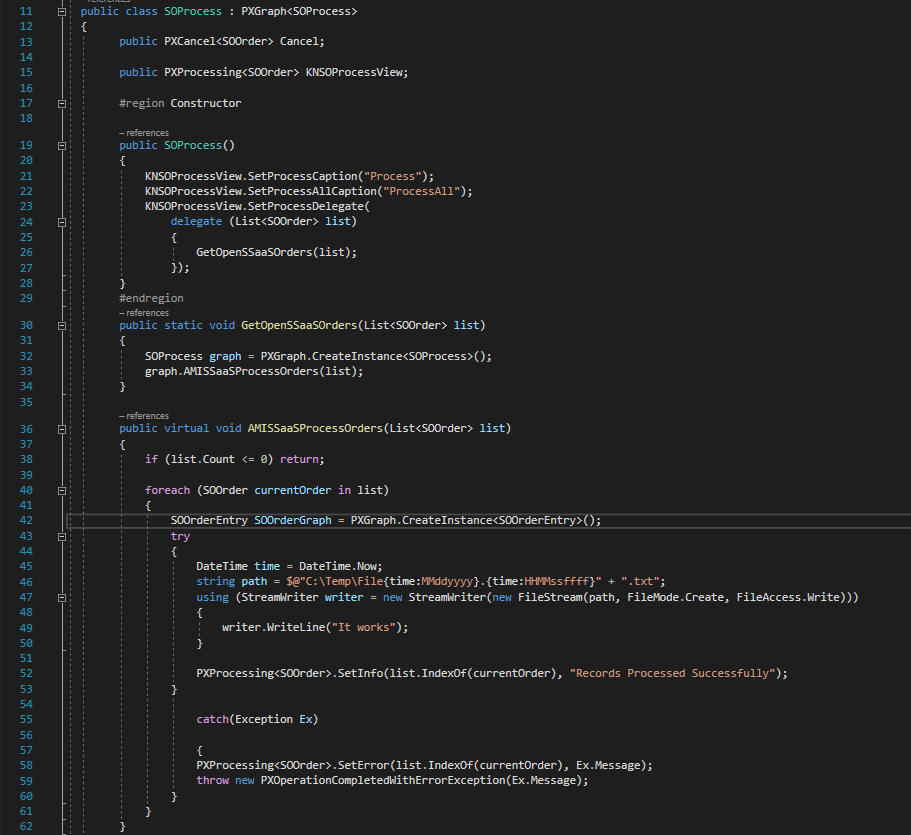
public class SOProcess : PXGraph<SOProcess> { public PXCancel<SOOrder> Cancel; public PXProcessing<SOOrder> KNSOProcessView; #region Constructor public SOProcess() { KNSOProcessView.SetProcessCaption("Process"); KNSOProcessView.SetProcessAllCaption("ProcessAll"); KNSOProcessView.SetProcessDelegate( delegate (List<SOOrder> list) { GetOpenSSaaSOrders(list); }); } #endregion public static void GetOpenSSaaSOrders(List<SOOrder> list) { SOProcess graph = PXGraph.CreateInstance<SOProcess>(); graph.AMISSaaSProcessOrders(list); } public virtual void AMISSaaSProcessOrders(List<SOOrder> list) { if (list.Count <= 0) return; foreach (SOOrder currentOrder in list) { SOOrderEntry SOOrderGraph = PXGraph.CreateInstance<SOOrderEntry>(); try { //Code here. PXProcessing<SOOrder>.SetInfo(list.IndexOf(currentOrder), "Records Processed Successfully"); } Catch(Exception Ex) { PXProcessing<SOOrder>.SetError(list.IndexOf(currentOrder), Ex.Message); throw new PXOperationCompletedWithErrorException(Ex.Message); } } } } }


The code that I was provided launches the new entity as I understand. 

I do not know what should be used instead of soentry,  soorder entities in my case. Because, I do not use Sales Order. All I need is to define independent code that will create files. How I should implement it for my screen ?
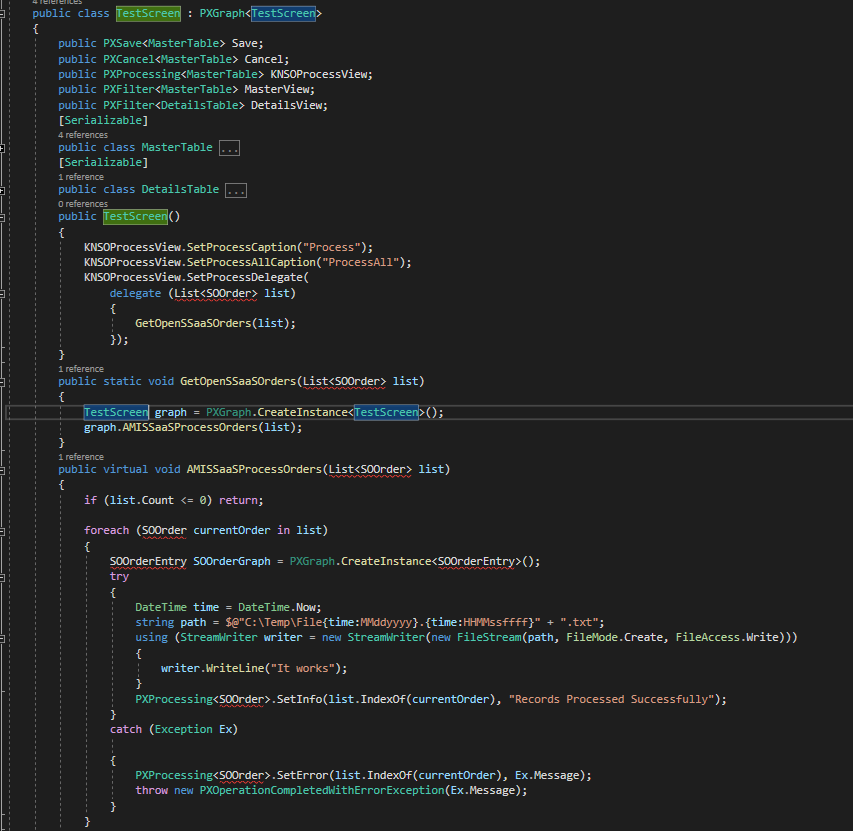
 

Hi @Ivan 

I’ve created a sample processing screen for your reference. Please review 


Hi @Ivan 

I’ve created a sample processing screen for your reference. Please review 

Hi @jinin 

Thanks a lot for the provided sample

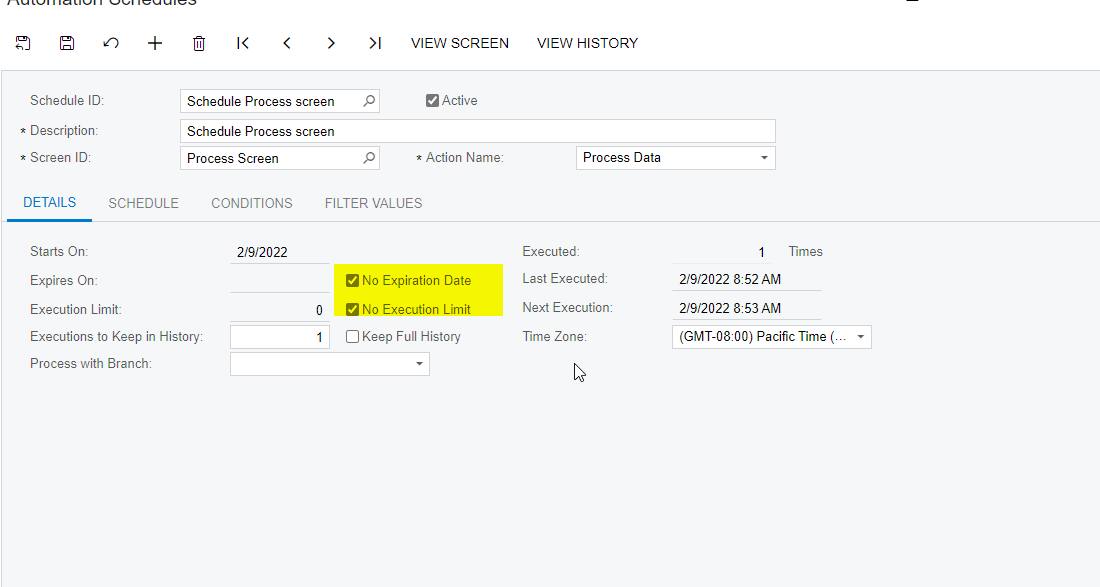
Now, I need to make schedule for it here right ? 

Or I do not need to do any actions ?


yes correct @Ivan . You need to schedule the screen 


yes correct @Ivan . You need to schedule the screen 

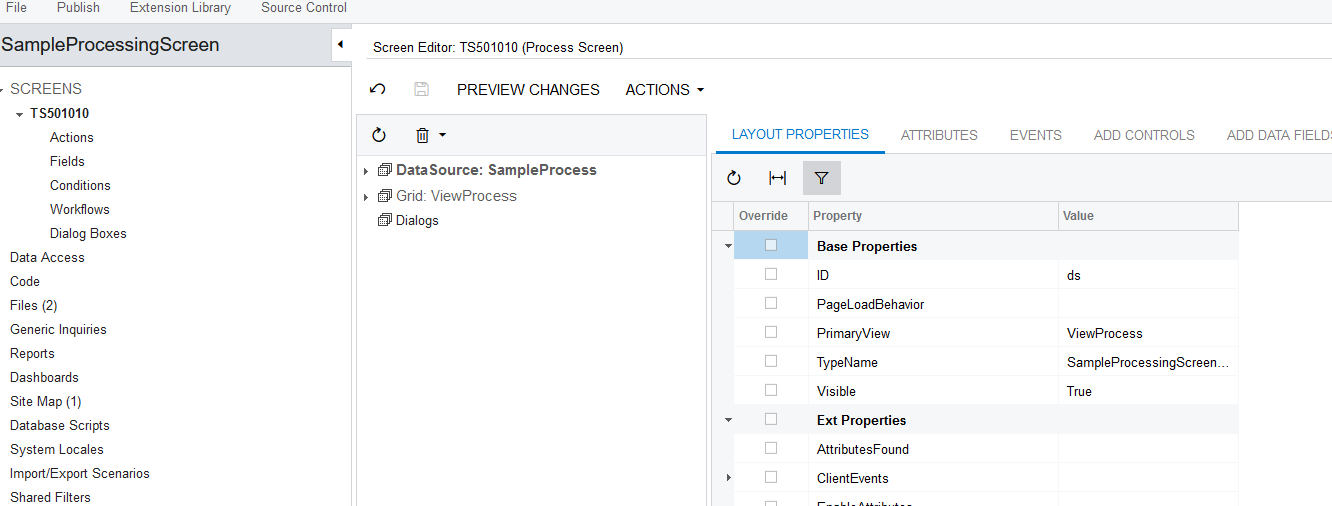
It’s strange, I imported and published you package,

your code successfully appeared in my project 

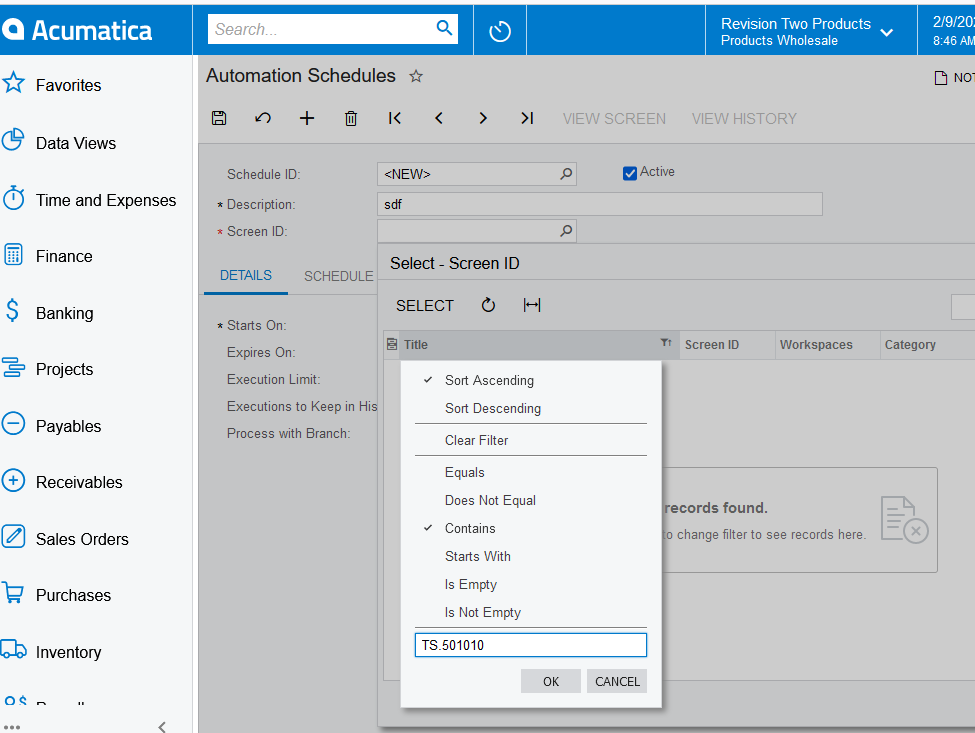
But I can’t find it in screen menu. It’s called “SampleProcess”

Is there something that I missed ?


Hi @Ivan 

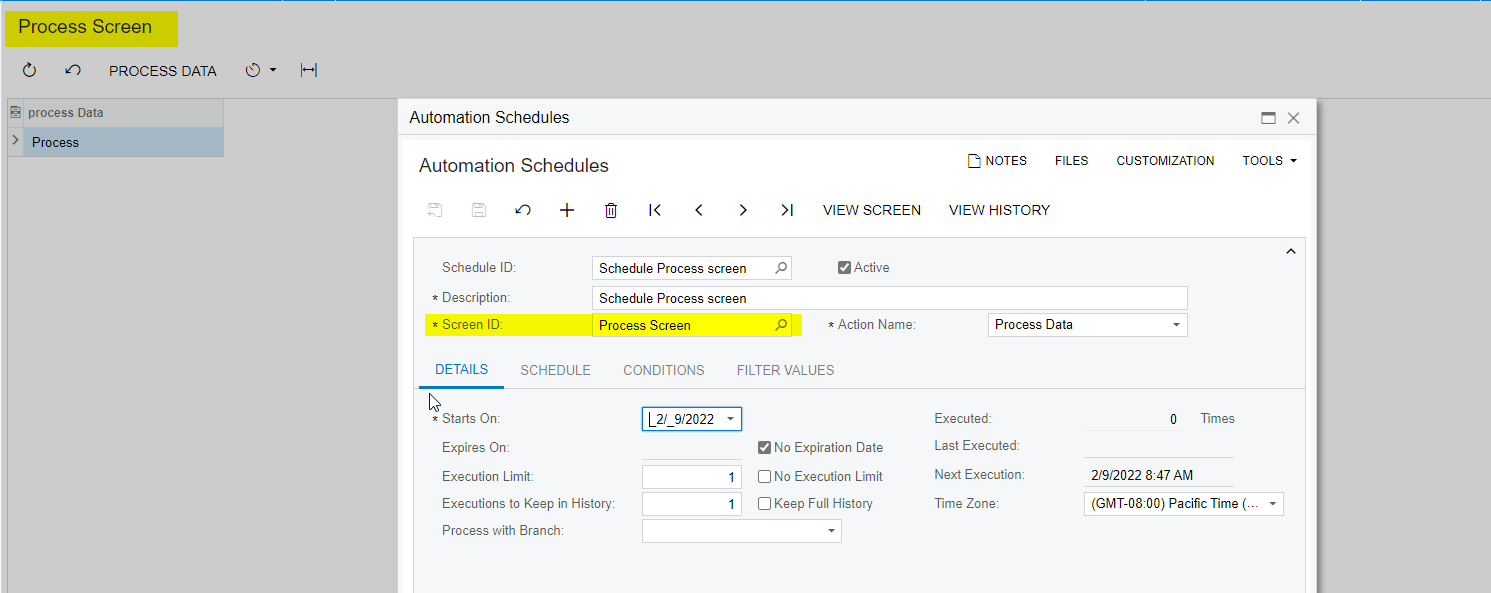
Add like below,


Hi @Ivan  You should get with the screen ID, I’m not sure why your not getting it.

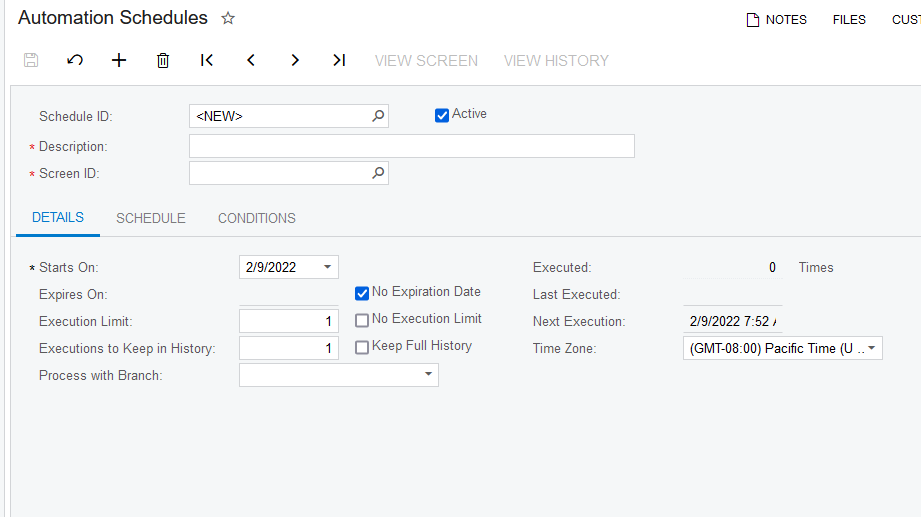
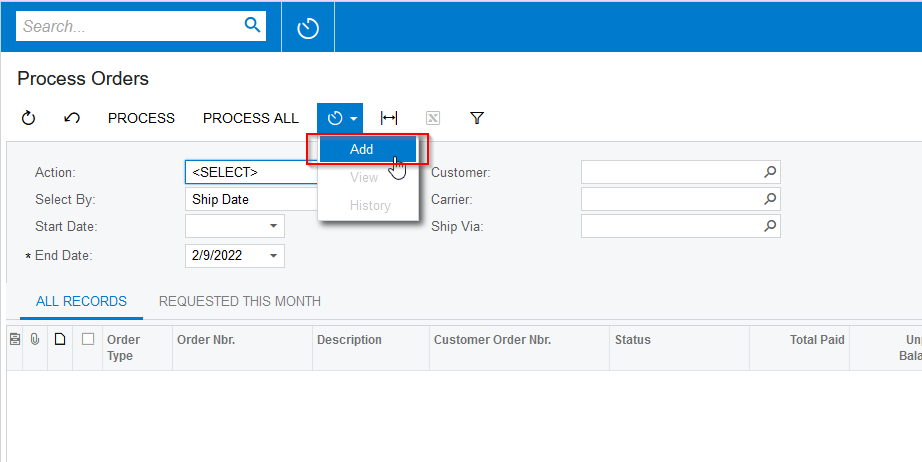
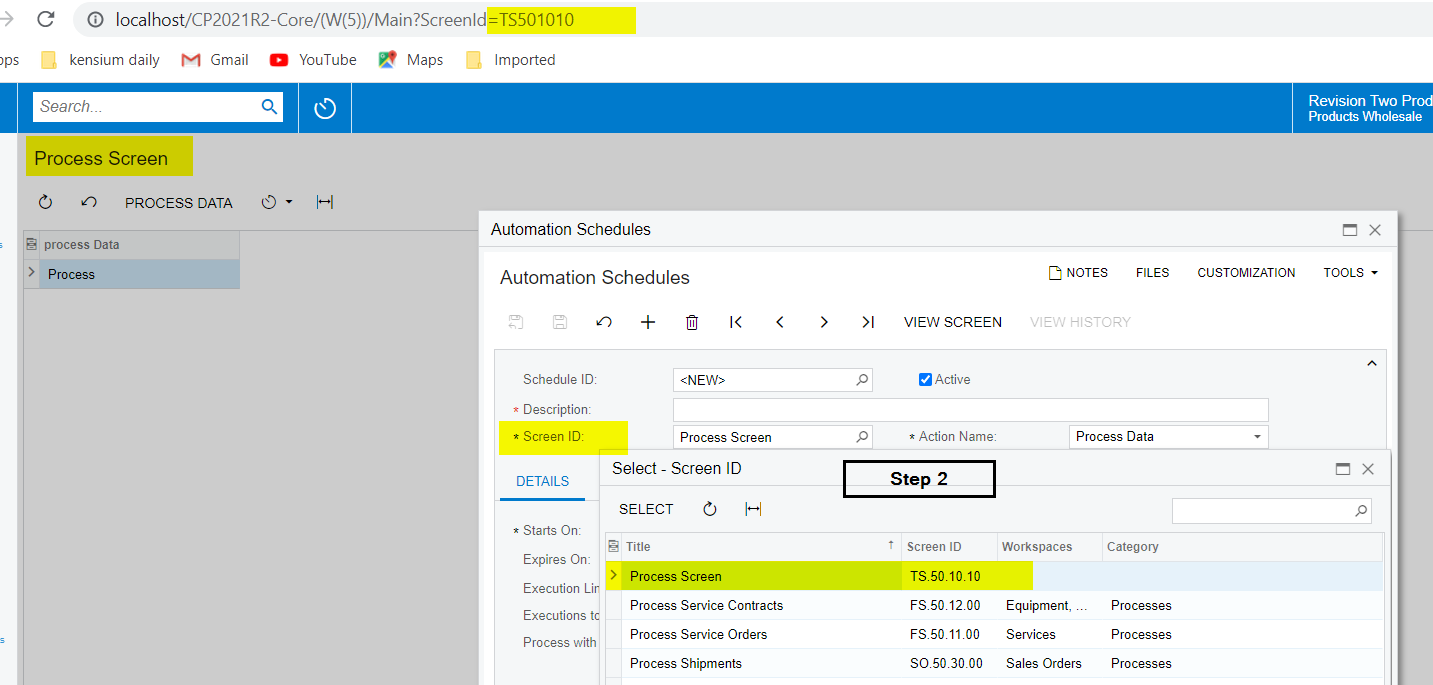
Go to your processing screen, click on the scheduler button and then click on the ADD button, then it will take you Automation schedules screen.


Hi @Ivan 

Add like below,


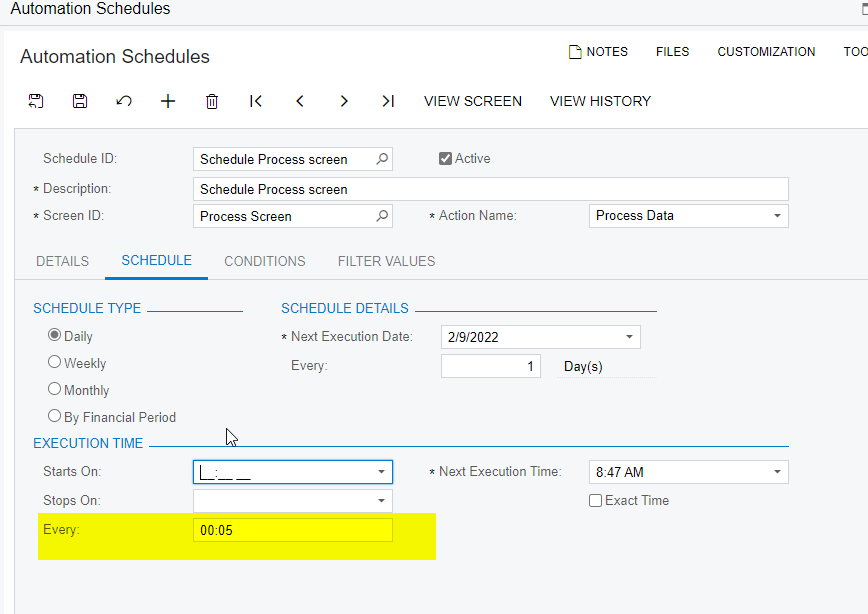
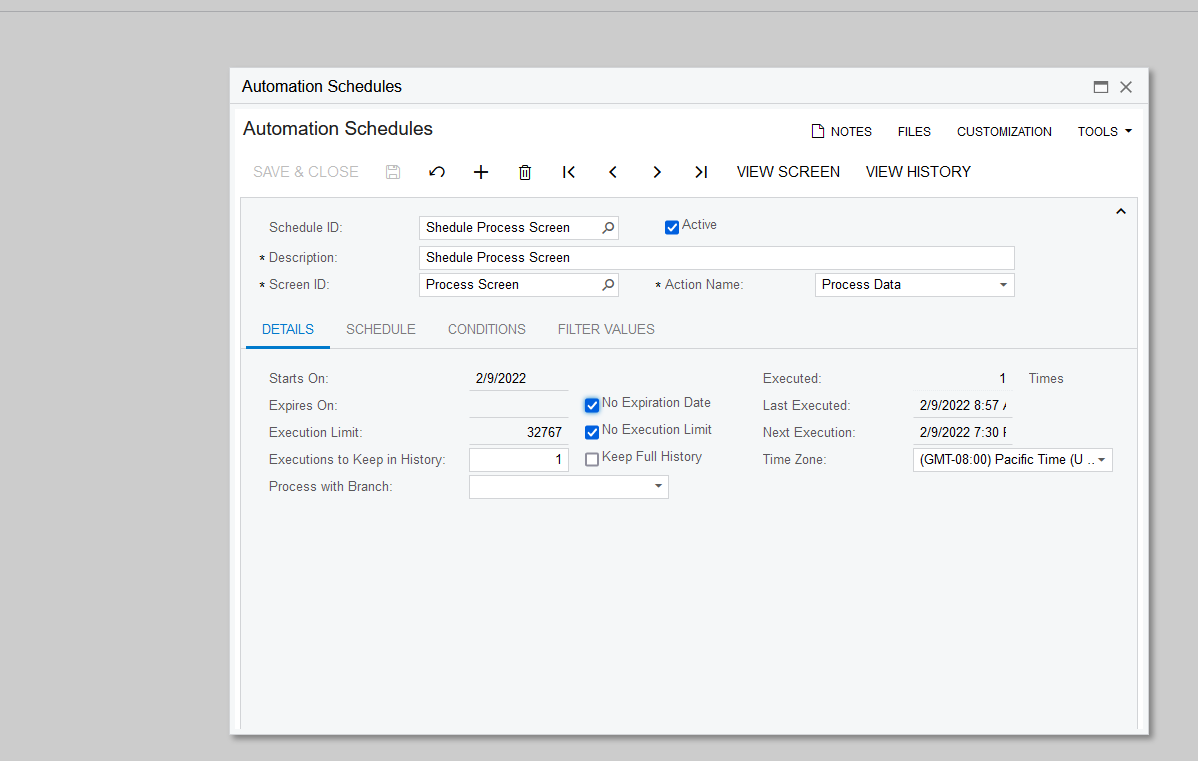
Thanks it generated file. One last moment. If I want to generate file every 5 min, what configuration should be applied ? That is fist tab

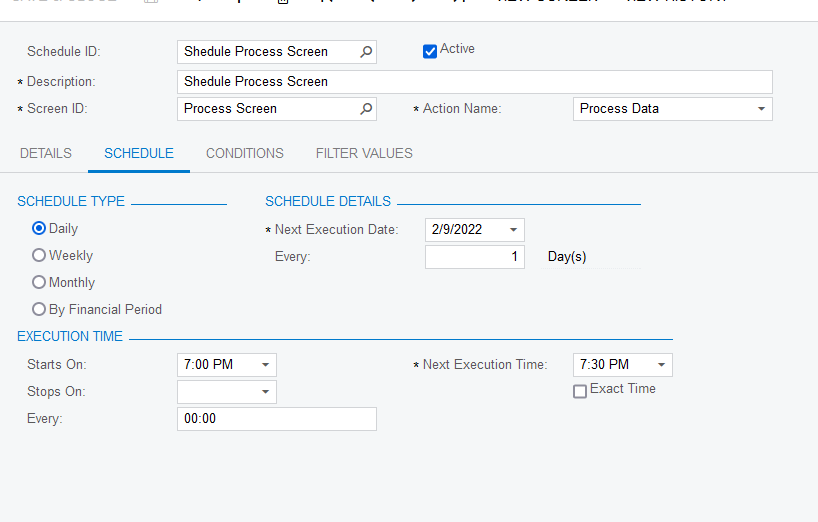
And the second

It looks like I can process it only two times at time when “Starts On” is set and “next Execution time”

Is there ability to make the calling of the code more frequent ?


Hi @Ivan 

Please make the below change on the scheduler screen to run the scheduler every 5 min.


hi @Ivan ,

This two step process that jini and naveen are trying to convey.

Step 1 : From the processing screen click on add.


Step 2 : you should be able to see the respective processing screen with ID and you configure the schedule as needed. 


@jinin  @Naveen B  @deebhane  Good Job team. 


 @Ivan Seems like you have grabbed all the attention of my Ace team members here :wink: , hope you have got the expected answers to resolve your issue. 


Thanks


@jinin  @Naveen B  Thank you a lot for your assistance 


hi @Ivan ,

This two step process that jini and naveen are trying to convey.

Step 1 : From the processing screen click on add.


Step 2 : you should be able to see the respective processing screen with ID and you configure the schedule as needed. 


Hi @deebhane 

Thanks for providing solution !


@jinin  @Naveen B  @deebhane  Good Job team. 


 @Ivan Seems like you have grabbed all the attention of my Ace team members here :wink: , hope you have got the expected answers to resolve your issue. 


Thanks

Hi @Vinay K  

Sorry about that

I am much obliged for provided help


Hi @Ivan 

I’ve created a sample processing screen for your reference. Please review 

Hi @jinin 

You provided a code sample for me recently

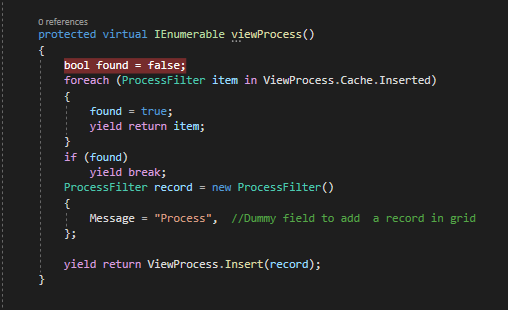
Can you please explain for what this part of code is responsible for ?


Hi @Ivan 

I’ve created a sample processing screen for your reference. Please review 

Hi @jinin 

You provided a code sample for me recently

Can you please explain for what this part of code is responsible for ?


Hi @Ivan ,

It's a processing screen so we need a record in the grid to execute the process. Without any

record the process action won’t work. As per your requirement, no need to add any records to the grid. So added a dummy record to the process 


Hi @Ivan 

I’ve created a sample processing screen for your reference. Please review 

Hi @jinin 

You provided a code sample for me recently

Can you please explain for what this part of code is responsible for ?


Hi @Ivan ,

It's a processing screen so we need a record in the grid to execute the process. Without any

record the process action won’t work. As per your requirement, no need to add any records to the grid. So added a dummy record to the process 


Hi @jinin 

Thanks for explanation 


Reply