I want to set this screen to the Modern UI. How can I set 4 columns in each row? Is there an original Acumatica screen example like this?

I want to set this screen to the Modern UI. How can I set 4 columns in each row? Is there an original Acumatica screen example like this?
Best answer by Marat43
Hi
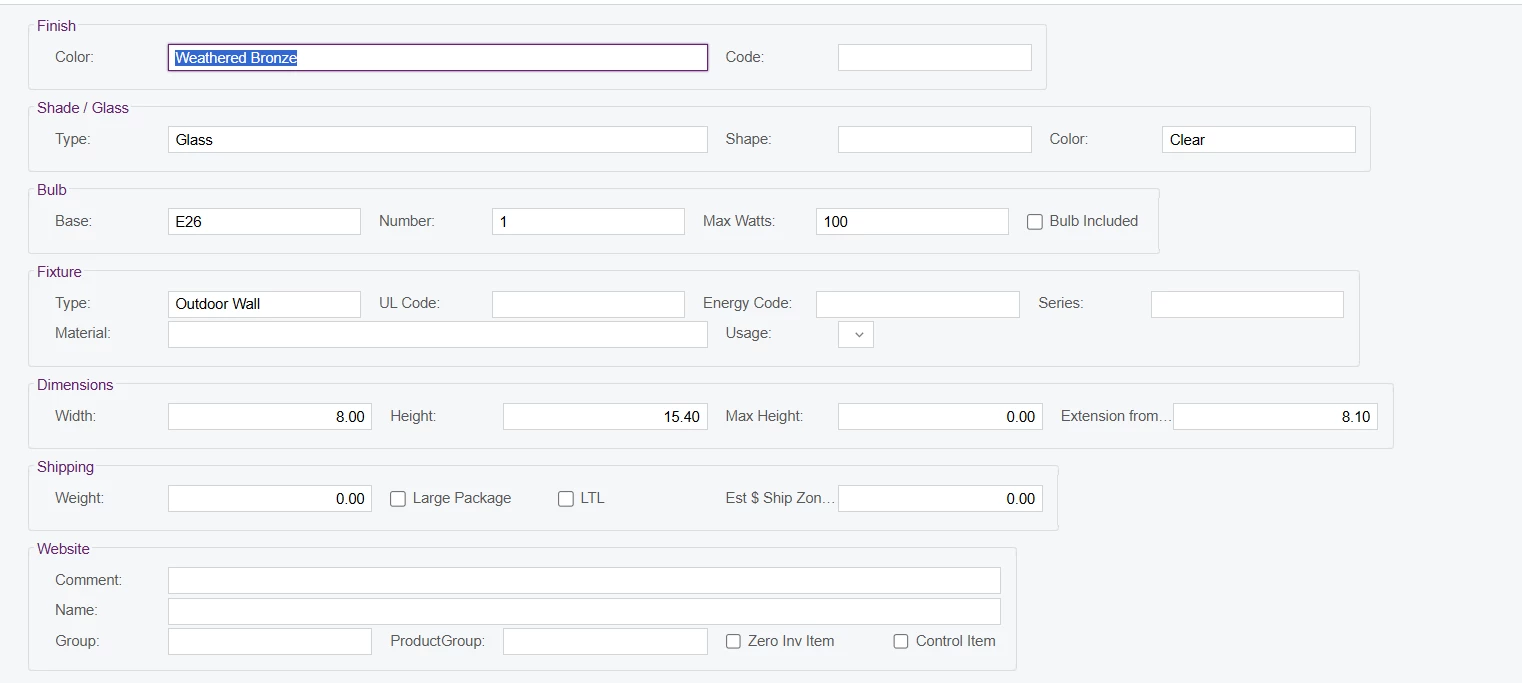
I was able to achieve a similar layout by combining nested templates instead of forcing a strict 4-column structure.
The idea is to split the layout into sections (e.g. 1-1 or 1-1-1) and then, where needed, nest another template inside one of the slots to simulate additional columns. For example:
<qp-tab after="#tab-example" id="tab-example" caption="Example">
    <qp-template id="form-example1" name="1-1">
        <qp-caption caption="Section 1"></qp-caption>
        <qp-fieldset id="Line1" view.bind="ExampleView" slot="A" class="label-size-xxs">
            <field name="YourField1"></field>
        </qp-fieldset>
        <qp-fieldset id="Line2" view.bind="ExampleView" slot="B">
            <field name="YourField2"></field>
        </qp-fieldset>
    </qp-template>

    <qp-template id="form-example2" name="1-1-1">
        <qp-caption caption="Section 2"></qp-caption>
        <qp-fieldset id="Line3" view.bind="ExampleView" slot="A">
            <field name="YourField3" class="label-size-xxs"></field>
        </qp-fieldset>
        <qp-fieldset id="Line4" view.bind="ExampleView" slot="B">
            <field name="YourField4"></field>
        </qp-fieldset>
        <qp-fieldset id="Line5" view.bind="ExampleView" slot="C">
            <field name="YourField5"></field>
        </qp-fieldset>
    </qp-template>

    <qp-template id="form-example3" name="1-1-1" caption="Section 3">
        <qp-caption caption="Section 3"></qp-caption>
        <qp-fieldset id="Line6" view.bind="ExampleView" slot="A">
            <field name="YourField6"></field>
        </qp-fieldset>
        <qp-fieldset id="Line7" view.bind="ExampleView" slot="B">
            <field name="YourField7"></field>
        </qp-fieldset>
        <qp-fieldset id="Line8" view.bind="ExampleView" slot="C">
            <field name="YourField8" class="label-size-xxs">
                <qp-field control-state.bind="ExampleView.YourField9" class="no-label" pinned="true"></qp-field>
            </field>
        </qp-fieldset>
    </qp-template>

    <qp-template id="form-example4" name="1-1" caption="Section 4">
        <qp-caption caption="Section 4"></qp-caption>
        <qp-template id="form-sub1" name="1-1" slot="A">
            <qp-fieldset id="SubLine1" view.bind="ExampleView" slot="A">
                <field name="YourField10"></field>
            </qp-fieldset>
            <qp-fieldset id="SubLine2" view.bind="ExampleView" slot="A">
                <field name="YourField11"></field>
            </qp-fieldset>
            <qp-fieldset id="SubLine3" view.bind="ExampleView" slot="B">
                <field name="YourField12"></field>
            </qp-fieldset>
        </qp-template>

        <qp-template id="form-sub2" name="1-1" slot="B">
            <qp-fieldset id="SubLine4" view.bind="ExampleView" slot="A">
                <field name="YourField13"></field>
            </qp-fieldset>
            <qp-fieldset id="SubLine5" view.bind="ExampleView" slot="A">
                <field name="YourField14"></field>
            </qp-fieldset>
            <qp-fieldset id="SubLine6" view.bind="ExampleView" slot="B">
                <field name="YourField15"></field>
            </qp-fieldset>
        </qp-template>
    </qp-template>

    <qp-template id="form-example5" name="1-1-1" caption="Section 5">
        <qp-caption caption="Section 5"></qp-caption>
        <qp-fieldset id="Line9" view.bind="ExampleView" slot="A">
            <field name="YourField16"></field>
        </qp-fieldset>
        <qp-fieldset id="Line10" view.bind="ExampleView" slot="B">
            <field name="YourField17"></field>
        </qp-fieldset>

        <qp-template id="form-sub3" name="1-1" slot="C">
            <qp-fieldset id="Line11" view.bind="ExampleView" slot="A">
                <field name="YourField18" class="label-size-xxs"></field>
            </qp-fieldset>
            <qp-fieldset id="Line12" view.bind="ExampleView" slot="B">
                <field name="YourField19" class="label-size-xxs"></field>
            </qp-fieldset>
        </qp-template>
    </qp-template>

    <qp-template id="form-example6" name="1-1-1" caption="Section 6">
        <qp-caption caption="Section 6"></qp-caption>
        <qp-fieldset id="Line13" view.bind="ExampleView" slot="A">
            <field name="YourField20"></field>
        </qp-fieldset>
        <qp-fieldset id="Line14" view.bind="ExampleView" slot="B">
            <field name="YourField21"></field>
        </qp-fieldset>
        <qp-fieldset id="Line15" view.bind="ExampleView" slot="C">
            <field name="YourField22">
                <qp-field control-state.bind="ExampleView.YourField23" class="no-label" pinned="true"></qp-field>
            </field>
        </qp-fieldset>
    </qp-template>

    <qp-template id="form-example7" name="1-1-1" caption="Section 7">
        <qp-caption caption="Section 7"></qp-caption>
        <qp-fieldset id="Line16" view.bind="ExampleView" slot="A">
            <field name="YourField24" class="label-size-xxs"></field>
            <field name="YourField25" class="label-size-xxs"></field>
            <field name="YourField26"></field>
        </qp-fieldset>
        <qp-fieldset id="Line17" view.bind="ExampleView" slot="B">
            <field name="YourField27"></field>
        </qp-fieldset>
        <qp-fieldset id="Line18" view.bind="ExampleView" slot="C">
            <field name="YourField28">
                <qp-field control-state.bind="ExampleView.YourField29" class="no-label" pinned="true"></qp-field>
            </field>
        </qp-fieldset>
    </qp-template>
</qp-tab>
Hope this helps!
No account yet? Create an account
Enter your E-mail address. We'll send you an e-mail with instructions to reset your password.

