Solved

How to add Ship Via under appointments screen?

  • January 26, 2026
  • 5 replies
  • 46 views

Forum|alt.badge.img

Hello all,

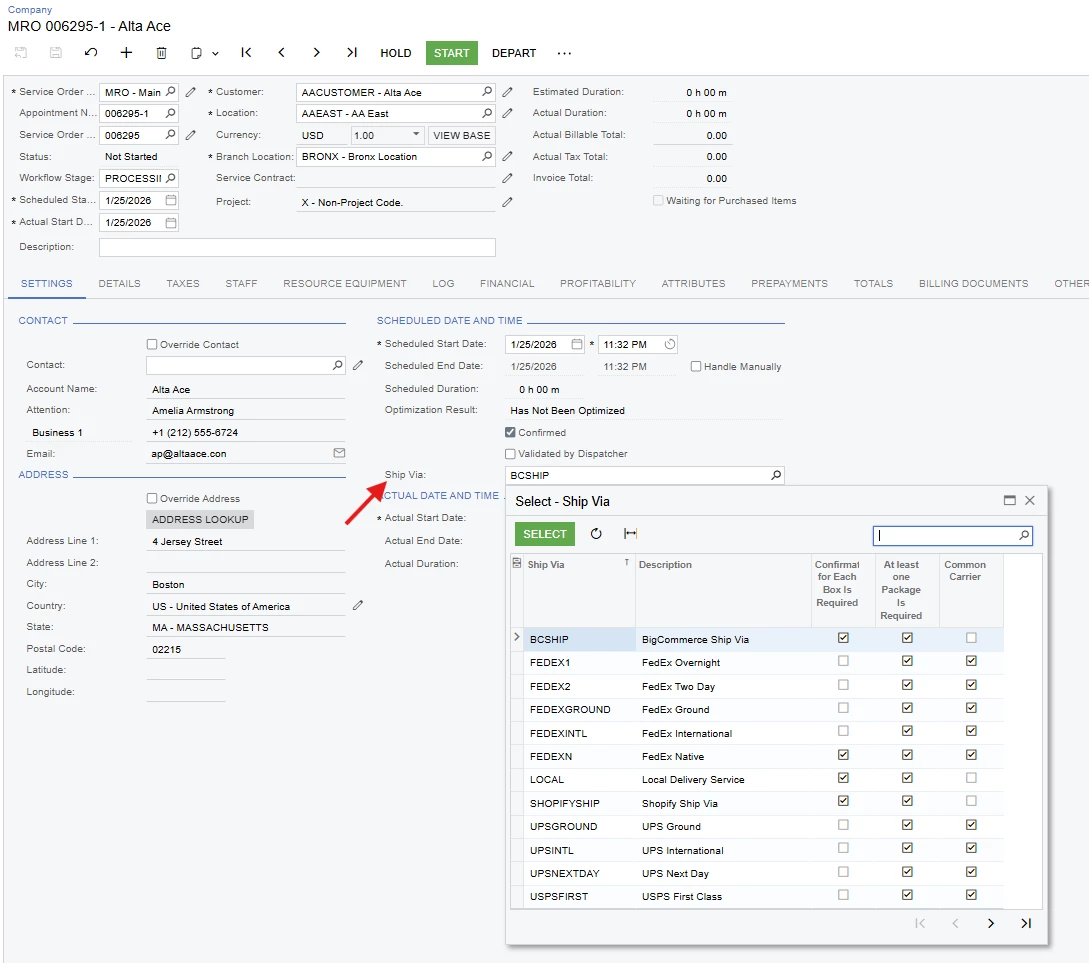
I have been trying to add a new field - Ship Via, which is similar to the one present under the Shipments (SO302000) screen.
As far as what i did is, have added as below:

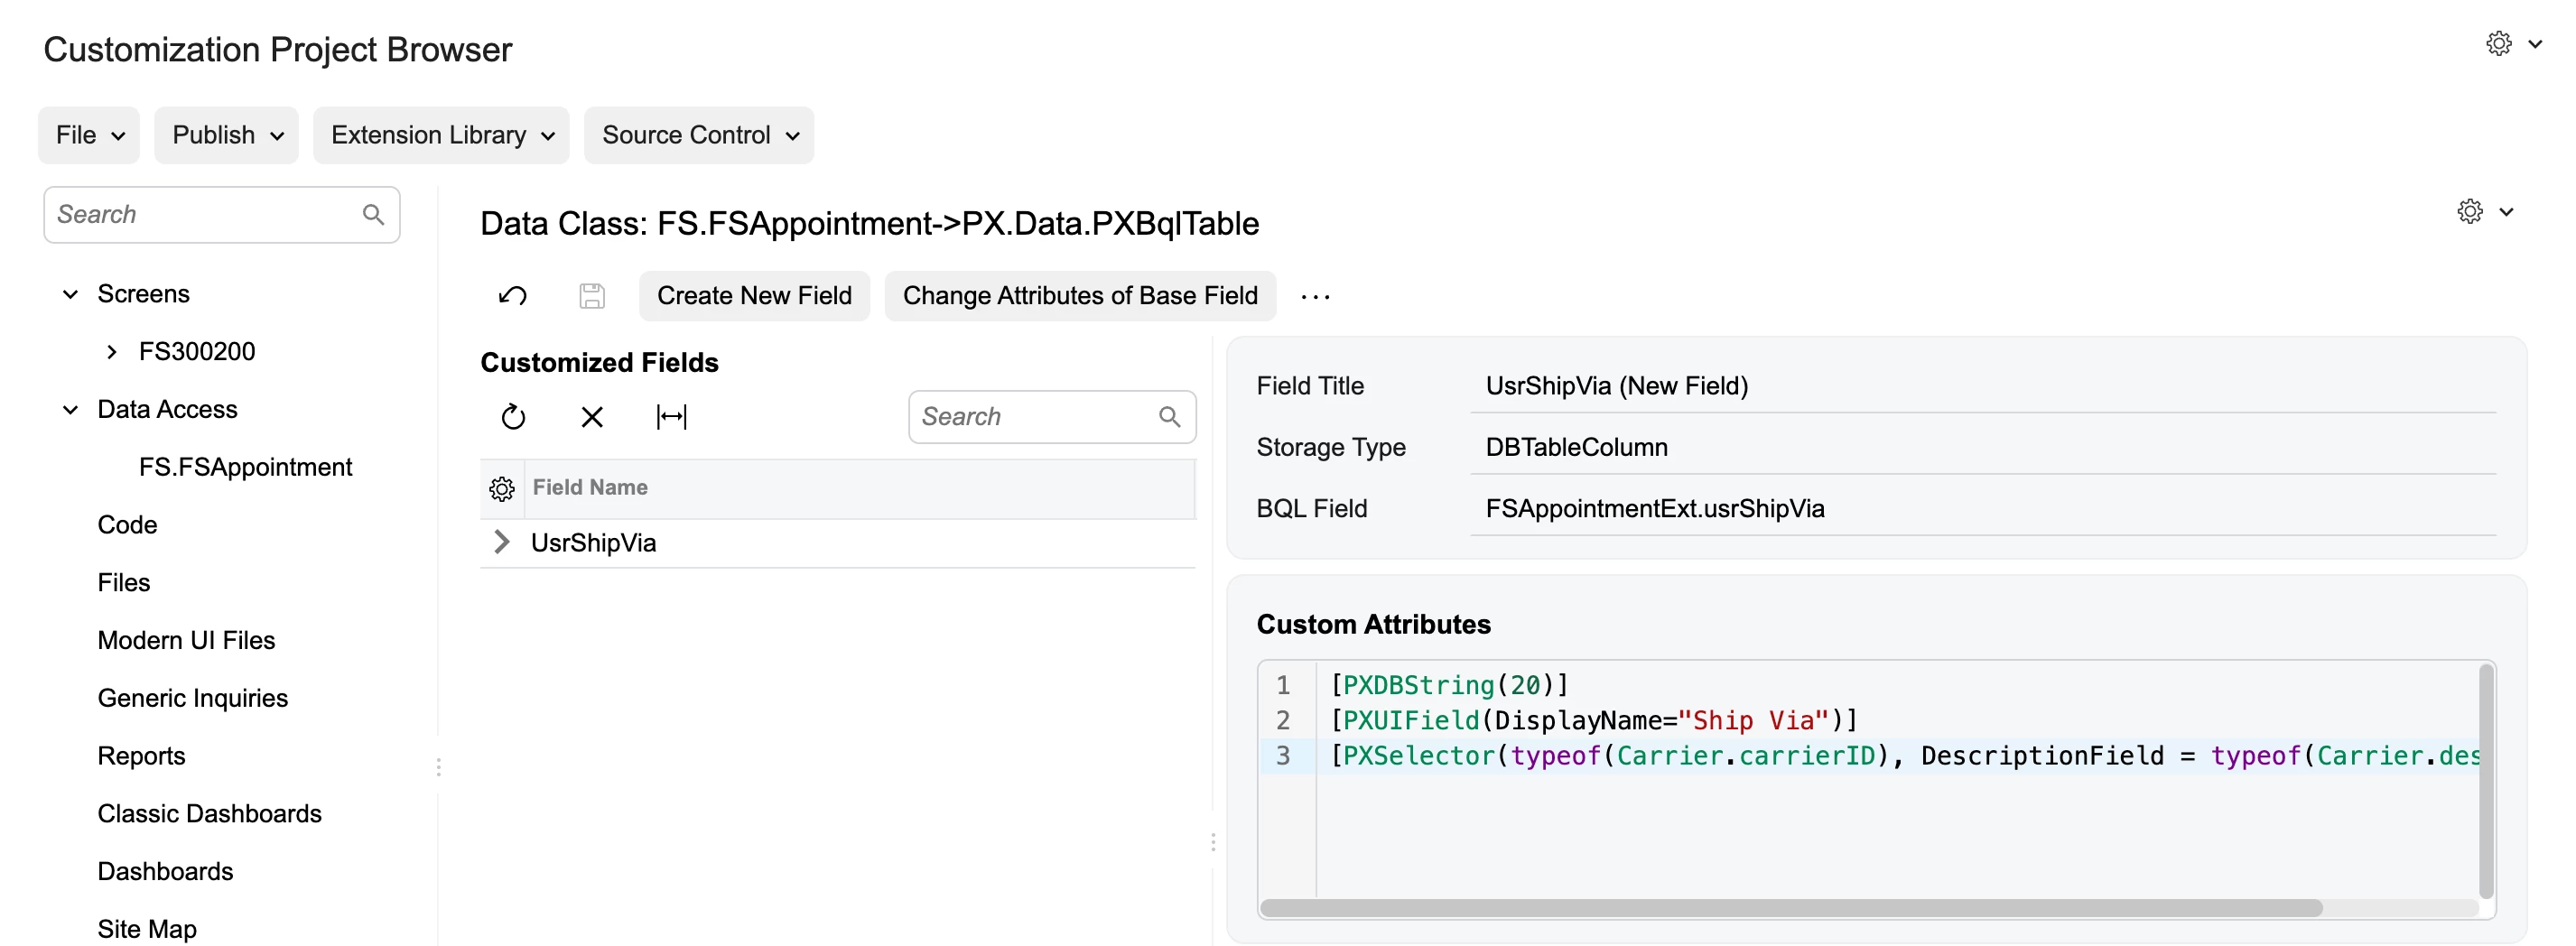
The Code under Custom Attributes section:
[PXDBString(20)]
[PXUIField(DisplayName="Ship Via")]
[PXSelector(typeof(Carrier.carrierID), DescriptionField = typeof(Carrier.description))]


Is this correct?

Best answer by Vard86

Hello  Harry,

Overall, the approach is correct and depends on where you would like to add the new fields.

If you want to create a new tab, that would be perfectly fine.
However, if you prefer to add the fields to an existing tab, you first need to confirm which Data View the tab is based on and which table it was created from. In this case, I have added the field under Settings.

Please note that before adding the field, the customization must be published.

Alternatively, you can create a new group specifically for shipping information to display it in the UI.


5 replies

  • Freshman II
  • Answer
  • January 26, 2026

Hello  Harry,

Overall, the approach is correct and depends on where you would like to add the new fields.

If you want to create a new tab, that would be perfectly fine.
However, if you prefer to add the fields to an existing tab, you first need to confirm which Data View the tab is based on and which table it was created from. In this case, I have added the field under Settings.

Please note that before adding the field, the customization must be published.

Alternatively, you can create a new group specifically for shipping information to display it in the UI.


Forum|alt.badge.img+9
  • Captain II
  • January 26, 2026

@Harry 


You can use Acumatica’s active carrier attribute like so:

[PXActiveCarrierSelector(typeof(Search<Carrier.carrierID>), DescriptionField = typeof(Carrier.description), CacheGlobal = true)]

But I think your approach should work too, with the risk you wont filter out inactive carriers


Forum|alt.badge.img
  • Author
  • Semi-Pro II
  • January 26, 2026

Thank you ​@aiwan  & ​@Vard86 , for your prompt response. I am looking to add the field on header level. Also, I am able to see the added field in Classic UI only but when switching to Modern UI it doesnt appear. Any reason so far? I am in 25R2.


Forum|alt.badge.img+9
  • Captain II
  • January 26, 2026

You need to add it in HTML & TypeScript for MUI.

HTML:

<template>
<field after="#AreatoPlaceID [name='PlaceAfterFieldName']" name="YourFieldName"></field>
</template>

TS:

import { ViewClass } from "src/screens/Module/ScreenID/ScreenIDClass";

export interface ExtensionClass extends ViewClass{ }
export class ExtensionClass {
YourField: PXFieldState;
}


Forum|alt.badge.img+2
  • Jr Varsity III
  • January 26, 2026

@Harry ,
Hi,
You need to modify the view file and add your field to the appropriate section. After that, run the Modern UI screen compilation command again.


Here I attach example in expense receipt screen after employee added field.


export class ClaimDetails extends PXView {
    ClaimDetailCD: PXFieldState;
    ExpenseDate: PXFieldState<PXFieldOptions.CommitChanges>;
    InventoryID: PXFieldState<PXFieldOptions.CommitChanges>;
    @headerDescription
    EmployeeID: PXFieldState<PXFieldOptions.CommitChanges>;
       Usrfromlocation: PXFieldState<PXFieldOptions.CommitChanges>;
       Usrtolocation: PXFieldState<PXFieldOptions.CommitChanges>;
}