Solved

Customized Acumatica Screens With Modern UI in 25R2

  • October 31, 2025
  • 31 replies
  • 926 views

DavidEichner
Captain II
Forum|alt.badge.img+14

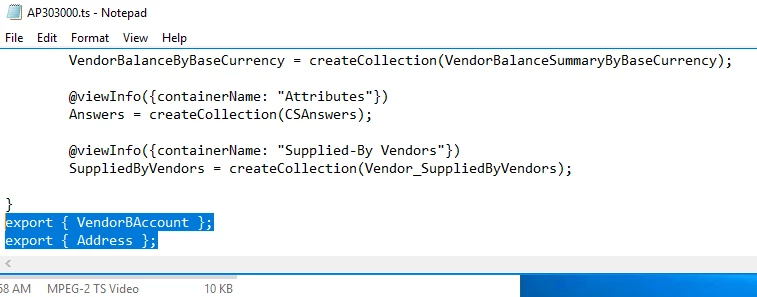
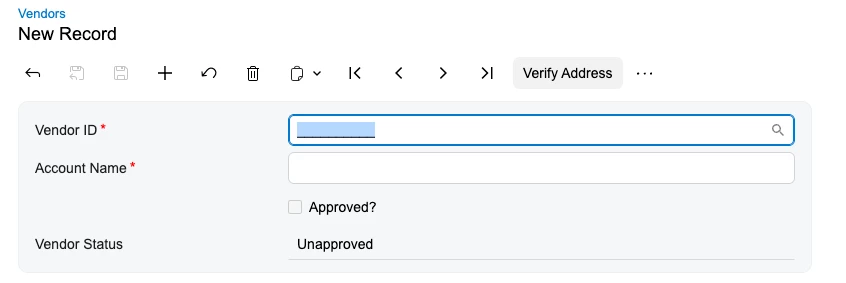
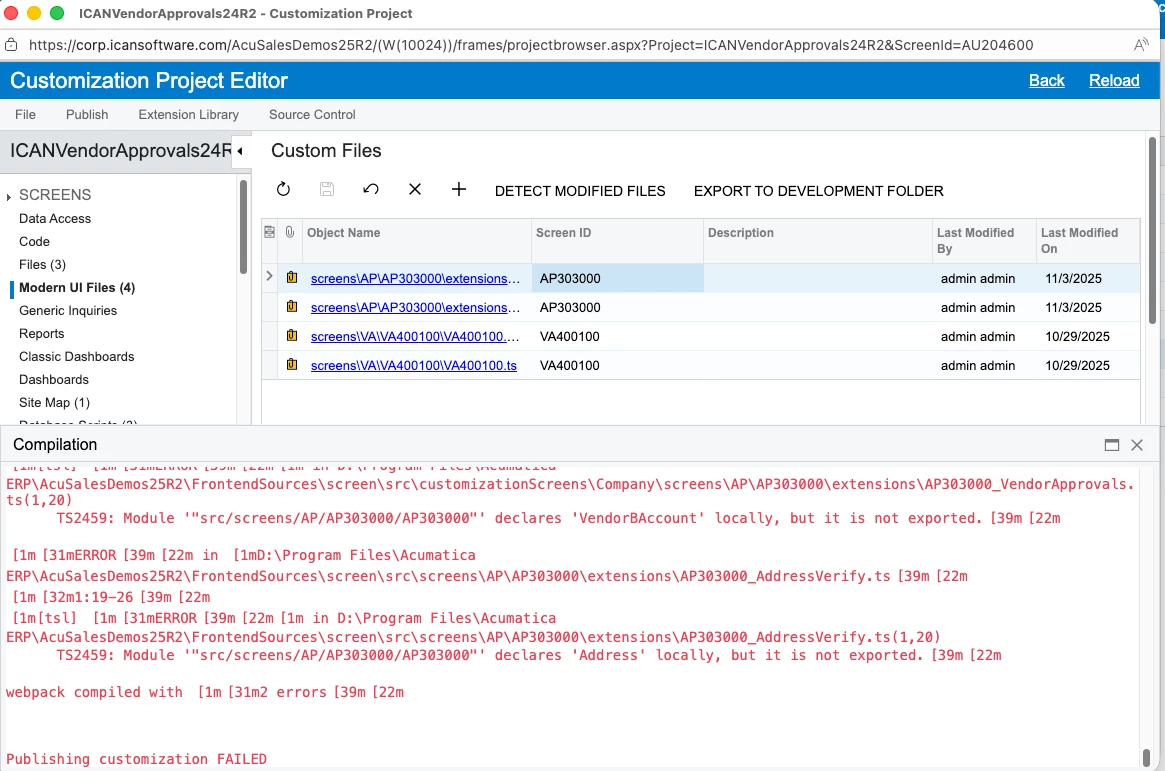
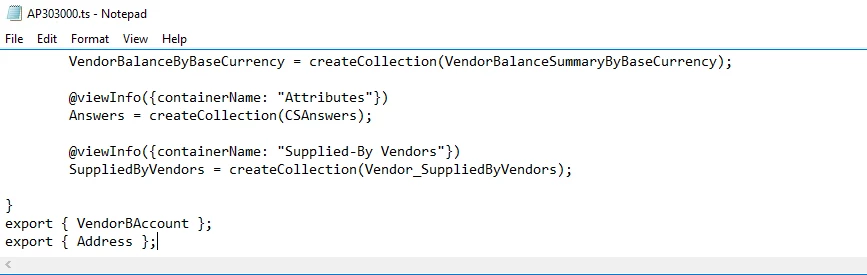
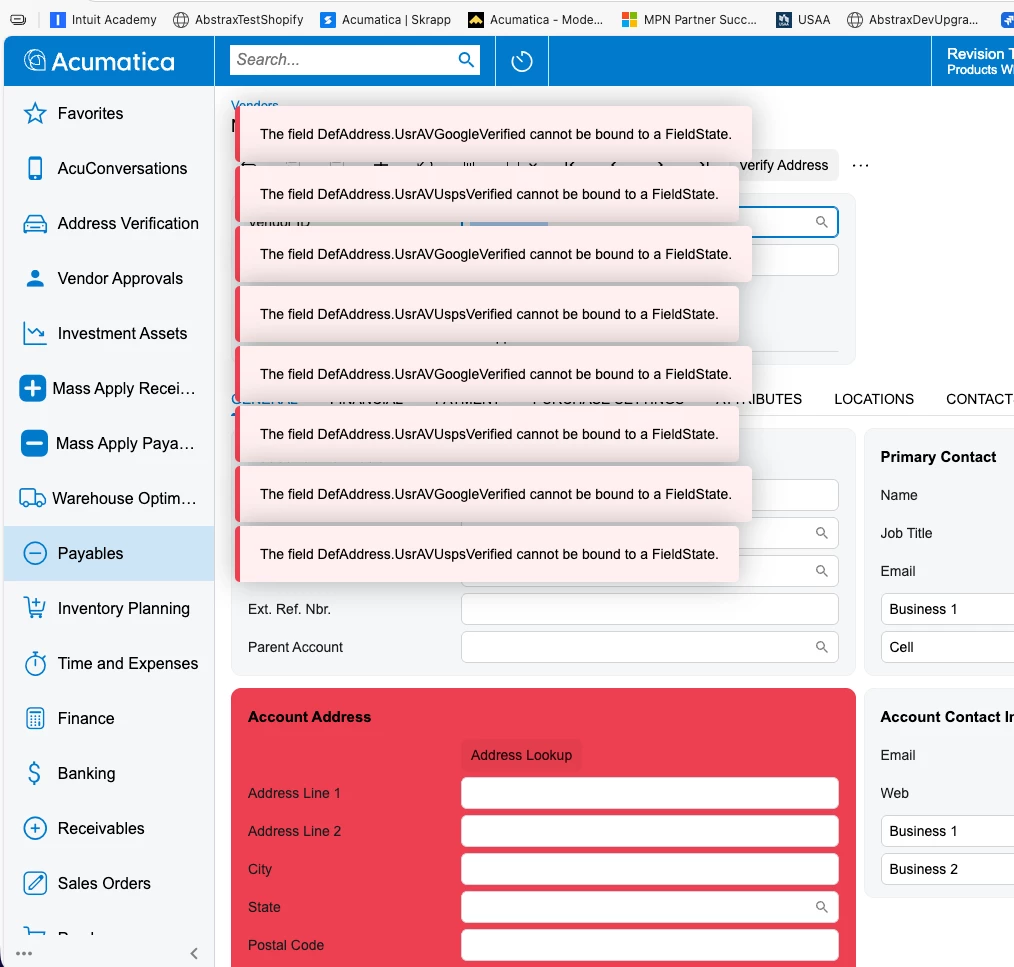
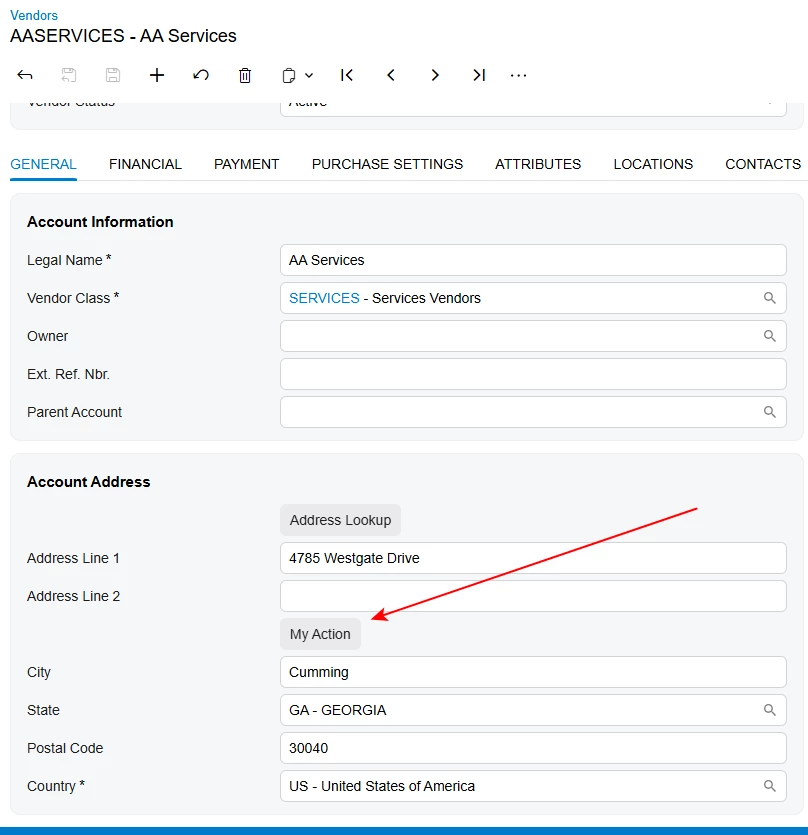
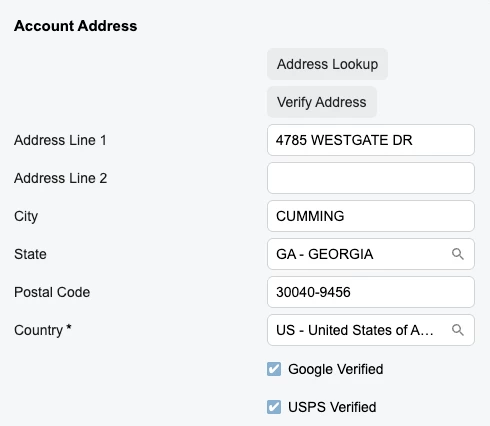
Has anyone else had problems with modern UI for Acumatica screens that are customized?  We have discovered that when you create extension modern UI files for a screen like the Vendor screen, they won’t work because Acumatica forgot to include export statements on the TS file for the screen so that they can be referenced by ISVs TS file to include custom fields onto the modern UI.

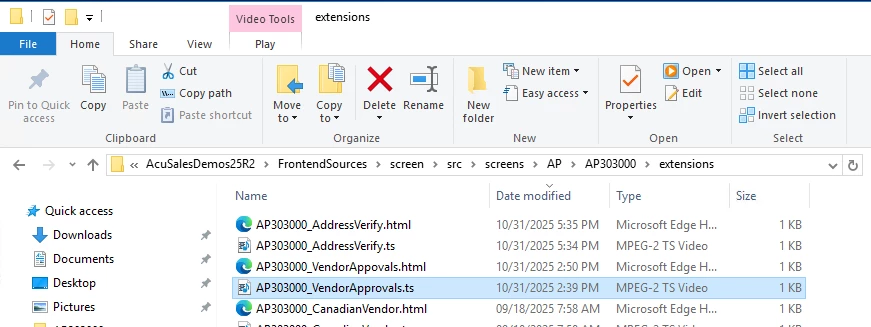
Also, the extension modern UI files don’t seem to be able to loaded into a customization project...just the files that are for non-Acumatica screens.  So, at this point, we apparently have to manually copy our files into the extensions folder for each screen and then edit the Acumatica screen TS file manually for every customized Acumatica screen for each of our customers? WTH?

Best answer by DavidEichner

Here’s the final version that is working:

import {
PXFieldState,
PXFieldOptions,
} from "client-controls";
import { AP303000 } from "src/screens/AP/AP303000/AP303000";

import {Location} from "src/screens/AP/AP303000/views";

import { Address } from "src/screens/common/form-address/form-address";


export interface Address_AddressVerify extends Address{ }
export class Address_AddressVerify  {
  UsrAVGoogleVerified: PXFieldState;
UsrAVUspsVerified: PXFieldState;
}
 

31 replies

Dmitrii Naumov
Acumatica Moderator
Forum|alt.badge.img+7
  • Acumatica Moderator
  • November 3, 2025

@DavidEichner seems like you are doing something wrong there. 

Could you please provide an example of a specific screen you’d like to customize and have troubles doing so?


DavidEichner
Captain II
Forum|alt.badge.img+14
  • Author
  • Captain II
  • November 3, 2025

Our VendorApprovals product adds UsrIsApproved checkbox to vendor screen.  In order to get it to work, we had to put HTML and TS files in the extensions folder underneath the AP303000 folder:

The TS file needs to reference VendorBAccount


We also had to edit the AP303000.TS file by adding an export statement for the VendorBAccount:


So my question remains, for the extension modern UI files (reflecting change to Acumatica screens rather than our product screens), how do we store them in a customization project that we can provide to our customers?  And how to include in the customization project, those modifications to the Acumatica screen TS file needed to make the extension TS work and provide the following:


Patrick Chen
Varsity III
Forum|alt.badge.img+3
  • Varsity III
  • November 3, 2025

Hey David

  1. You should not actually edit the existing Acumatica MUI files.  I think your change to AP303000.ts will be lost.  Looks like you need to extend the existing BAccount view?
  2. You need to create a development folder to put your extensions into. i.e. (FrontendSources\screen\src\development\screens\AP\AP303000\extensions). Once your extensions are located here they will be available to be scooped up by the Customization Manager in the Modern UI tab.

darylbowman
Captain II
Forum|alt.badge.img+16

In order to get it to work, we had to put HTML and TS files in the extensions folder underneath the AP303000 folder

Unless I'm missing something, that's the way Modern UI customizations normally work.


DavidEichner
Captain II
Forum|alt.badge.img+14
  • Author
  • Captain II
  • November 3, 2025

@Patrick Chen  Thanks for the guidance on the path under development for extensions modern UI files. Still not sure how to make sure the customization package updates AP303000.TS file for the VendorBAccount export needed.


DavidEichner
Captain II
Forum|alt.badge.img+14
  • Author
  • Captain II
  • November 3, 2025

@Patrick Chen  Until I manually edit the AP303000.TS file with the export VendorBAccount statement, I get the following error:


DavidEichner
Captain II
Forum|alt.badge.img+14
  • Author
  • Captain II
  • November 3, 2025

After I edit the AP303000.TS with the following, I am able to publish the customization.


Dmitrii Naumov
Acumatica Moderator
Forum|alt.badge.img+7
  • Acumatica Moderator
  • November 3, 2025

@DavidEichner 

Well, the easiest way is to go through UI wizard. 

  1. Create a customization package and click ‘Customize existing screen’
  1. Open modern UI editor for the screen, click Add Field, add the required field
    1. At that point the ts file is generated for you. It’ll look something like that: 
    2. import {
      PXFieldState,
      PXFieldOptions,
      PXView,
      updateDecorator,
      removeDecorator,
      featureInstalled,
      FeaturesSet,
      placeBeforeView,
      placeAfterView,
      placeBeforeProperty,
      placeAfterProperty,
      graphInfo,
      viewInfo,
      gridConfig,
      columnConfig,
      treeConfig,
      controlConfig,
      linkCommand,
      fieldOptions,
      fieldConfig,
      fieldInfo,
      headerDescription,
      autoRefresh,
      mappedToViewField,
      suppressLabel,
      readOnly,
      disabled,
      unbound,
      text,
      multiLine,
      primaryKey,
      type,
      ControlParameter,
      NetType,
      MenuItemRenderType,
      ScrollMode,
      TextAlign,
      GridPreset,
      GridColumnType,
      GridColumnShowHideMode,
      GridColumnDisplayMode,
      GridAutoGrowMode,
      GridPagerMode,
      GridFastFilterVisibility,
      GridNoteFilesShowMode,
      HeaderDescription,
      GridColumnGeneration,
      GridFilterBarVisibility,
      NodeSelectMode,
      PXSelectorMode,
      ApplySuggestionMode,
      ITextEditorControlConfig,
      ITimeSpanConfig,
      ISelectorControlConfig,
      ISegmentedSelectorControlConfig,
      IEditorControlConfig,
      INumberEditorControlConfig,
      IMaskEditorControlConfig,
      IMailEditorControlConfig,
      ILinkEditorControlConfig,
      IDropDownConfig,
      IDatetimeEditControlConfig,
      IColorPickerControlConfig,
      ICheckBoxControlConfig,
      ICalendarControlConfig,
      IBranchSelectorConfig,
      IBarcodeInputControlConfig,
      ITreeSelectorConfig,
      IRichTextEditorConfig,
      IFormulaEditorConfig,
      ICurrencyControlConfig,
      FieldGenerationMode
      } from "client-controls";
      import { AP303000 } from "src/screens/AP/AP303000/AP303000";
      import { VendorBAccount } from "src/screens/AP/AP303000/views";

      export interface AP303000_VendorApproved_generated extends AP303000 {}
      export class AP303000_VendorApproved_generated {}

      export interface VendorBAccount_VendorApproved_generated
      extends VendorBAccount {}
      export class VendorBAccount_VendorApproved_generated {
      UsrApproved: PXFieldState;
      }
    3. You can now click ‘export to development folder’ and modify it according to your needs. 

Alternatively you can start right away with creating ts and html files in FrontendSources\screen\src\development\screens\AP\AP303000\extensions


I do not see any need to modify anything in base Acumatica files.


The example customization is attached.


DavidEichner
Captain II
Forum|alt.badge.img+14
  • Author
  • Captain II
  • November 3, 2025

@Dmitrii Naumov  Are you able to publish it and have it work?


darylbowman
Captain II
Forum|alt.badge.img+16

You were trying to use VendorBAccount from AP303000.ts when it’s defined in views.ts


DavidEichner
Captain II
Forum|alt.badge.img+14
  • Author
  • Captain II
  • November 3, 2025

@Dmitrii Naumov  Also, when I try export to development, Acumatica states that it is going to delete all of the other existing files from the development folder...which is a problem since we have multiple products that need modern UI files and they need to be in that folder in order to add them to the customization project.


DavidEichner
Captain II
Forum|alt.badge.img+14
  • Author
  • Captain II
  • November 3, 2025

@darylbowman It didnt work until I added it to the AP303000.ts file


darylbowman
Captain II
Forum|alt.badge.img+16

@darylbowman It didnt work until I added it to the AP303000.ts file

Because you were trying to import it from AP303000:


You need to import from views:


DavidEichner
Captain II
Forum|alt.badge.img+14
  • Author
  • Captain II
  • November 3, 2025

@darylbowman  OK.  Let me try that.  It would be nice if the training manual mentioned that.  Their example led us down the wrong path.

So it should look like this?

import {
PXFieldState,
PXFieldOptions,
} from "client-controls";
import { AP303000,VendorBAccount} from "src/screens/AP/AP303000/AP303000";
import { VendorBAccount} from "src/screens/AP/AP303000/views";
export interface BAccount_VendorApprovals extends VendorBAccount{ }
export class BAccount_VendorApprovals  {
  UsrIsApproved: PXFieldState;
}


darylbowman
Captain II
Forum|alt.badge.img+16

Close, but you need to remove VendorBAcount from being imported from AP303000

import { AP303000,VendorBAccount} from "src/screens/AP/AP303000/AP303000";

Some screens don’t have a views.ts file and instead define everything within the screen file, in which case you would do it the way you were. This one uses views.ts.


Dmitrii Naumov
Acumatica Moderator
Forum|alt.badge.img+7
  • Acumatica Moderator
  • November 3, 2025

@Dmitrii Naumov  Are you able to publish it and have it work?

Yes, it’s a working example that I published and tested.


@Dmitrii Naumov  Also, when I try export to development, Acumatica states that it is going to delete all of the other existing files from the development folder...which is a problem since we have multiple products that need modern UI files and they need to be in that folder in order to add them to the customization project.

The idea is that you simultaneously develop one customization. You can have other customizations published at the same time, but you’ll only have one that you are currently working on in the development folder. 


Once you’ve completed some dev work on a customization, you update it in the customization package and you can go on and clean the development folder to work on the next customization.


DavidEichner
Captain II
Forum|alt.badge.img+14
  • Author
  • Captain II
  • November 3, 2025

OK.  That worked for VendorBAccount.  However, when I try the same approach with another project that customizes the vendor screen, it publishes but throws errors when the screen is opened.  

Previously, it worked with Address instead of Location when I added the export { Address} line to the AP303000.ts file.

import {
PXFieldState,
PXFieldOptions,
} from "client-controls";
import { AP303000 } from "src/screens/AP/AP303000/AP303000";
import { Location } from "src/screens/AP/AP303000/views";
export interface Location_AddressVerify extends Location{ }
export class Location_AddressVerify  {
  UsrAVGoogleVerified: PXFieldState;
UsrAVUspsVerified: PXFieldState;
}

HTML:


<template>
  
<field
    after="#groupAccountAddress [name='CountryID']"
    name="UsrAVGoogleVerified"
  ></field>

<field
    after="#groupAccountAddress [name='UsrAVGoogleVerified']"
    name="UsrAVUspsVerified"
  ></field>

</template>


DavidEichner
Captain II
Forum|alt.badge.img+14
  • Author
  • Captain II
  • November 3, 2025

Since views didnt have Location or Address defined, I had to copy some of the imports on the AP303000.ts and paste them into our ts file in order to get it to work.  Now, I just have to determine which of them are needed and which can be removed.  Will update this thread with the final file contents.  Here’s what is currently working but probably overkill in terms of the imports.

import {
PXFieldState,
PXFieldOptions,
} from "client-controls";
import { AP303000 } from "src/screens/AP/AP303000/AP303000";

import {
    Vendor, Vendor_SuppliedByVendors, VendorBalanceSummary, Location, VendorPaymentMethodDetail,
    VendorBalanceSummaryByBaseCurrency, CSAnswers, VendorBAccount,
    LocationBranchSettings
} from "src/screens/AP/AP303000/views";
import { PXActionState, PXScreen, createSingle, createCollection, graphInfo, viewInfo } from "client-controls";
import { PrimaryContact } from "src/screens/CR/common/forms/form-primary-contact/form-primary-contact";
import { Address } from "src/screens/common/form-address/form-address";
import { Contact, DefaultContact } from "src/screens/common/form-contact-profile/form-contact-profile";


export interface Address_AddressVerify extends Address{ }
export class Address_AddressVerify  {
  UsrAVGoogleVerified: PXFieldState;
UsrAVUspsVerified: PXFieldState;
}


DavidEichner
Captain II
Forum|alt.badge.img+14
  • Author
  • Captain II
  • Answer
  • November 3, 2025

Here’s the final version that is working:

import {
PXFieldState,
PXFieldOptions,
} from "client-controls";
import { AP303000 } from "src/screens/AP/AP303000/AP303000";

import {Location} from "src/screens/AP/AP303000/views";

import { Address } from "src/screens/common/form-address/form-address";


export interface Address_AddressVerify extends Address{ }
export class Address_AddressVerify  {
  UsrAVGoogleVerified: PXFieldState;
UsrAVUspsVerified: PXFieldState;
}


Dmitrii Naumov
Acumatica Moderator
Forum|alt.badge.img+7
  • Acumatica Moderator
  • November 3, 2025

Here is an example customization with the Address panel extended as well.


DavidEichner
Captain II
Forum|alt.badge.img+14
  • Author
  • Captain II
  • November 3, 2025

Thanks for everyone’s assist!  :)


DavidEichner
Captain II
Forum|alt.badge.img+14
  • Author
  • Captain II
  • November 4, 2025

One more ASK if there is anyone who knows how to do the following:

How do I edit the extension ts and html file to place a button for a graph action below the address?


Forum|alt.badge.img+4

Here’s how you can place the custom button below the address:

AP303000_Community.ts

import { AP303000 } from "src/screens/AP/AP303000/AP303000";
import { PXActionState } from "client-controls";

export interface AP303000_Community extends AP303000 { }
export class AP303000_Community
{
   MyAction : PXActionState;
}

AP303000_Community.html

<template>
   <field after="#groupAccountAddress [name='AddressLine2']" name="fakeField" unbound >
      <qp-button id="myButton" state.bind="MyAction" class="col-auto" ></qp-button>
   </field>
</template>

Result:

If you want to place the button after a different field, just replace AddressLine2 in the HTML with the field name you need.


DavidEichner
Captain II
Forum|alt.badge.img+14
  • Author
  • Captain II
  • November 4, 2025

@aleksandrsechin  Thank you!  And thanks to all who contributed!

Now our team can update all of the screens with addresses for our AddressVerify product in the modern UI on 25R2.  


Joe Schmucker
Captain II
Forum|alt.badge.img+3
  • Captain II
  • November 5, 2025

Wow.  This is crazy difficult.  I am bookmarking this post.  

Here are a couple questions to add to the mix.  

I have two customization projects for the same customer for the PM301000 screen. There are some pretty extensive changes and I separate the projects into two because I want to separate the concerns.  Since each project does something entirely different, it is better to have two projects in case one has an issue, so we only need to unpublish the project that is causing a problem and not remove everything. The customer has also made changes (no code) to that screen.

Do I have to merge ALL the changes to the screen in one extension?  If it is possible to do it in multiple extensions, I can only imagine the screen will be pretty ugly.  

Also, does this mean the customer cannot make their own no code changes to a screen that I have modified?  Or, if I have modified the screen, do I have to add their changes to my project and remove their projects?

I think this is going to be a nightmare.