Here is how you set up Acumatica Payments in 2023r2 version of Acumatica ERP.
Prerequisites
Make sure you have the details needed to connect to your Processing Center.
For Acumatica Payments you need the following values APIKEY, HASHKEY, LOCATIONID, USERID.
It usually looks like the following:
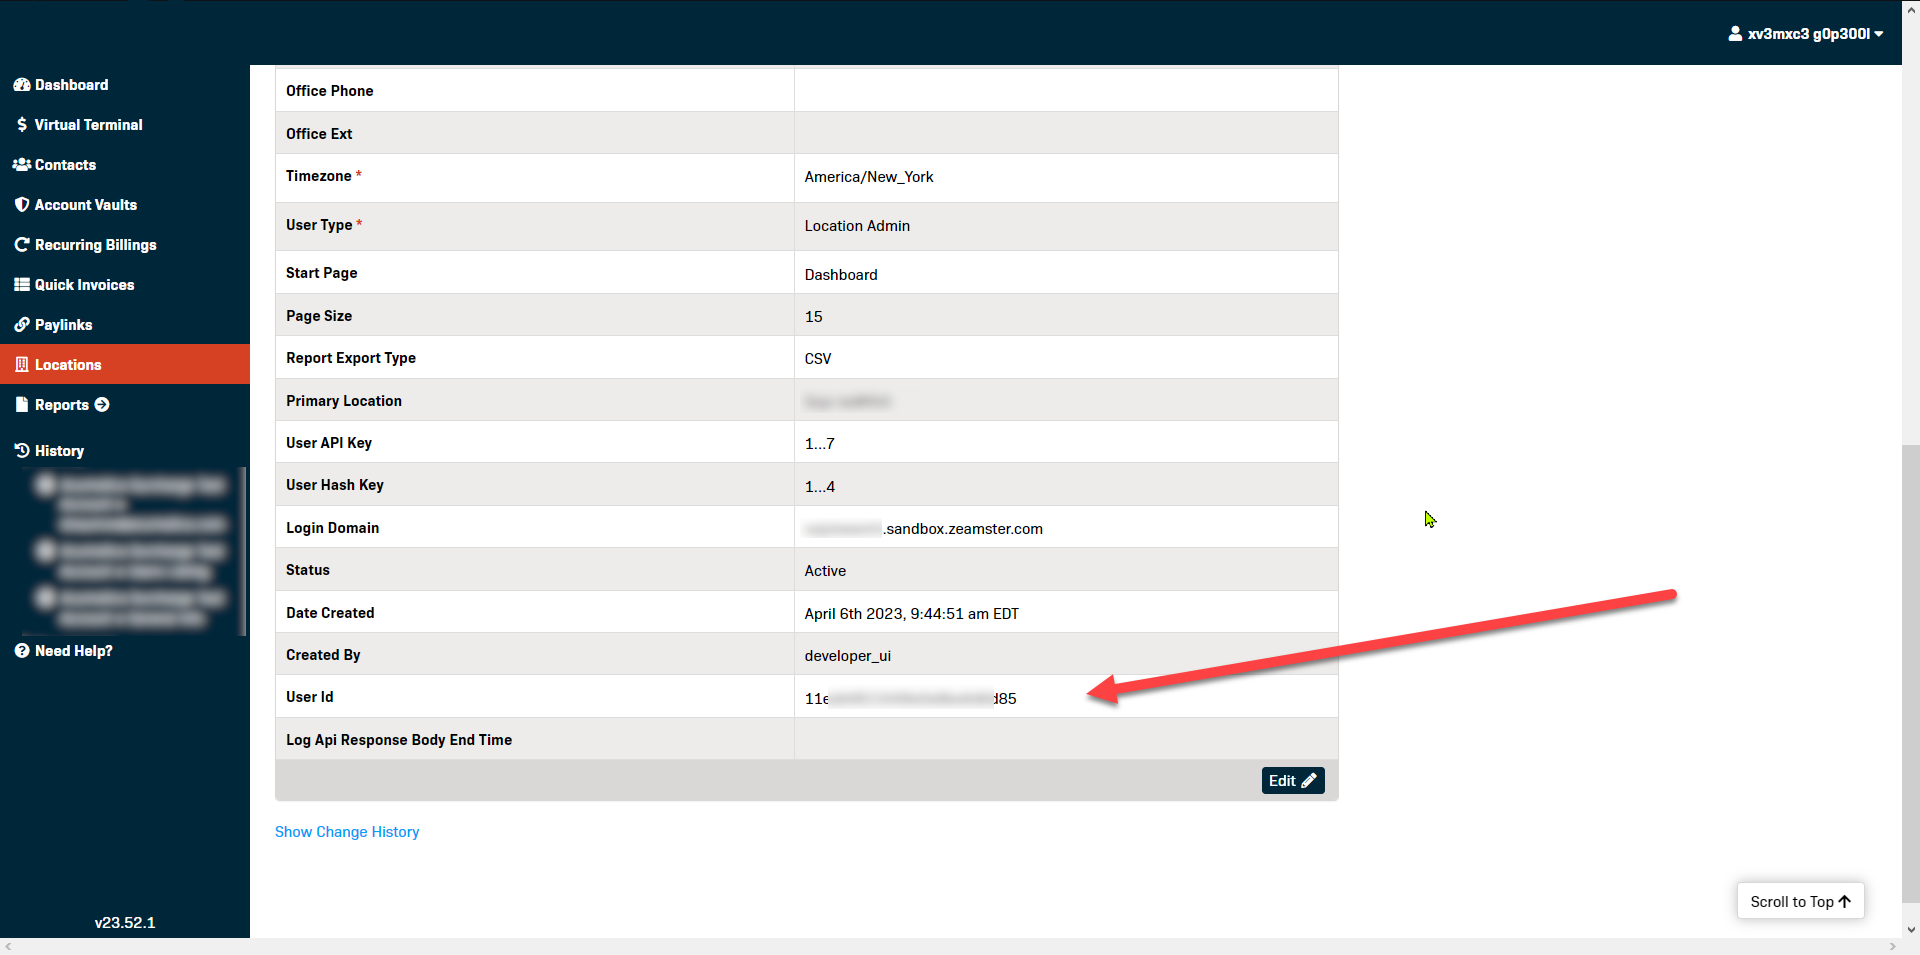
LOCATIONID: 11eda672c8d689b4ae137d65
USERID: 11ecb74a72b0eb6ba237fcd7
APIKEY: 41db9b32681e5a2ea1122e40
HASHKEY: e6f8fe93f9479c330148c9e1
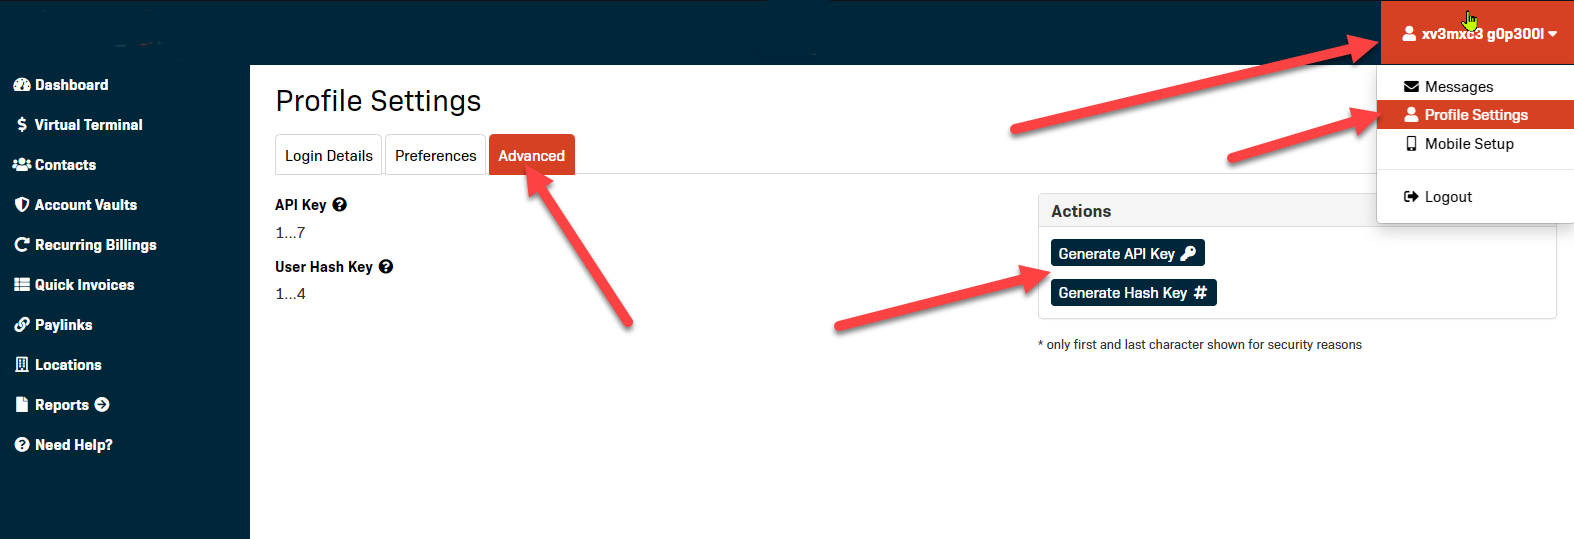
To get these values, you need to log in to your merchant account, using https://[yourcompany].sandbox.zeamster.com/ for the sandbox account or https://[yourcompany].zeamster.com/ for the live account.
Then navigate to your profile settings → Advanced to generate Hash Key and API Key
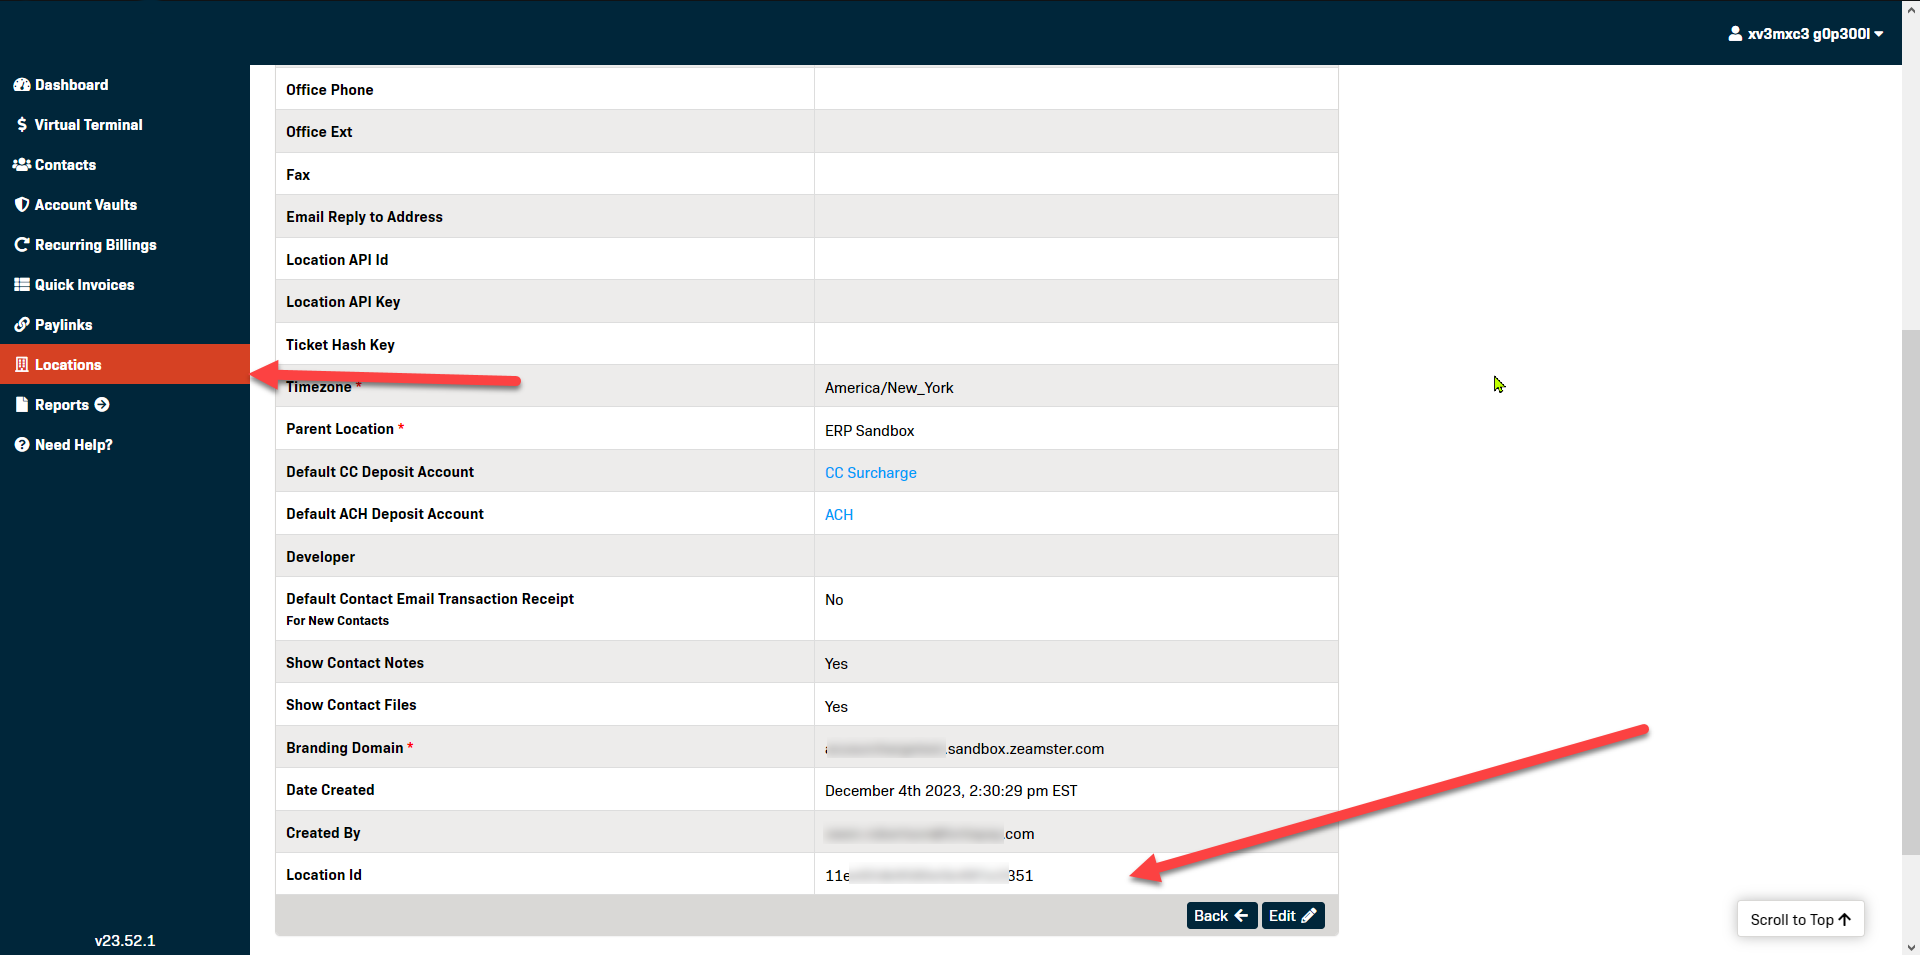
Then go to Locations → Your Location and copy Location Id.
Then go to the settings of the location→ users
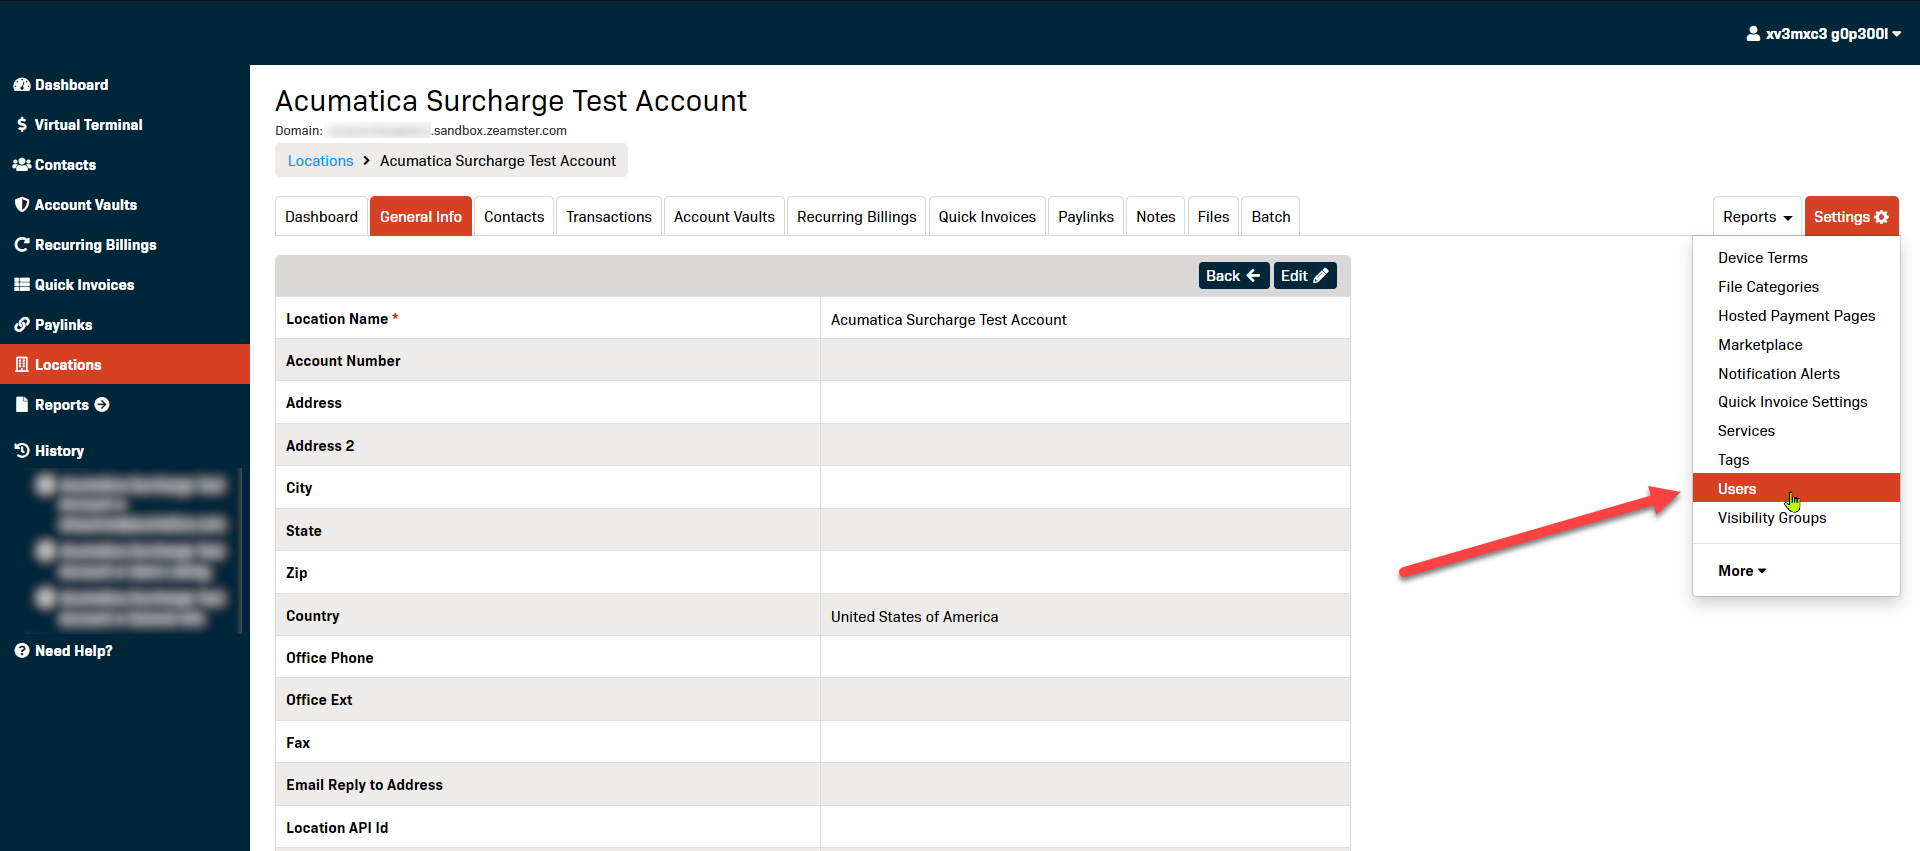
Select your user and copy the UserID
In Acumatica make sure you have the following settings.
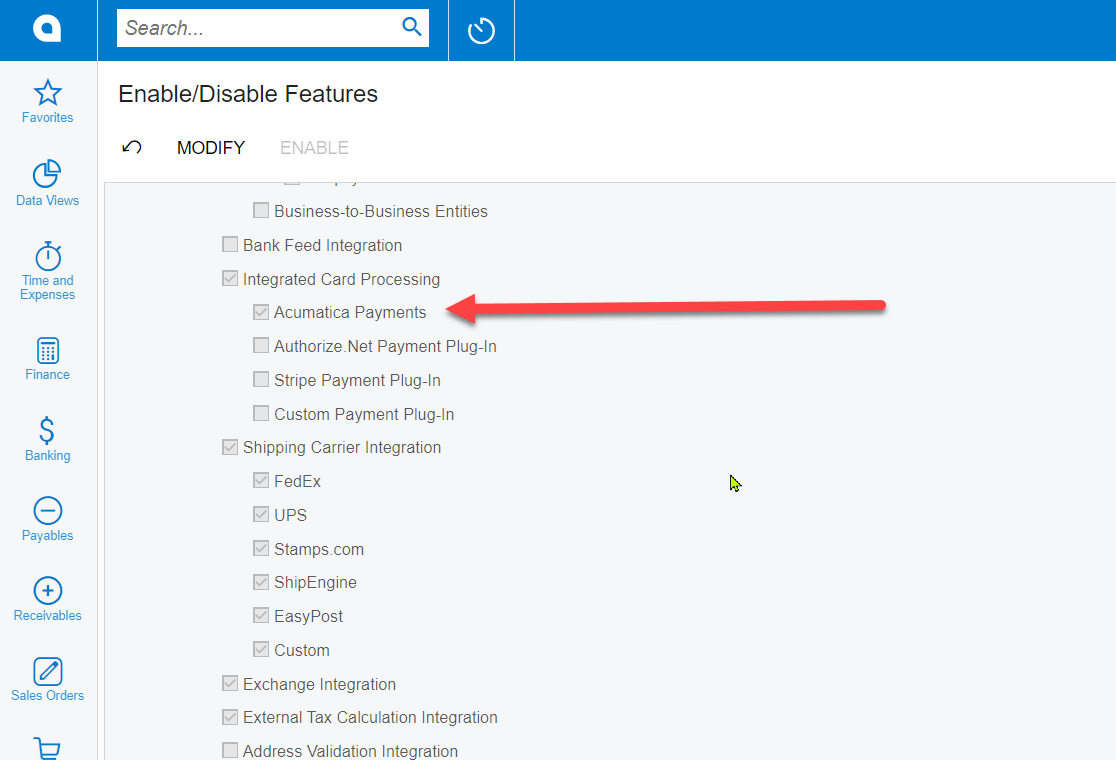
- The Acumatica Payments feature is active on the Enable/Disable features form (CS100000)
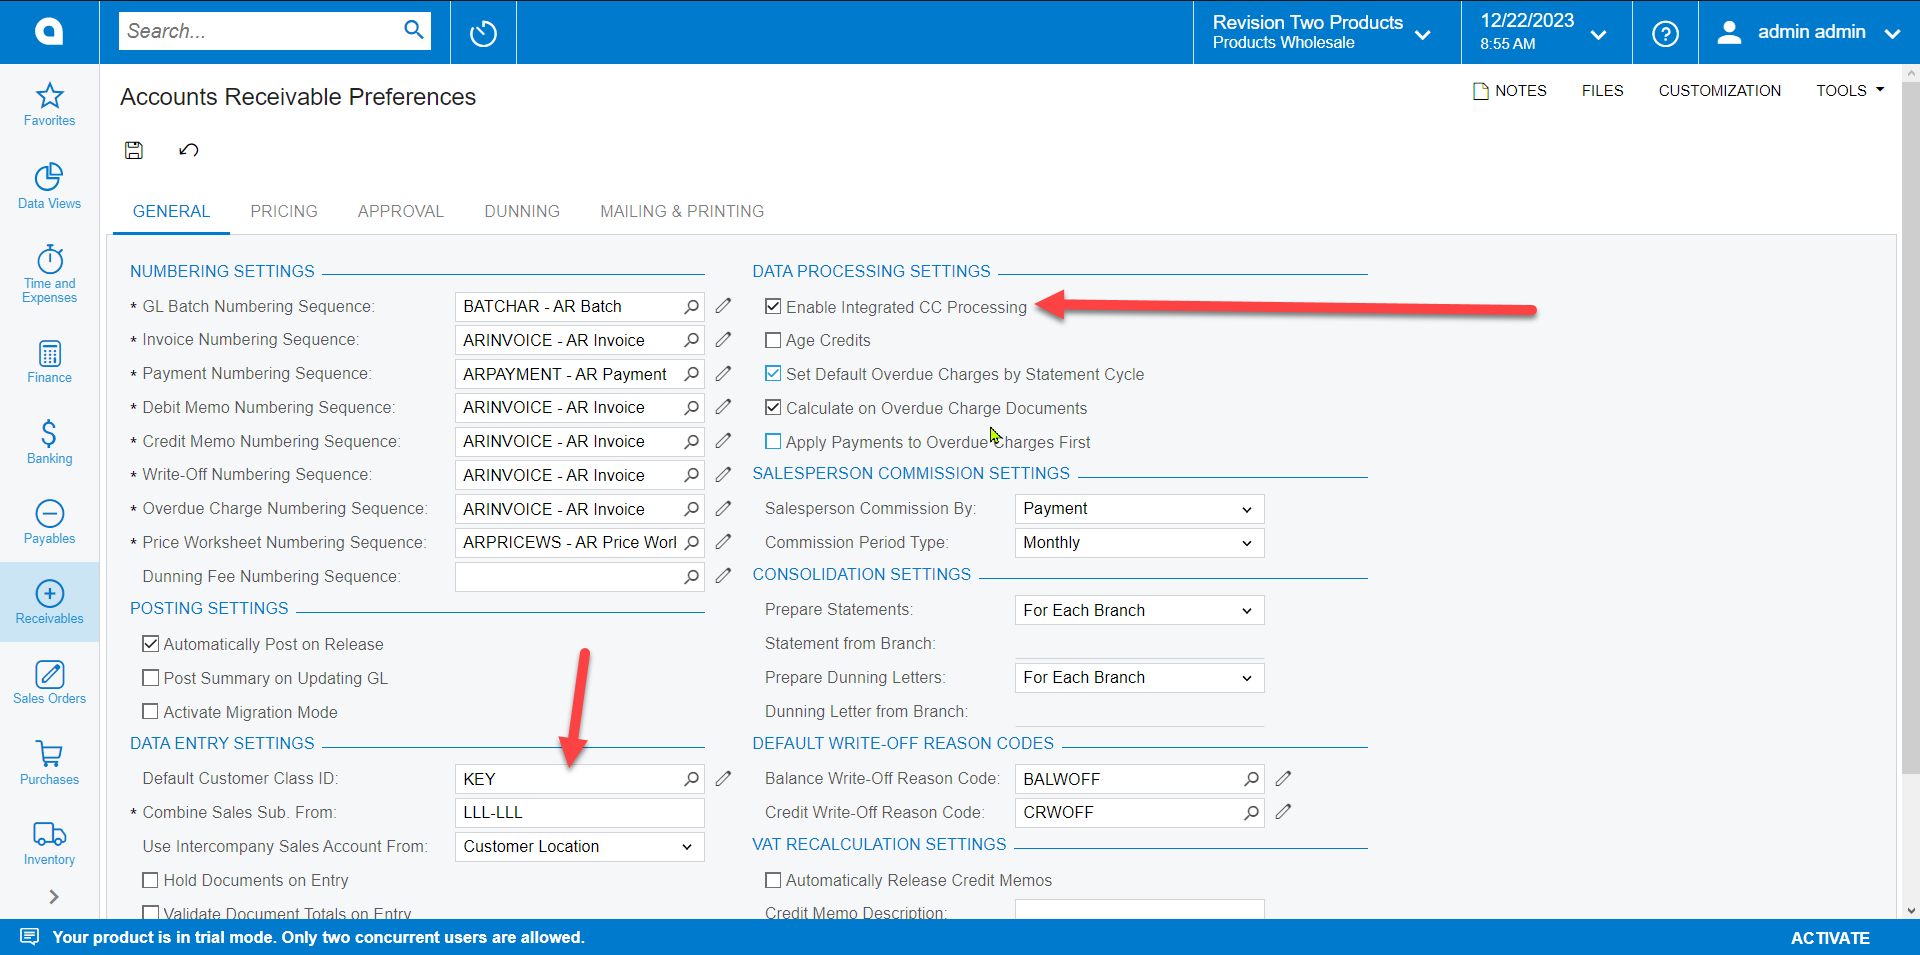
- On the Accounts Receivable Preferences form (AR101000) set Default Customer Class and Enable Integrated CC Processing
- Make sure you have Chart of Accounts and Cash Accounts set up (you’ll need your Bank Account and a Clearing account as Cash Accounts).
Basic Configuration of Acumatica Payments
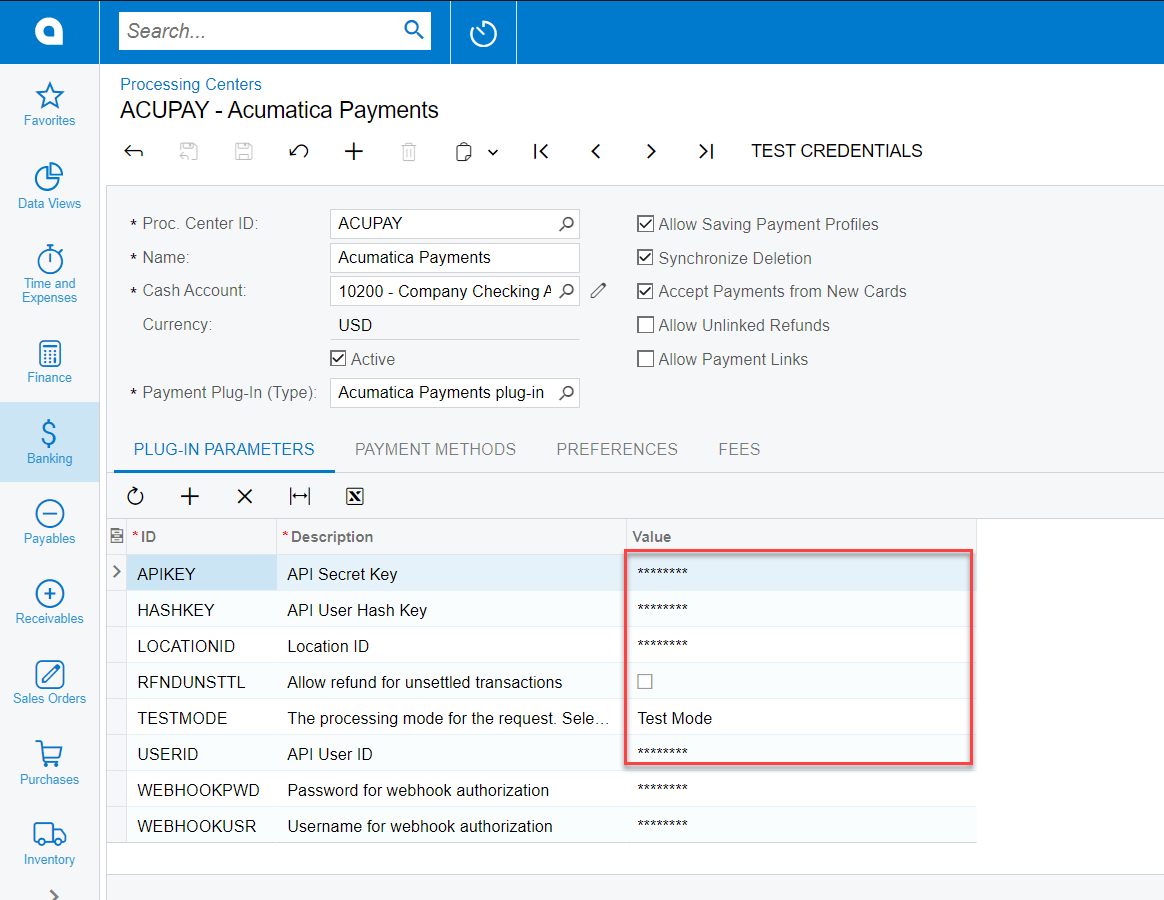
- Go to the Processing Centers form (CA205000) and create a new Processing center.
- Give it a name.
- Select a cash account that has the same currency you’ll be working with.
- Set Active to true.
- Select Payment Plugin = Acumatica Payments plug-in.
- In plugin parameters fill APIKEY, HASHKEY, LOCATIONID, USERID.
- Set Test Mode to Test or Lice depending on what you are setting up.
- Save
- Go to the Payment Methods form (CA204000)
- Create a new Payment Method for Credit Cards or use existing Credit Cards payment method.
- Important settings to set on CC Payment Method:
- Means of Payment = Credit Card
- Use in AR=true
- Allowed Cash Accounts – select one or multiple. Recommended to set one of the as AR Default =true
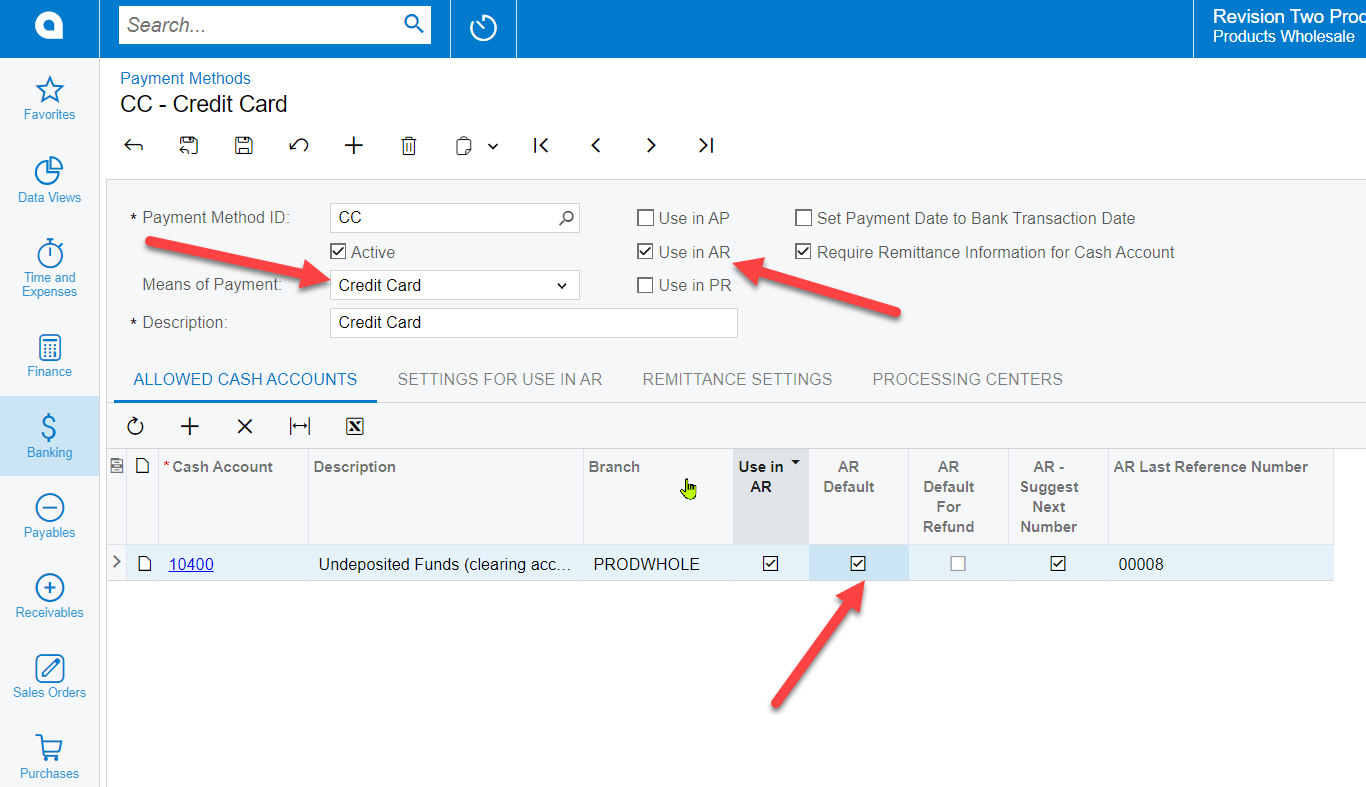
- Settings to use in AR-> Integrated Processing = true
- Processing Centers -> Add Acumatica Payments processing center and recommended to set Default=true
- Save
If you are going to use EFT/ACH payment methods along with Credit Cards, please set up the Payment method for that too.
- Go to the Payment Methods form (CA204000)
- Create a new Payment Method for EFT/ACH or use existing EFT payment method
- Important settings to set on EFT Payment Method:
- Means of Payment = EFT
- Use in AR=true
- Allowed Cash Accounts – select one or multiple. Recommended to set one of the as AR Default =true
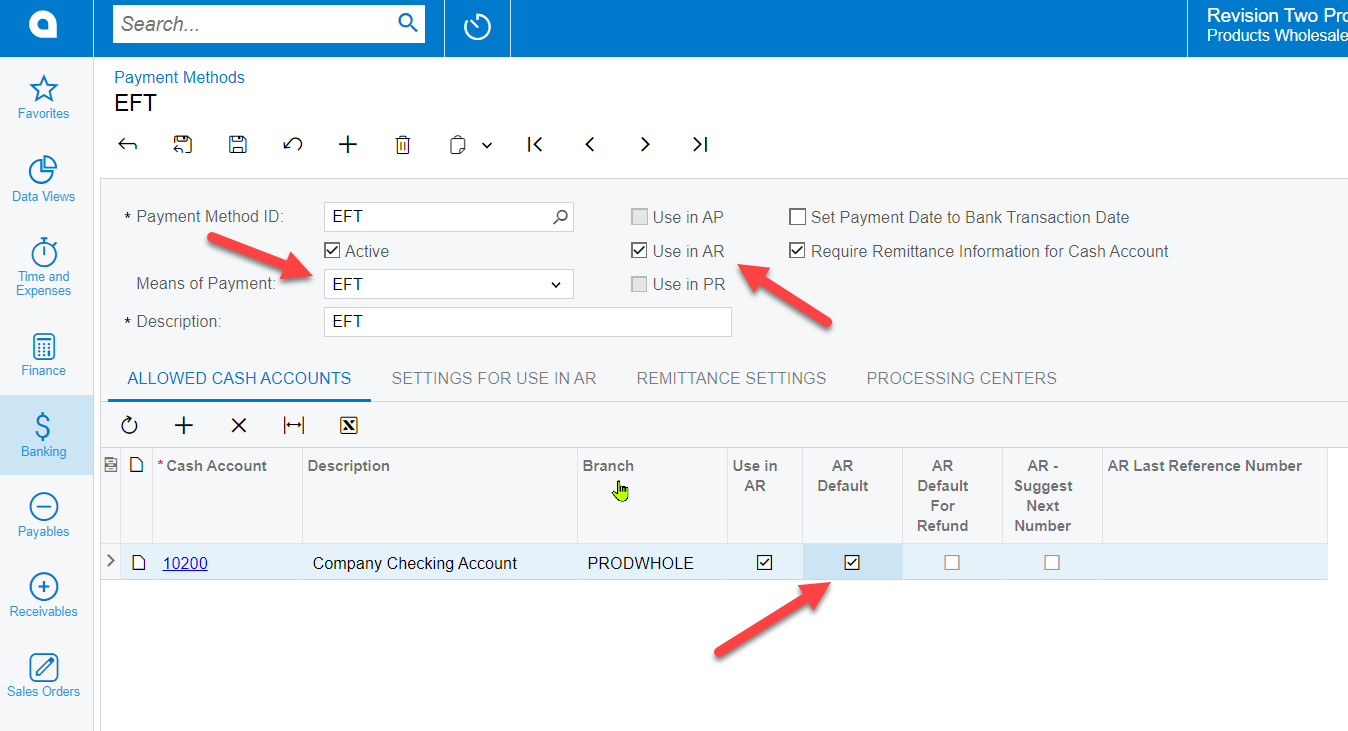
- Processing Centers -> Add Acumatica Payments processing center and recommended to set Default=true
- Save
You can now make credit card payments in the system!
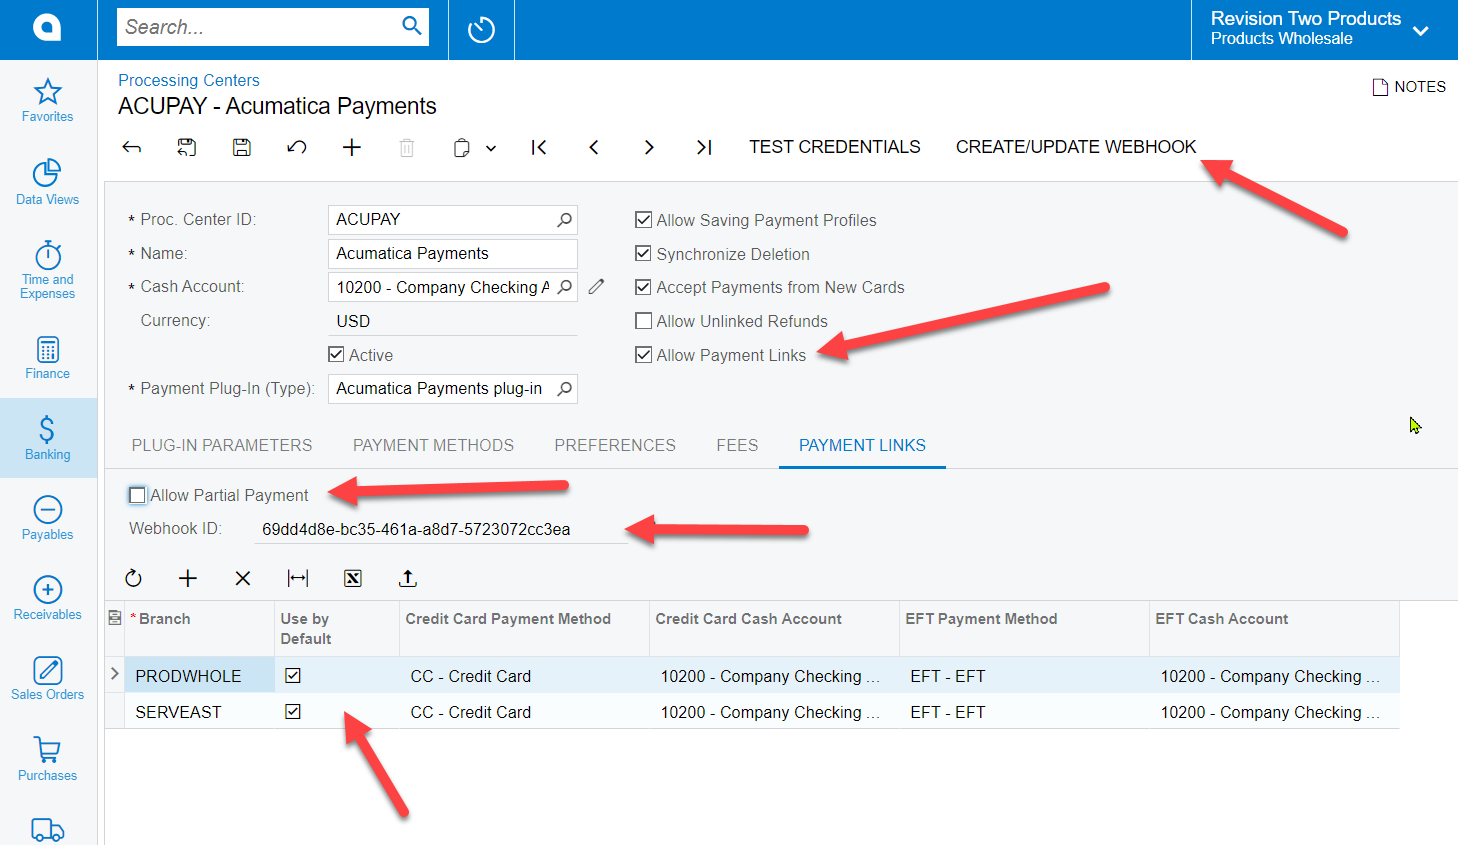
Configuring Payment Links
- Go back to your Acumatica Payments Processing center.
- Check ‘Allow Payment Links’ checkbox.
- Click ‘Create/Update webhook’. That should allow payments to be created once they are received without a need to run the synchronization process. (Webhooks do not work with locally deployed instance).
- Open tab Payment Links tab
- Check Allow Partial Payment if needed
- Make sure Webhook ID is present
- For each branch that you are planning to send links from create a line in the grid and fill either Credit Card related fields, or EFT Related fields or both depending on whether you are going to use CC, EFT or both. It is recommended to set Use by default = true.
-
Save the processing center.
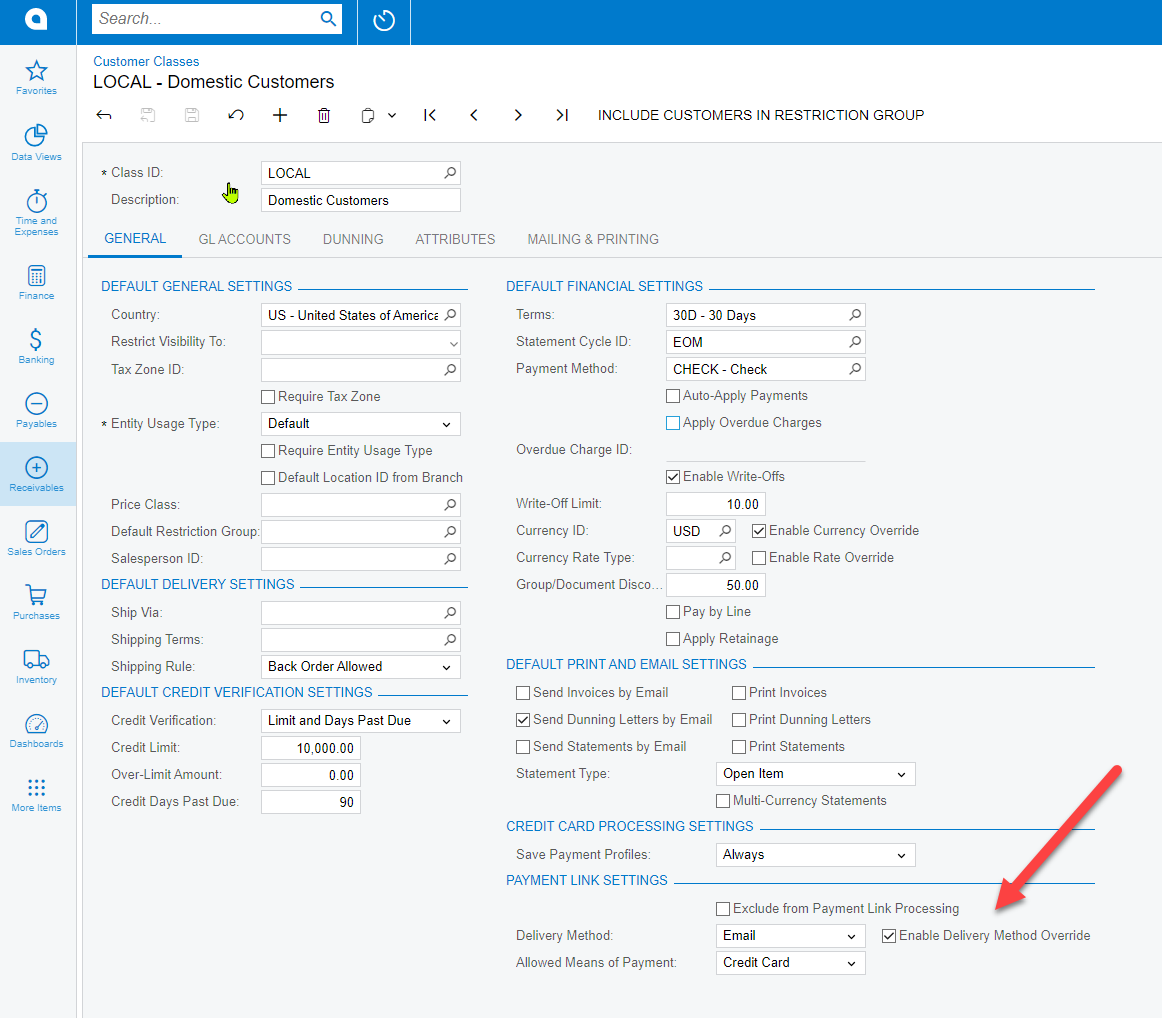
- Open Customer Classes form (AR2010PL).
- For each customer class define whether you want to exclude this customer class from links processing and whether you want to Allow EFT, CC or both payment methods for that customer class. Also define if you want to automatically send the pay link notification using Delivery method box. The default values are: Include in payment links process, don’t send email notifications, allow both CC and EFT.
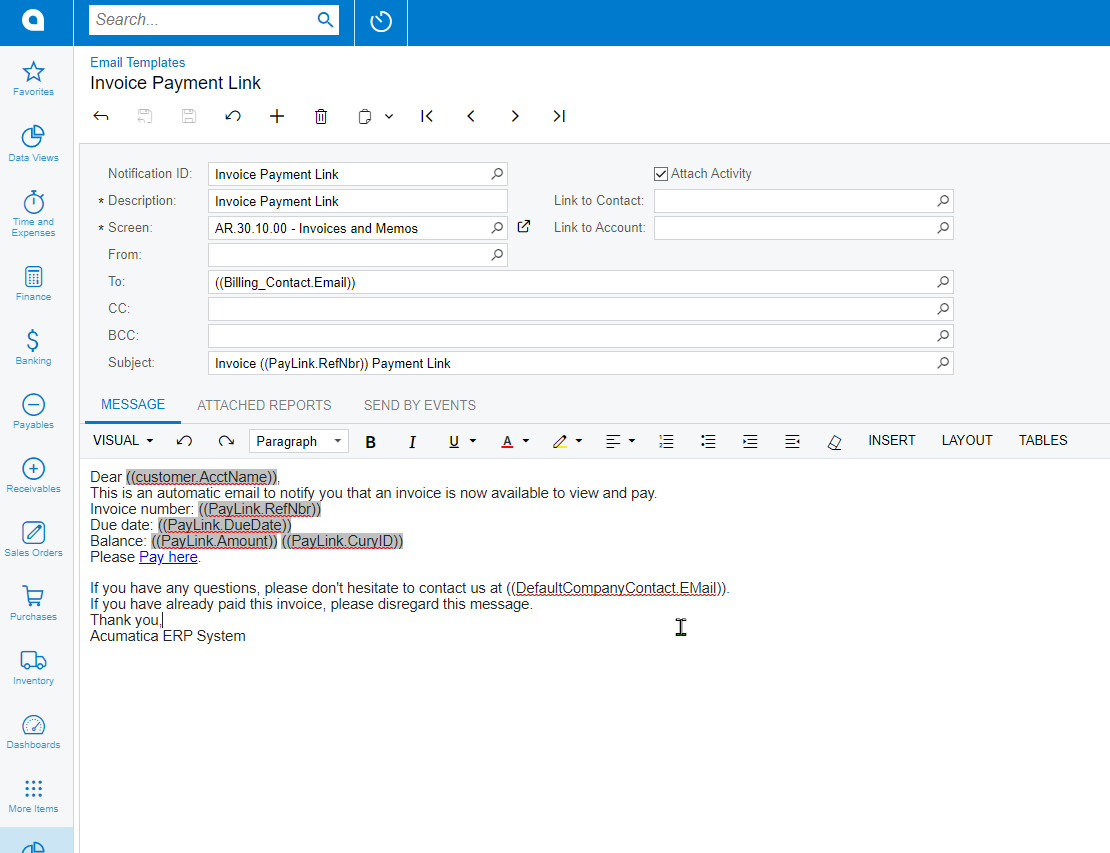
- Go to the Email Templates form (SM2040PL) and change the Invoice Payment Link or Sales Order Payment Link email template if needed.
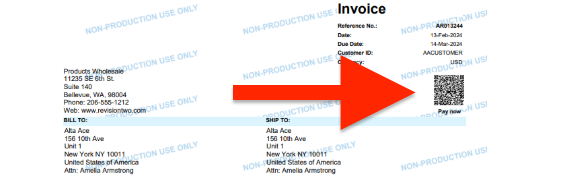
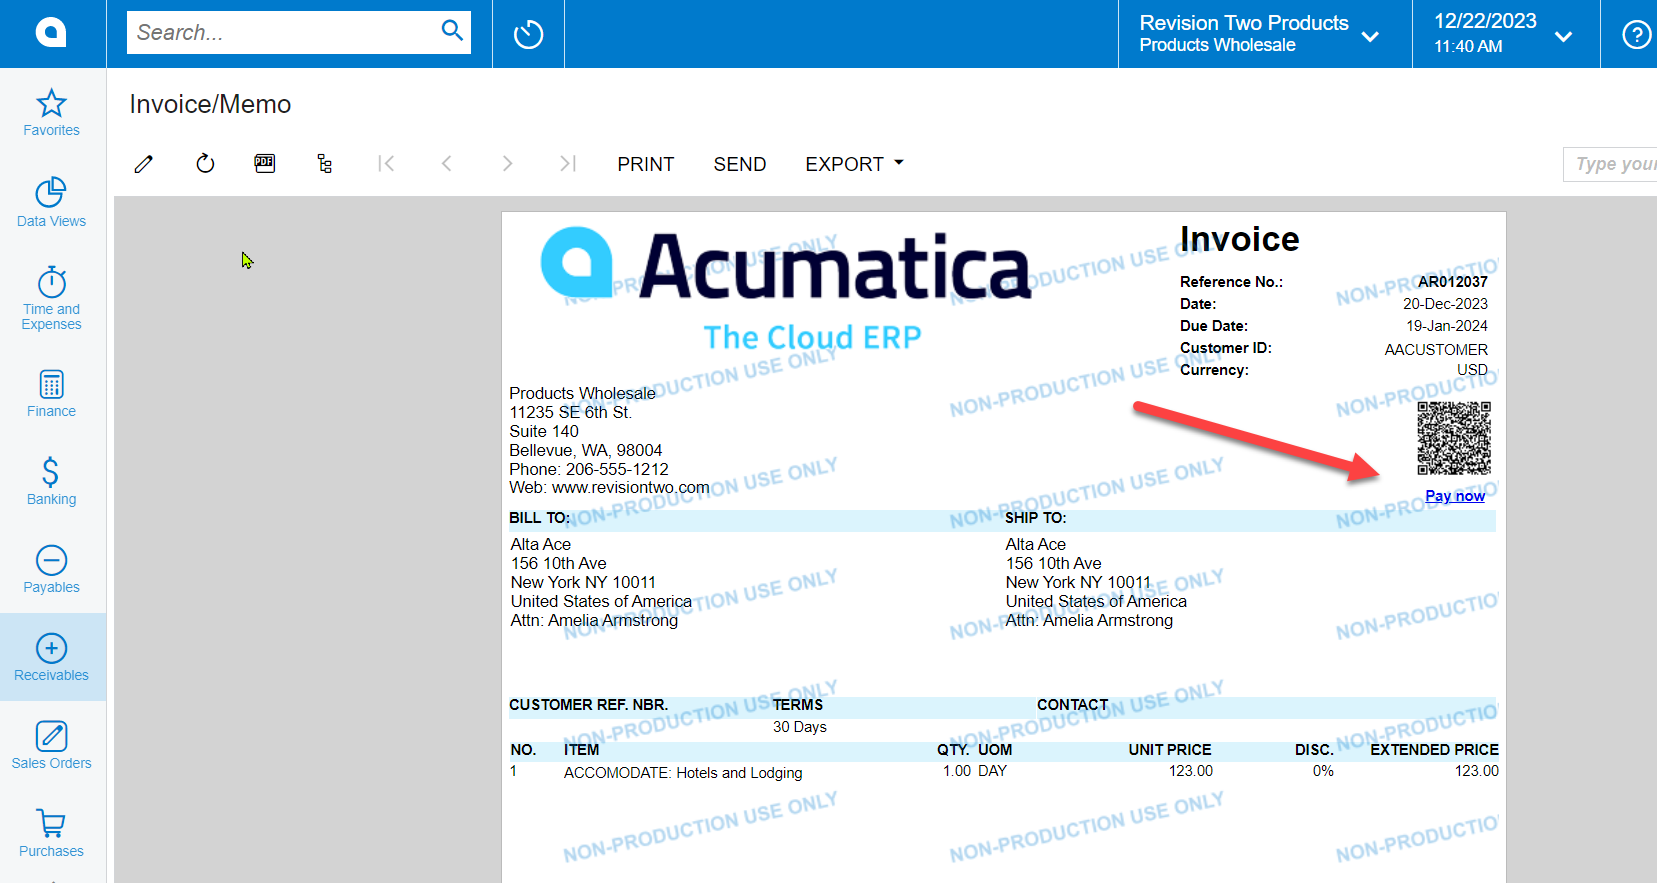
- Go to the Invoice/Memo or Sales Order printed form and make sure QR code for payment link is printed on the form and modify it if needed.
The setup is now complete!