

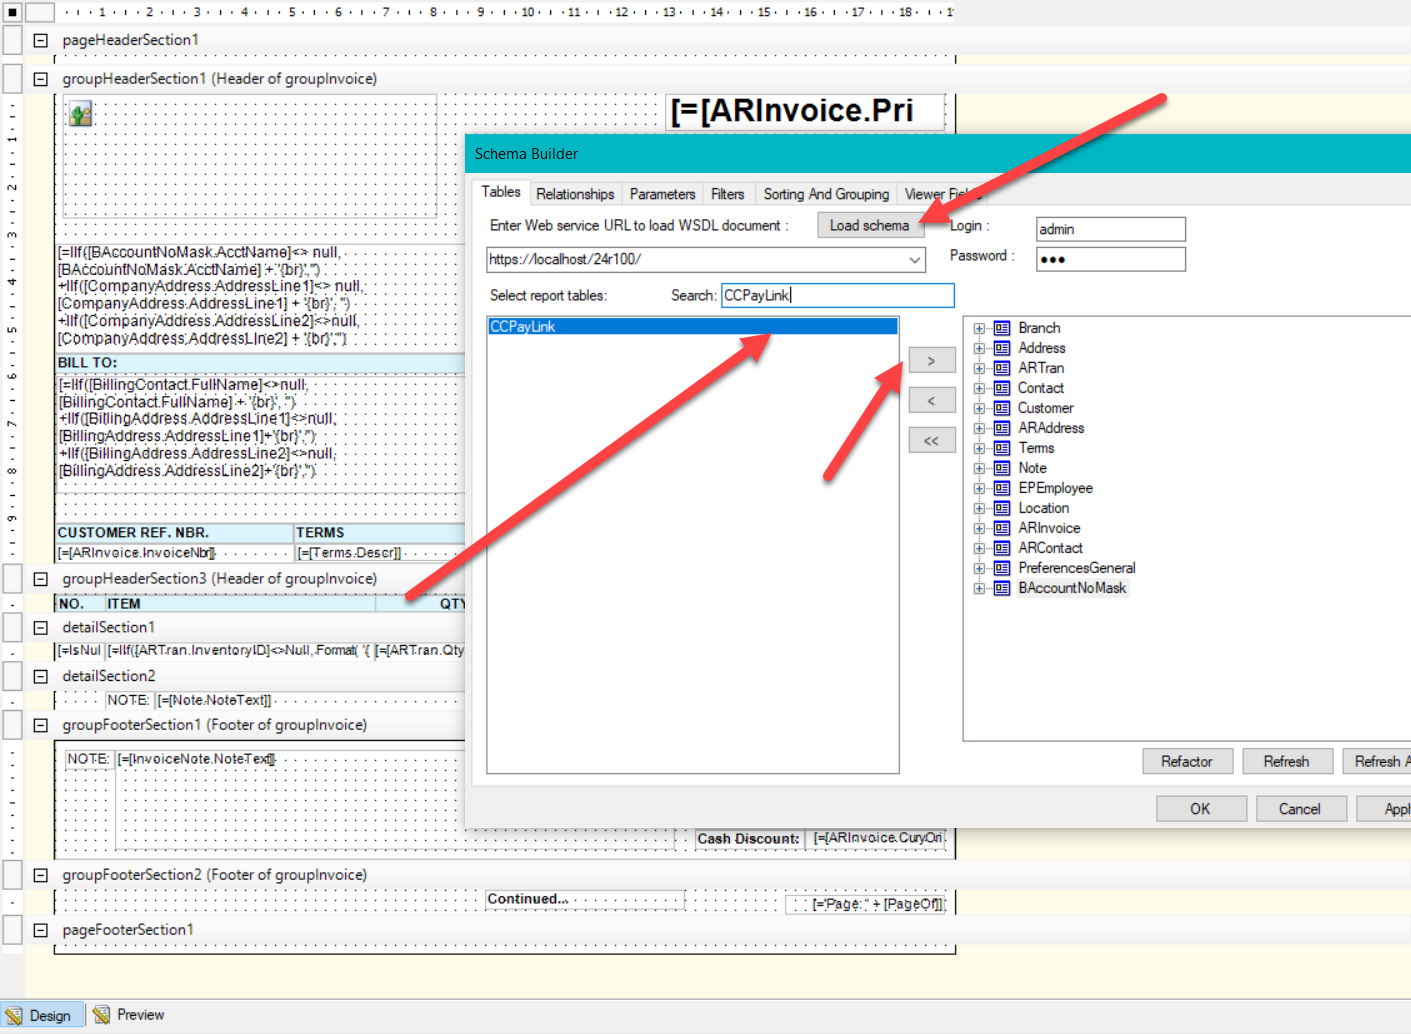
- Open the report that you need to modify in the Report Designer (see more about the report designer here https://openuni.acumatica.com/courses/reporting/s150-reporting-report-designer/)
- Open File → Build Schema… menu and make sure the CCPayLink table is added to the report
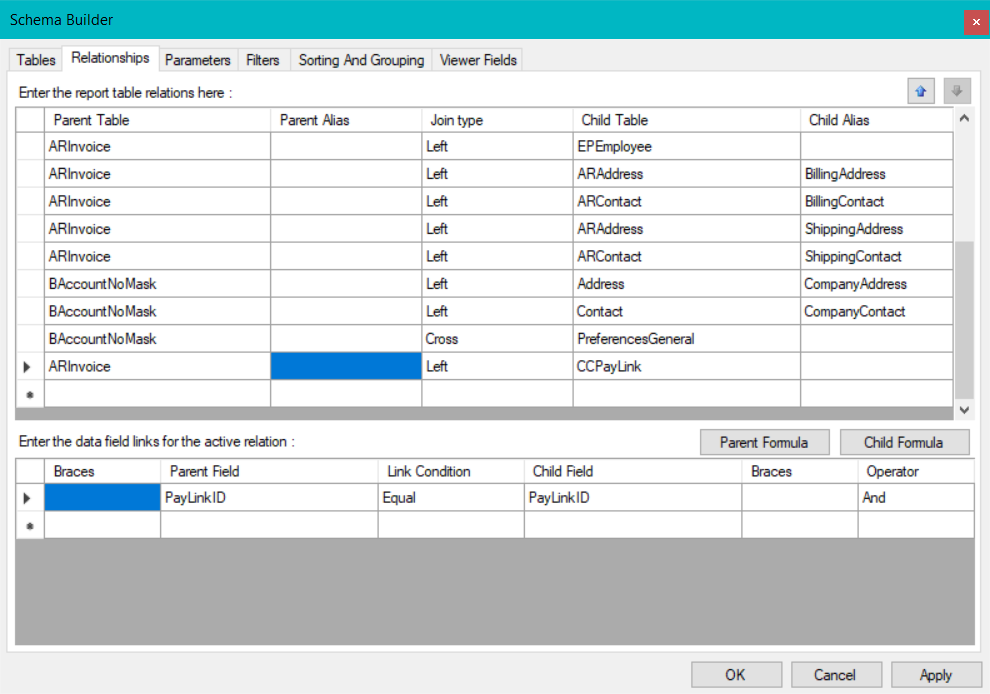
- Go to Relationships Tab and Left Join CCPayLink to ARInvoice or SOOrder based on PayLinkID
- Add new Picture Box control to the report and configure it the following way:
- VisibleExpr: =[CCPayLink.Url]<>null
- BarcodeType: QRCode
- Source: Barcode
- Value: =[CCPayLink.Url]
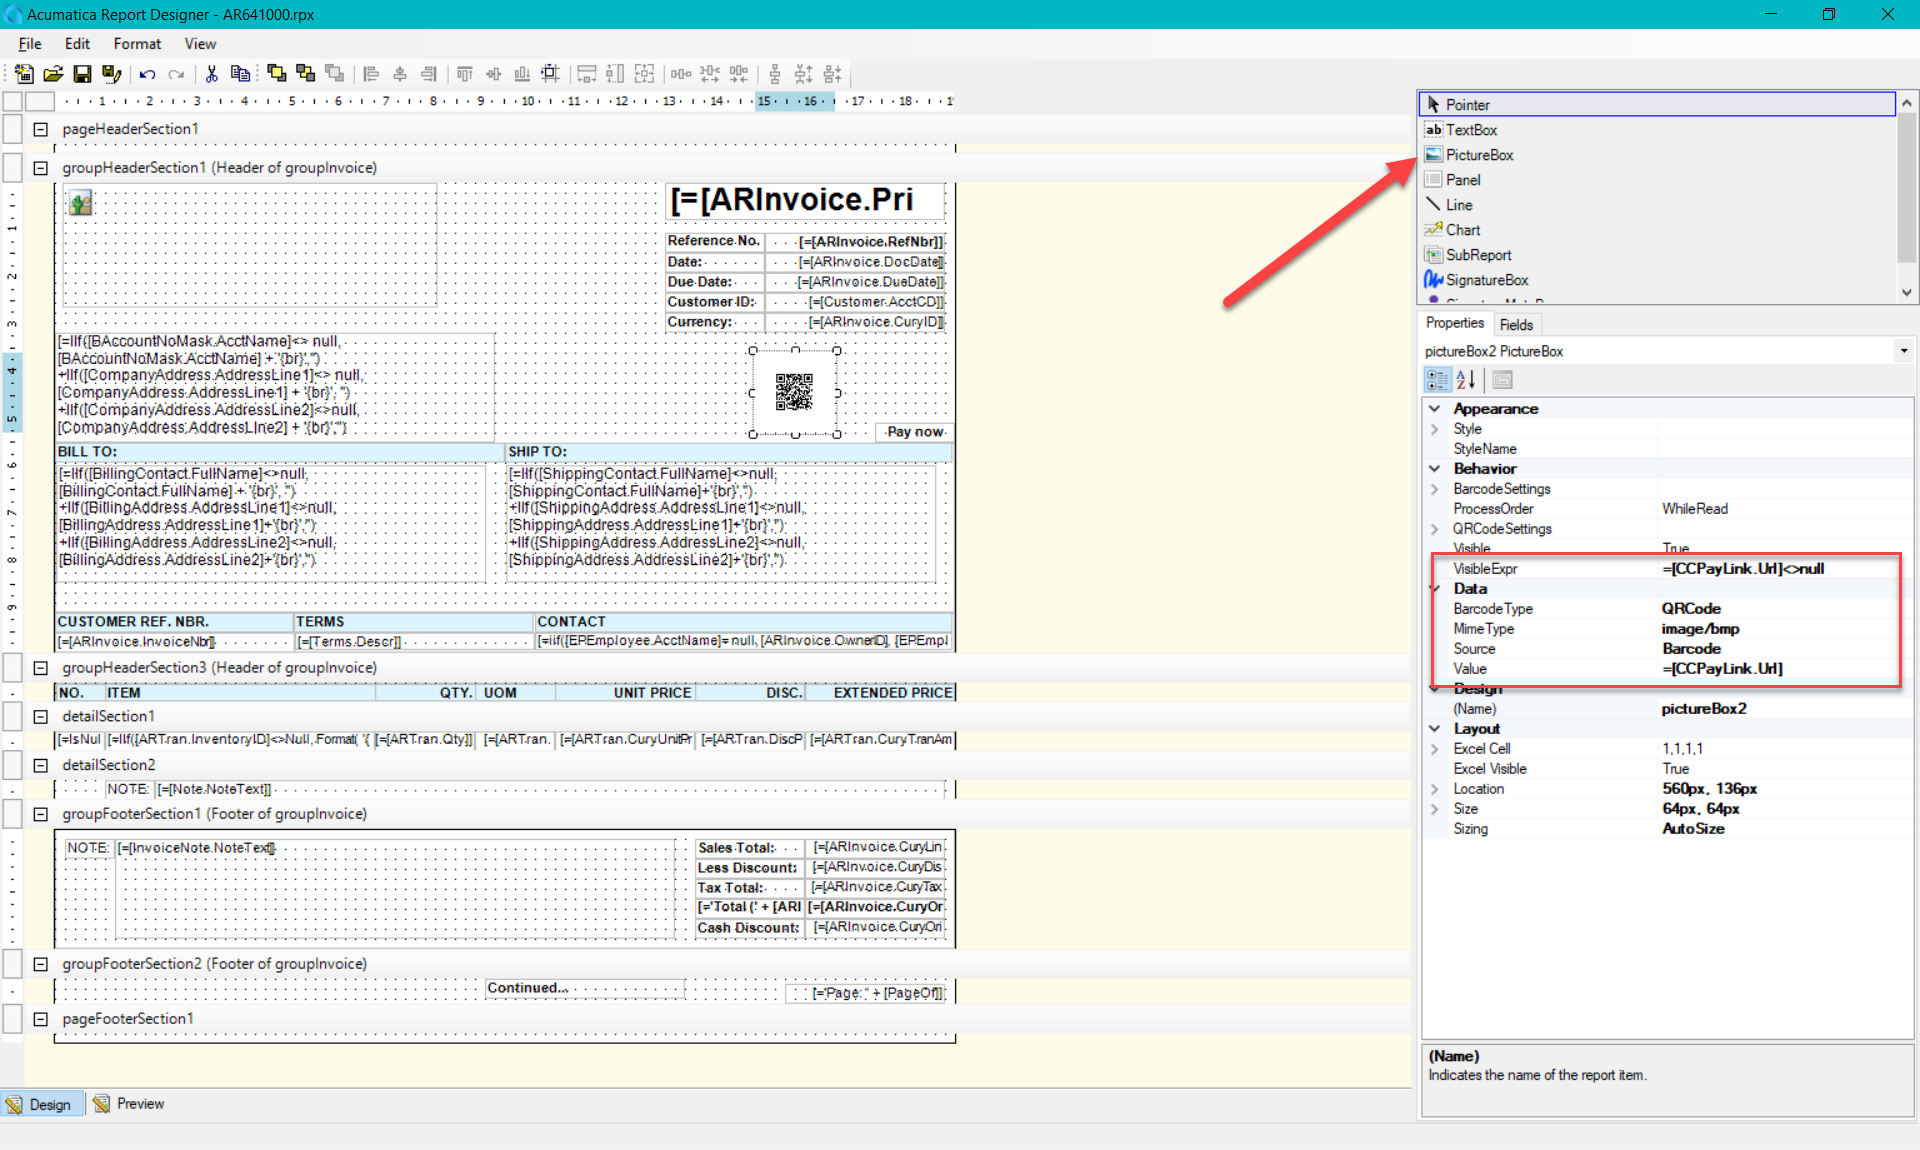
- Configure the size and position of the barcode.
- Add a new textbox and configure it the following way:
- Value “Click Here To Pay!” or any other label
- Navigate Url: =[CCPayLink.Url]
- Visible Expr: =[CCPayLink.Url]<>null
- Save the report back to the server!
Done! You now have a report with a barcode and a link that navigates customer to the pay link!
Troubleshooting:
If you’ve configured the code and it still does not show up (or rather show up as an empty message) try setting the QRCodeSettings→ CodeSize to a bigger value (e.g. 80).
It’s possible that there is just not enough place to put all the bits from the payment link.

