

It used to take hours to update my local Acumatica Dev/Sandbox environments with the latest data from our production instance.
I would avoid it for as long as possible, then some urgent bug would arise that needed testing, so I would scramble to get it done. Our tenant snapshots are fairly large, so it would take a few hours upload and restore them. That was after fiddling with the web.config file to increase the snapshot size limits so I hopefully wouldn’t run into any issues.
Then I discovered the process that I want to share with you today.
Please note that this does require you to have access to backup files from the database that you wish to copy. We host our own Acumatica instance with frequent, full database backups, so this works really well.
Here’s what I like to do.
- Publish any latest customizations to your production Acumatica instance. (If you want the backup that you restore to your local instance to have the latest customizations on it.)
- Ensure that you have a local (username and password) user login on the production site. (This is what you’ll use to log into your local instance after restoring the production backup to that site.)
- Create a backup (.bak) file from the production database (or find where one might already be stored, if regular backups are already happening).
- Log in to your local Acumatica instance and unpublish all customizations.
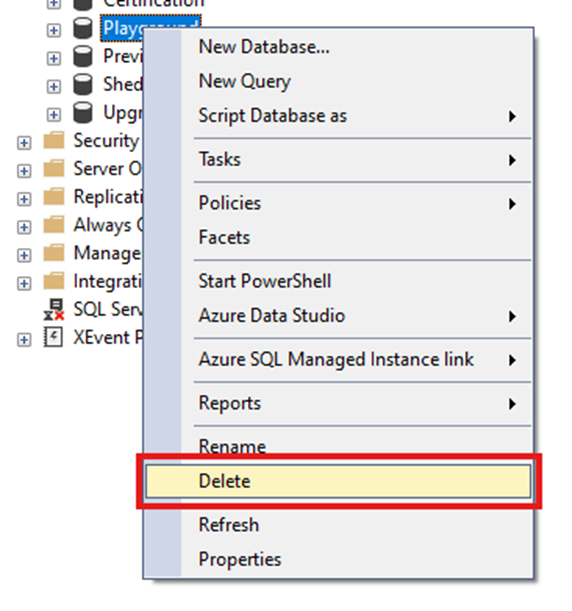
- Connect to your local SQL Server instance (I use SQL Server Management Studio) and Delete the Database: Clicking “Delete” opens the “Delete Object” dialog box.
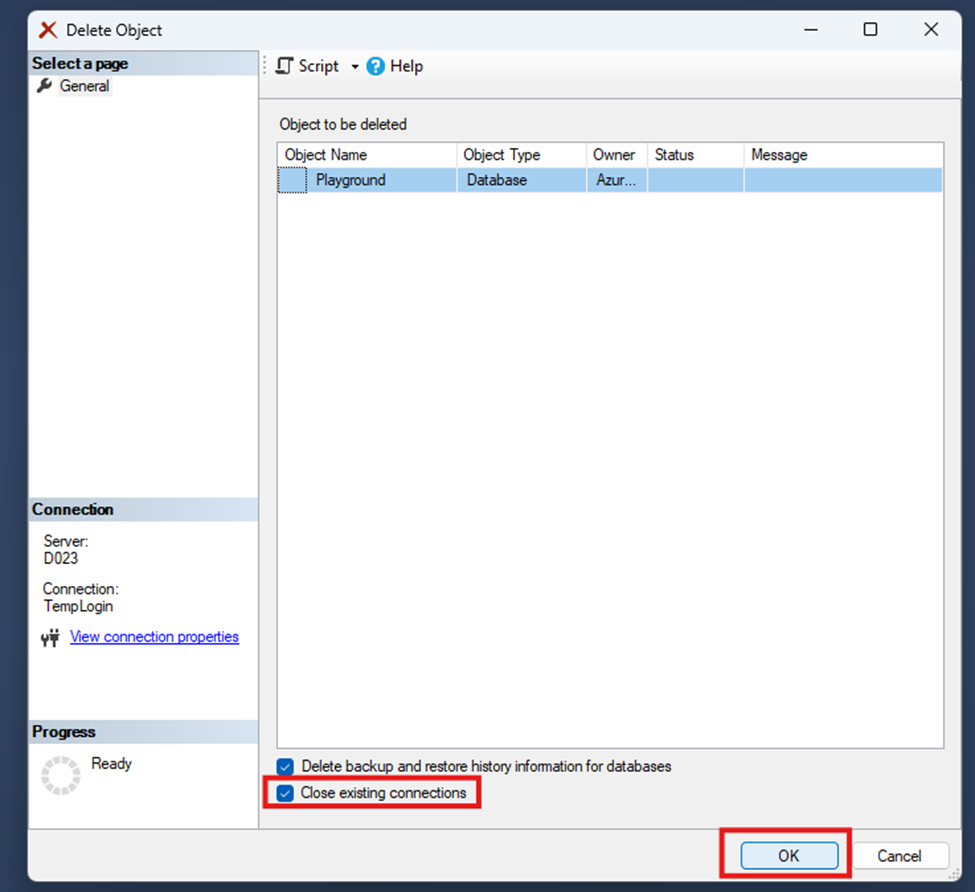
- Make sure to check the “Close Existing Connections” box, then click “OK”.
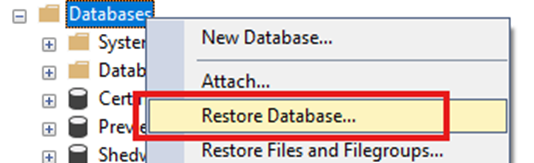
- Right Click on “Databases” and select “Restore Database”.
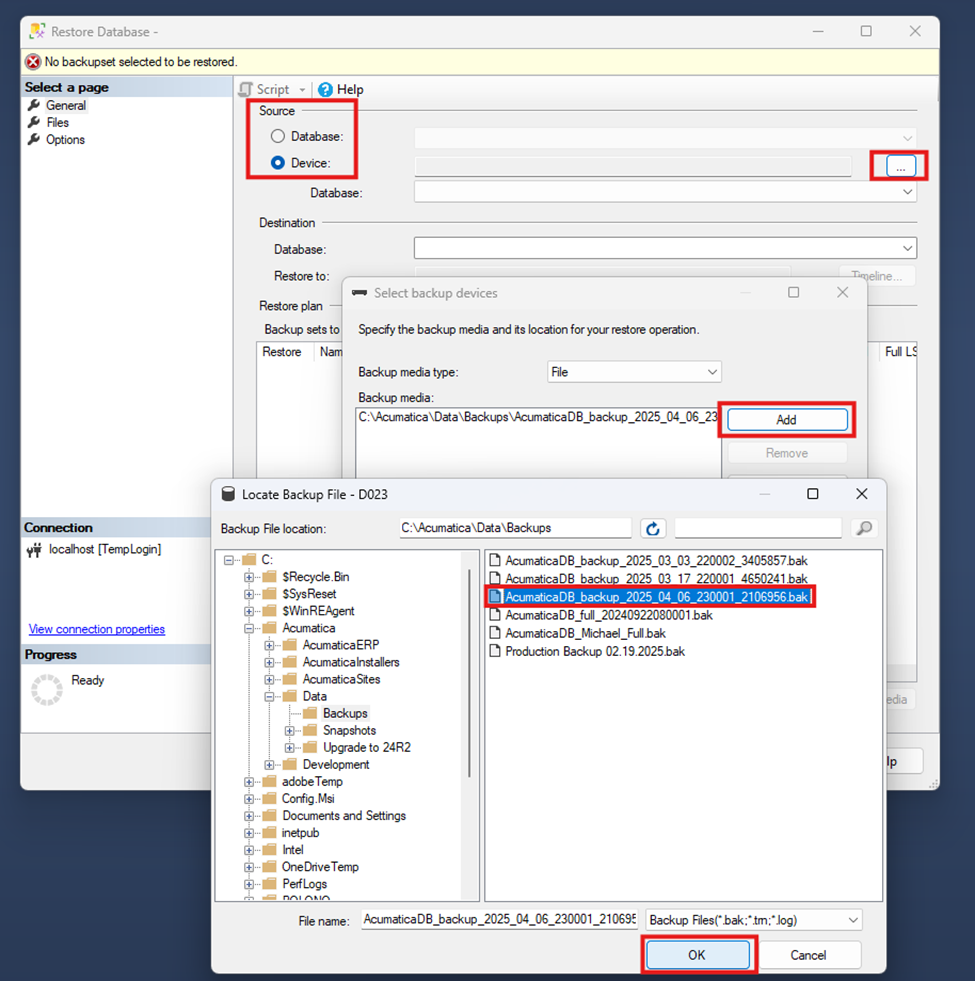
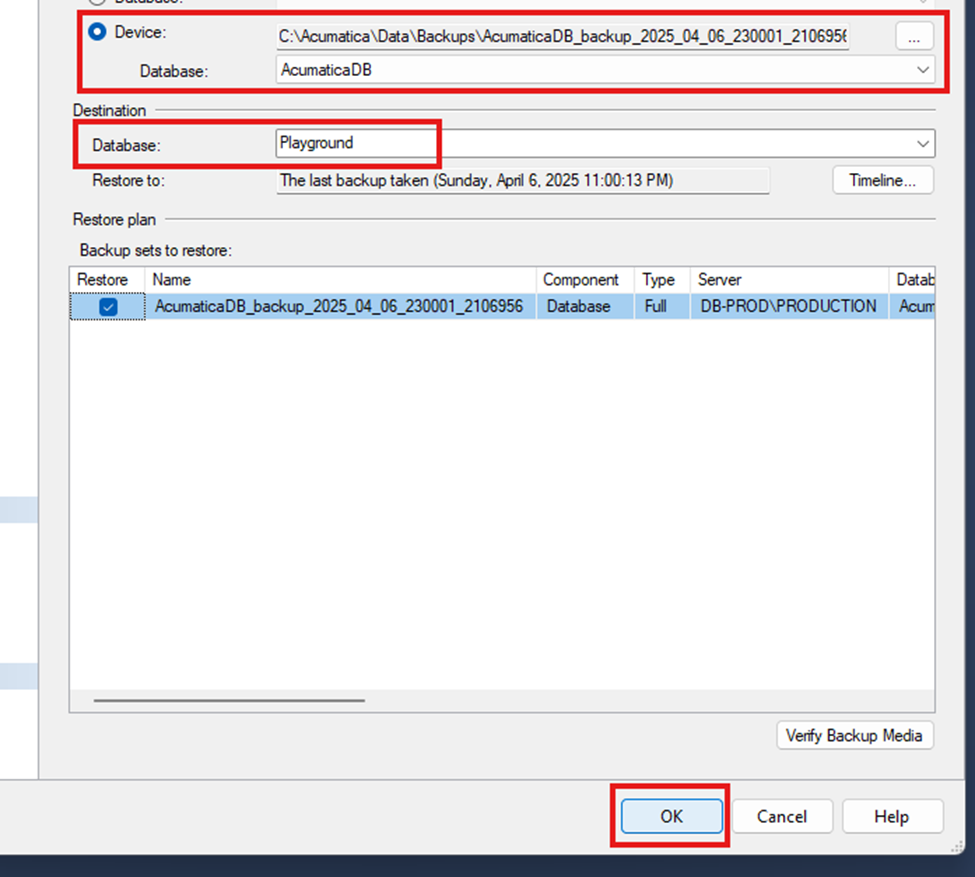
- In the “Restore Database” dialogue, select “Device” as the source, then click on the 3-dot ellipsis button to open the “Select backup devices” dialog box. Make sure the media type is set to “File”, then click the “Add” button to open the file browser. Highlight the backup file created in step 3, and click “OK” to close the file browser.
- Click “OK” to close the “Select backup devices” dialog box. The Source should now show the file path to the backup, along with the database name. Under “Destination”, make sure to enter the database name of the one you deleted in steps 5-6 because we want to restore the backup to a new database with the same name. Then click “OK” to restore the backup to a new database on your local SQL Server Instance.
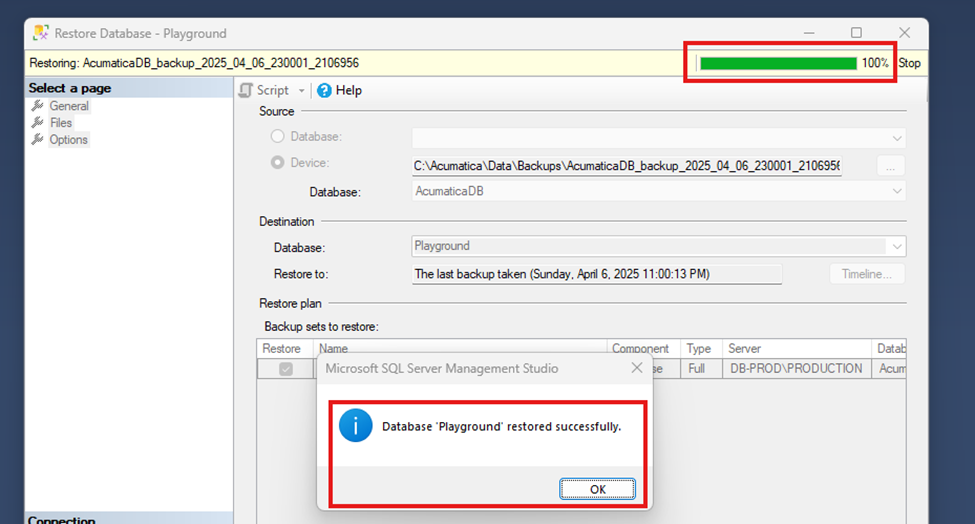
- The restoration process takes less than 30 seconds on my instance. A progress bar is shown as the backup is restored. When completed, a popup notifies you that the database restored successfully. Note that the name matches what we entered as the “Destination” database in step 9, and also the database that we deleted. Click “OK”.
- Reload the local Acumatica instance website and use the local login username and password from the production instance to log in. (Apparently the database is identified by the name, because the database can be deleted and the new one created with the same name, and the site works just fine.)
- Navigate to the “Customization Projects” screen and publish the customization projects. (If you didn’t publish the latest projects to your production instance before creating the backup, you may need to upload them here before publishing.)
Note: As with any new process, I would highly recommend testing this on a separate sandbox instance before incorporating it into your workflow.
This has been super helpful for me, and I hope you can use it as well!


