
I have hyperlinked a similar issue from this community forum. I am having the same issue as the OP, but the solution provided in the replies is not working as a viable solution for me. Would anyone know if there is an alternate solution I have not been able to find in previous threads?
Solved
Error when uploading snapshot in the U100/SweetLife instance
Best answer by nhatnghetinh
Hi
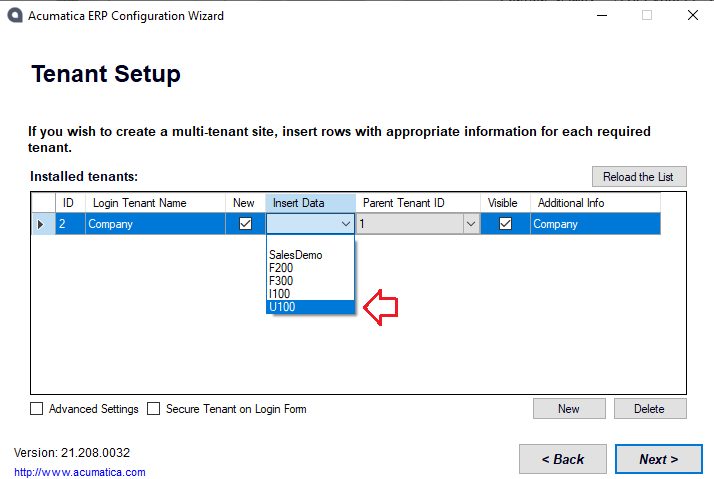
Try using Acumatica ERP Configuration Wizard to create U100 snapshot directly.
Best Regards,
NNT


Reply


Enter your E-mail address. We'll send you an e-mail with instructions to reset your password.