Clients are having hard time automating the synchronization processes between e-stores and ERP. Such as syncing entities like Orders, Payments, Refunds and so on.
So, we decided to prepare and provide the pre-configured Automation Schedules which Customer can activate and use at his/her convenience starting from 2021R2 version.
You will be able to find them at the Automation Schedules form (SM205020).
They come in two portions:
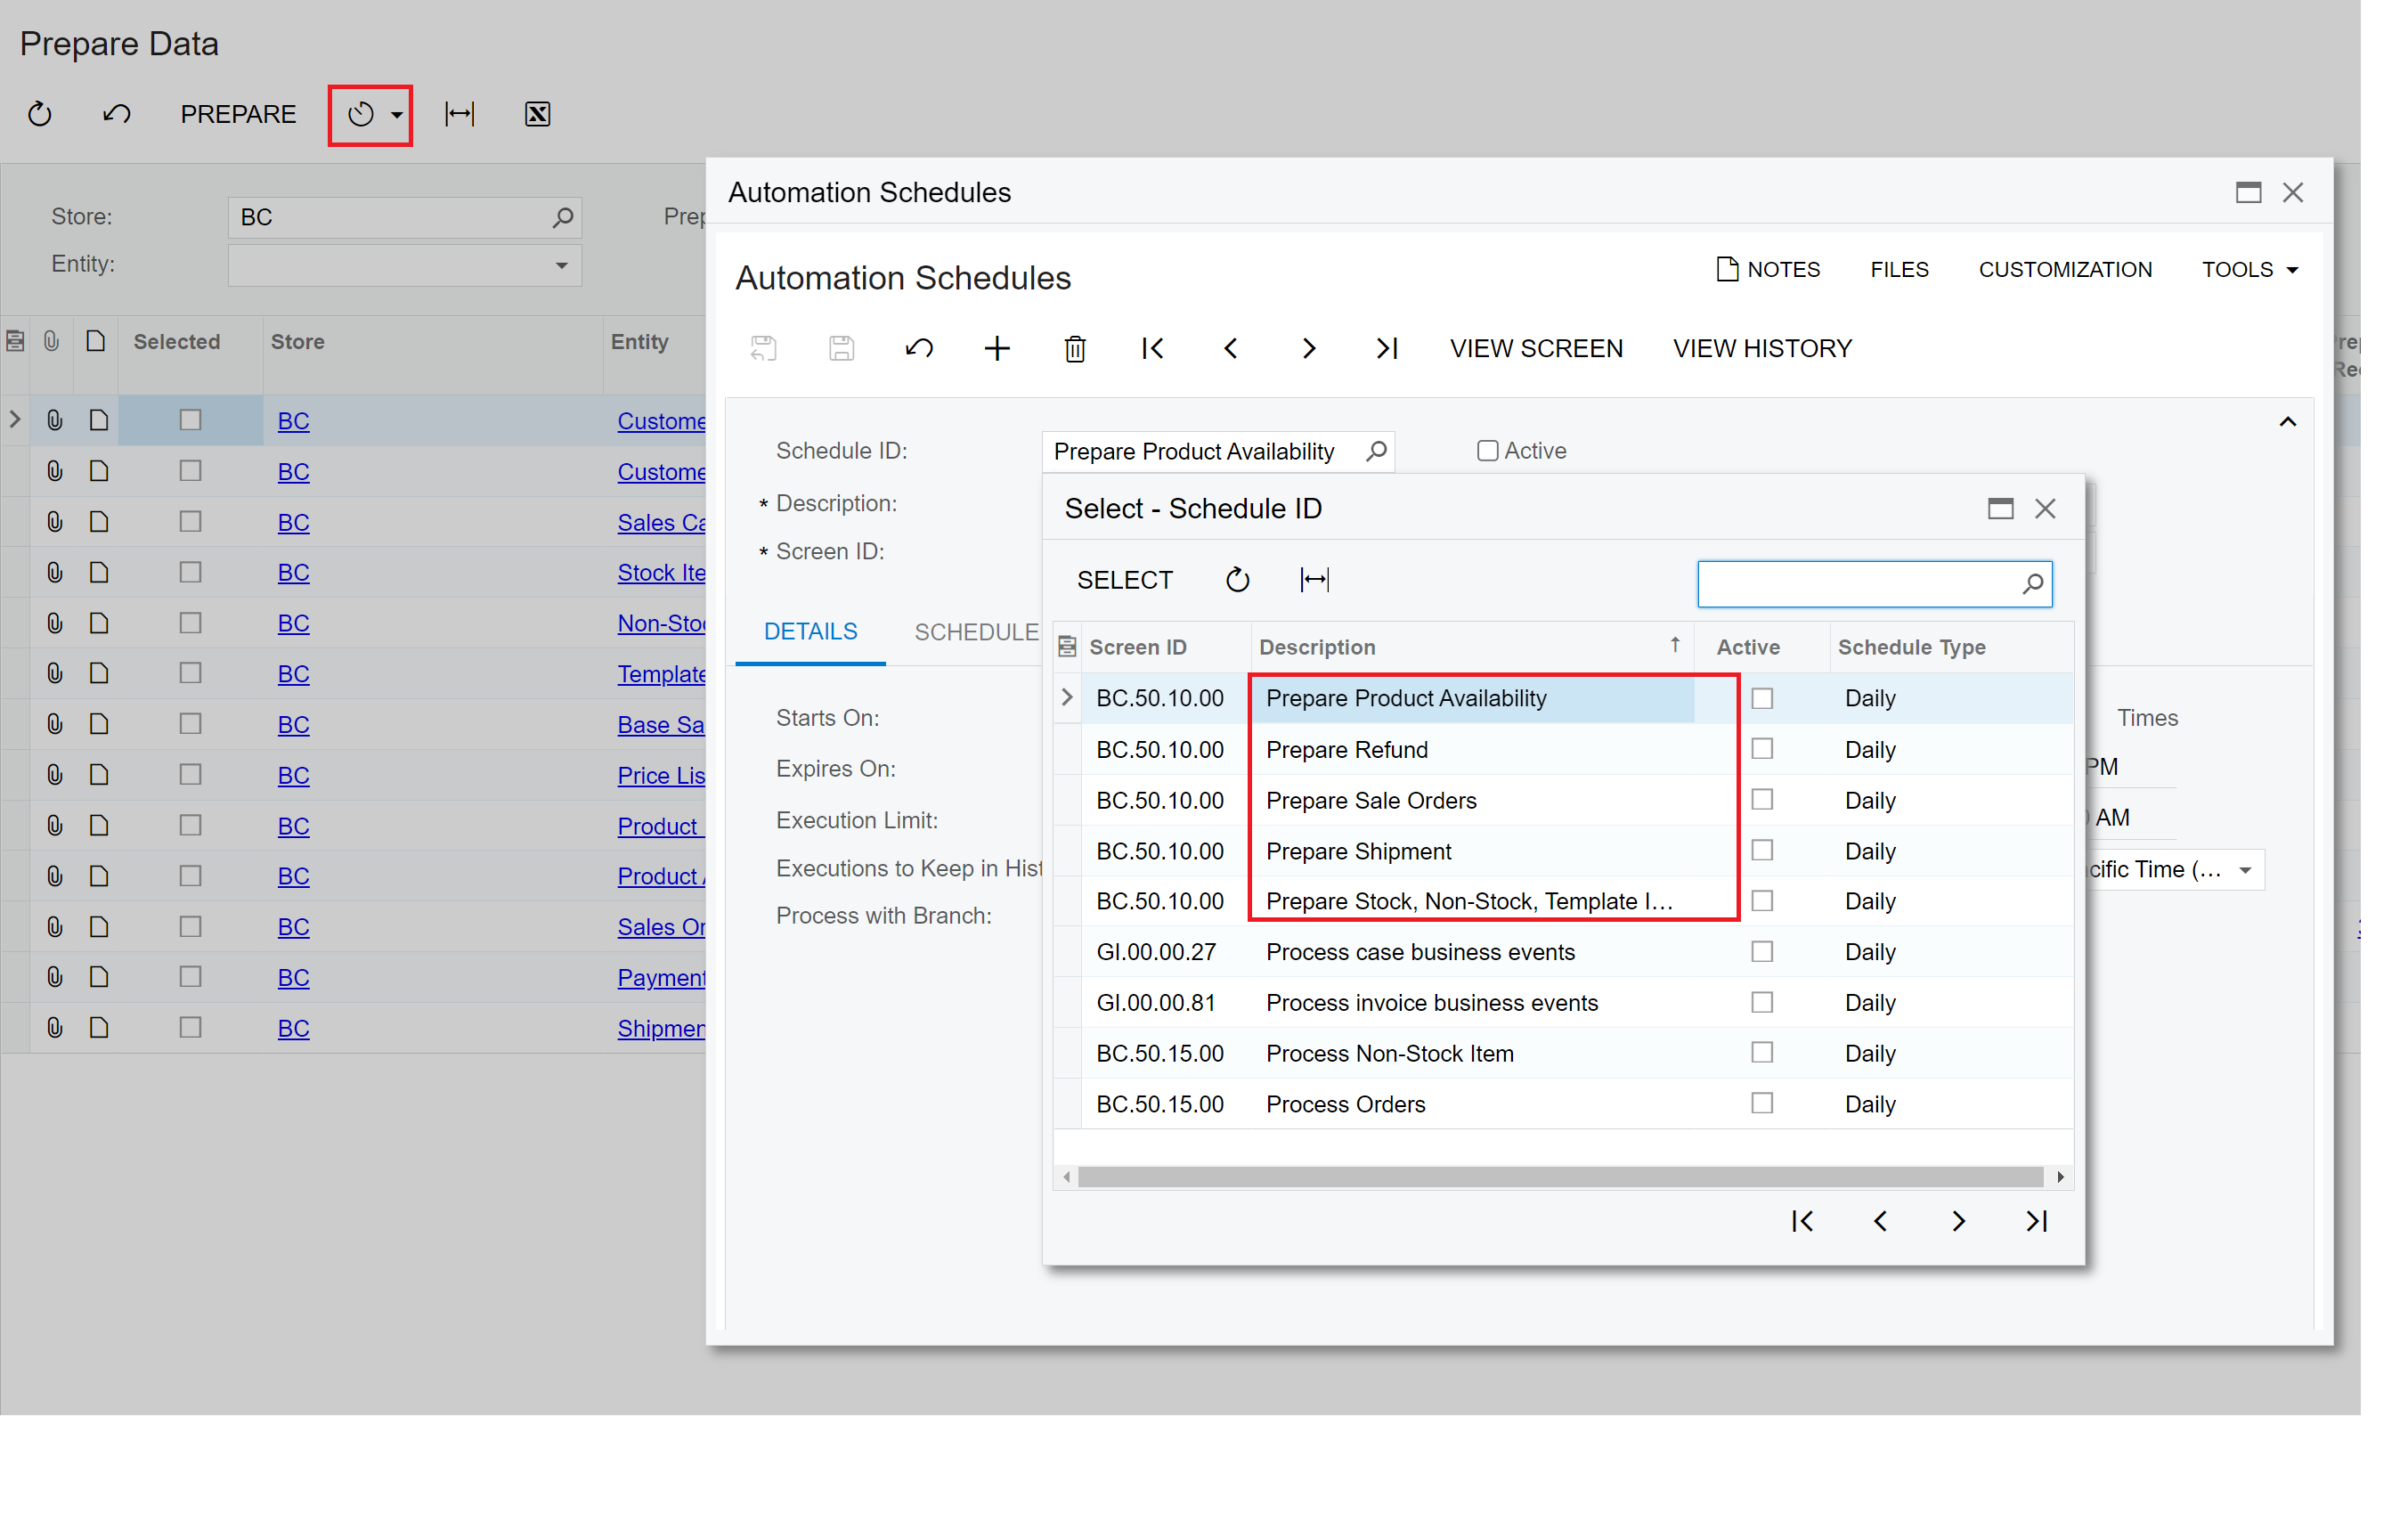
- One is for preparing data:
- Prepare Sales Order;
- Prepare Shipment;
- Prepare Refund;
- Prepare Product Availability;
- Prepare Stock, Non-Stock, Template Items.
With the following default Schedules:
| Entity | Schedule Frequency |
| Sales Order | Every 10 min. |
| Shipment | Every 30 min. |
| Refund | Every 20 minutes. |
| Product Availability | Every 1 hour. |
| Stock Item | Every 24 hours. |
| Non-Stock Item | Every 24 hours. |
| Template Item | Every 24 hours. |
You can also find them at Prepare Data form (BC501000). Just click the clocks button in the top menu, then click View in the drop-down select list:

- Another one is for processing data:
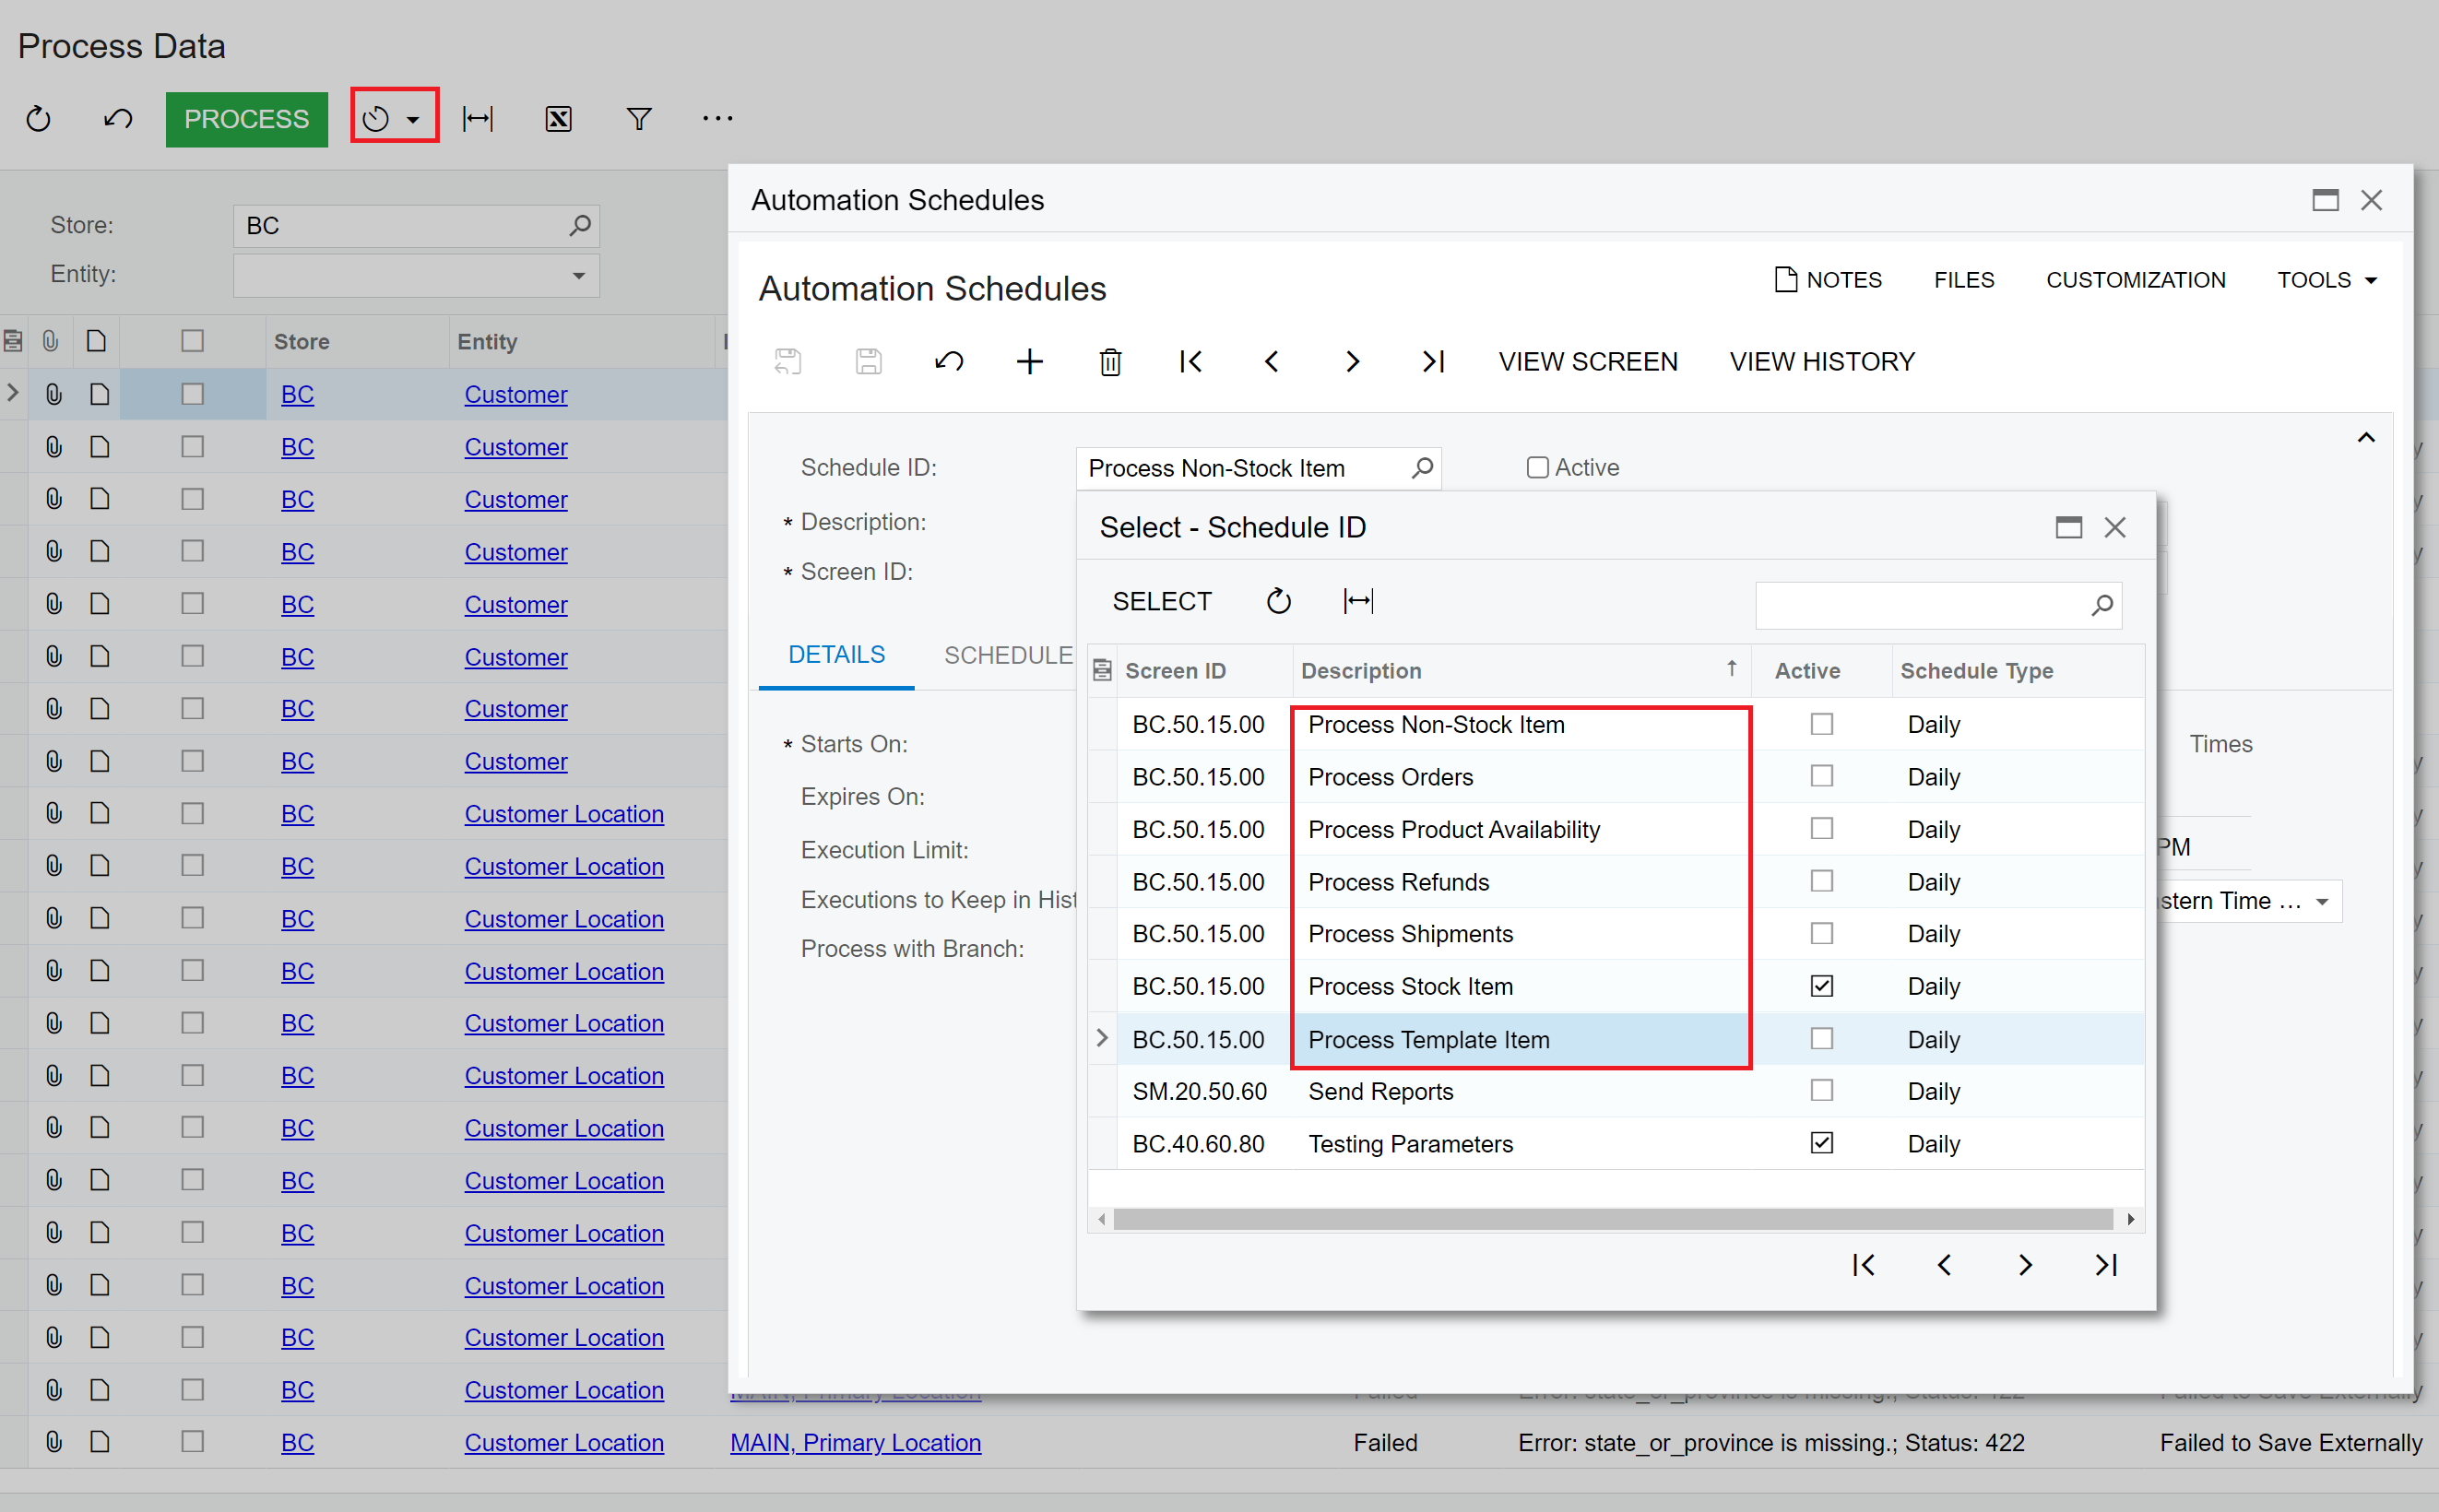
- Process Orders;
- Process Product Availability;
- Process Refunds;
- Process Shipments;
- Process Stock Item;
- Process Non-Stock Item;
- Process Template Item
With the following default Schedules:
| Entity | Schedule Frequency |
| Sales Order | Every 10 min. |
| Shipment | Every 10 min. |
| Refund | Every 10 min. |
| Product Availability | Every 1 hour. |
| Stock Item | Every 1 hour. |
| Non-Stock Item | Every 1 hour. |
| Template Item | Every 1 hour. |
You can also find them at Process Data form (BC501500). Just click the clocks button in the top menu, then click View in the drop-down select list:

Usage.
- SCHEDULE tab.
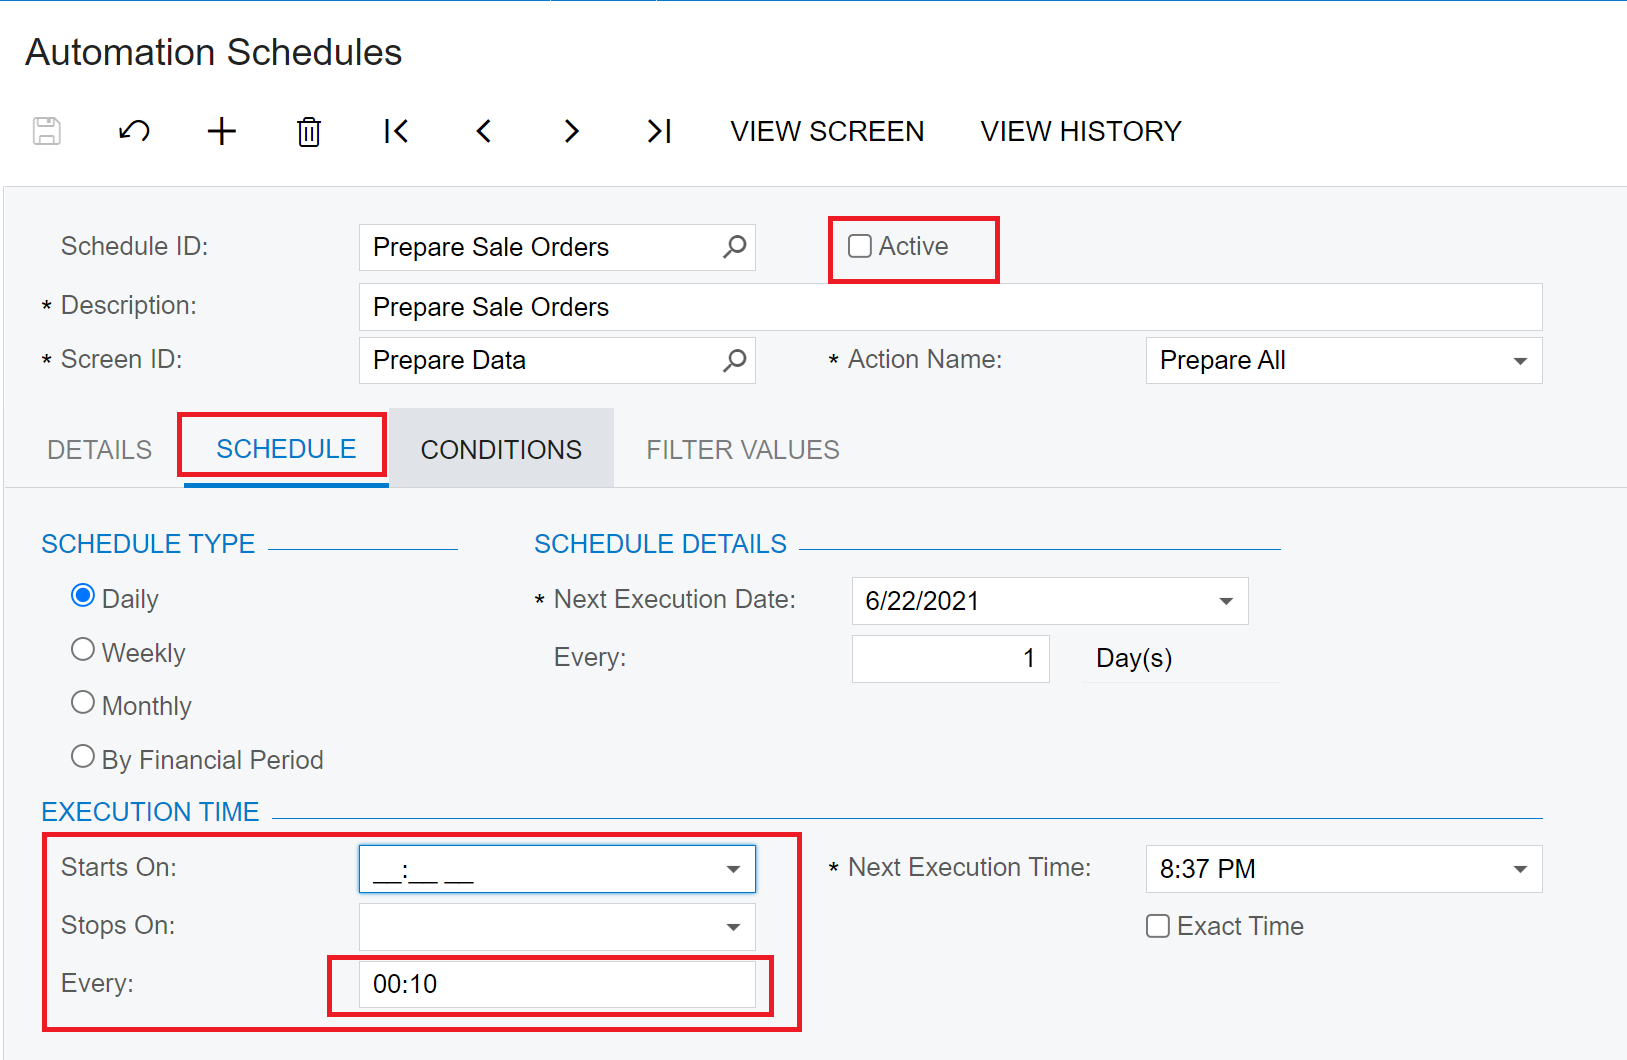
On the Schedule tab, configure the execution dates and time
Usually, customers just need to adjust the field “Every” (image below), setting the frequency of how often the process should be executed. For instance, “00:10” would be each 10 minutes and so on.
- Activation.
To set a particular schedule active just check the respective checkbox (on the image below) and click Save button in the top menu.

The default Execution Time is set for example. It will probably work well for midsized business.
But it is strongly recommended to review and adjust it in every particular case before setting the schedule active.


