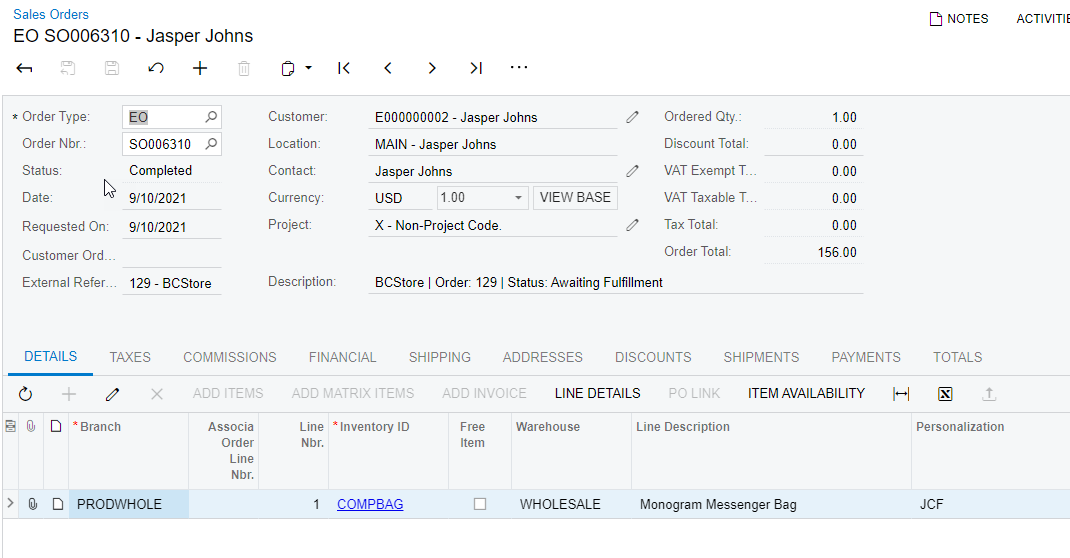
In 21R2 the Retail-Commerce team has added support for selling personalized items on BigCommerce and Shopify then passing the personalization instructions into the Sales Order. This feature was requested by several existing customers and prospects. It was possible to accomplish in the past versions with customizations, but now it is much easier.
Here is how it works:
- On the eCommerce site you must configure the Made to Order item.
- Within the ERP you must add a field within the Sales Order to accept this information. This requires a customization package. Below we are sharing a template to help you get started.
- You must use the entities window to map the eCommerce field to the Sales Order field you must use the entities window to map the fields
More details about each step are below.
Customization Package Template
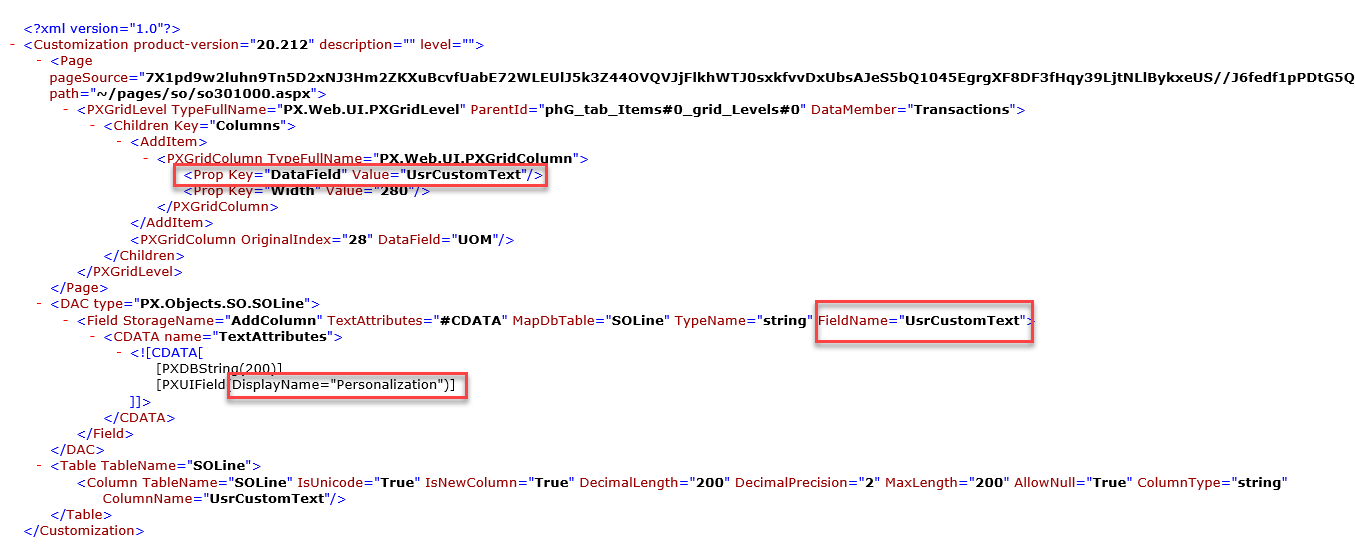
Attached here is a template customization package. The template, when installed in 21R2, will add a column to the line items within the Sales Order window. The column header is "Personalization", but this can be easily updated in the package. Simply unpack the zip, open the XML file and update the text to the text you prefer.
- DataField and FieldName - these represent the name of the field accepting data in Acumatica.
- DisplayName - this is the text found in the column header within the Sales Order Window
BigCommerce - adding modifier options to products
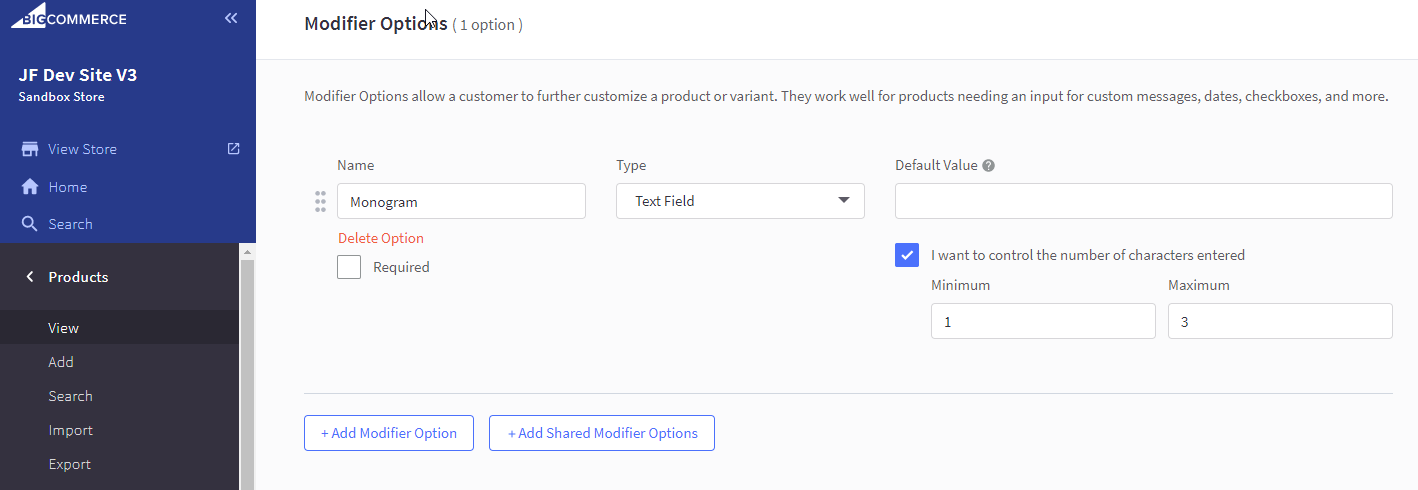
Within BigCommerce this is done with modifiers. The BigCommerce modifiers accept strings, booleans or a selector or a multiple selector. Instructions for how to use modifiers -
- BigCommerce Docs on Modifiers - https://support.bigcommerce.com/s/article/Product-Options-v3?language=en_US#customizations
Shopify - adding line item properties
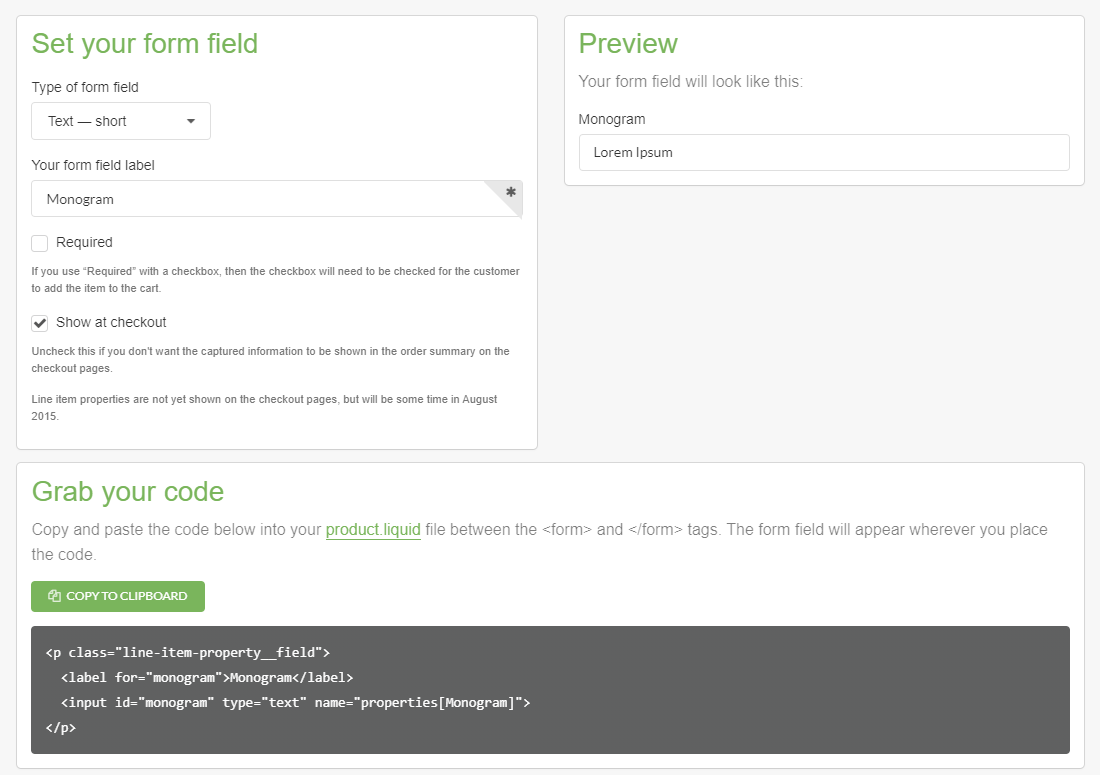
Within Shopify this is done with Line Item Properties. The Shopify Line Item Properties are a core feature of Shopify, however, the fields for accepting custom data are added on the theming layer.
- Shopify Dev Docs - Line Item Property - https://youtu.be/WTuP5QLlmBg
- Video - Adding Line Item Properties in Shopify - https://youtu.be/WTuP5QLlmBg
- UI Elements Creation Tool by Shopify - https://ui-elements-generator.myshopify.com/
Acumatica Entities Window
Once your fields are configured in eCommerce and the package is installed in Acumatica, you're ready to map the fields using the Commerce Entities window.
BigCommerce
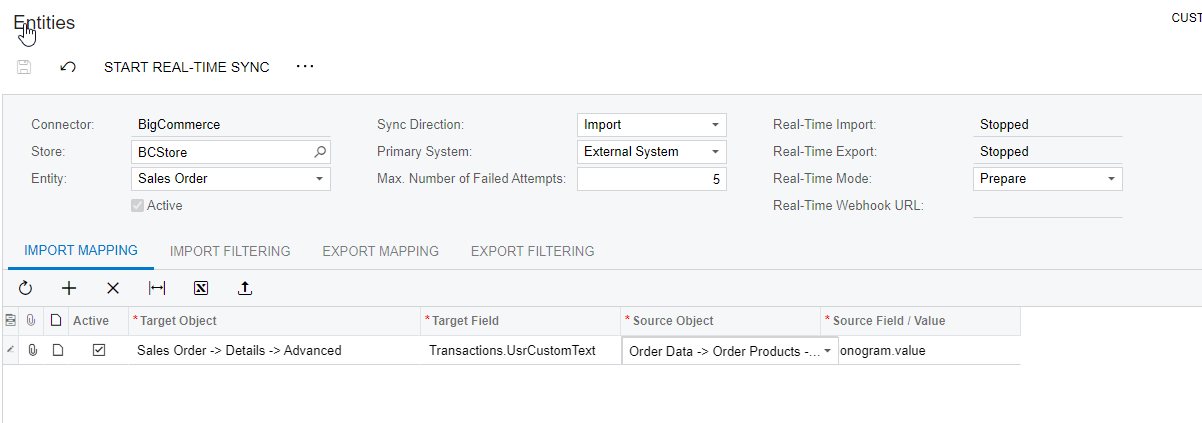
- Go to Commerce > Entities
- Select your store
- Select the Sales Order Entity
- Ensure your on the Import Mapping tab
- Add a row
- Target Object: Sales Order > Details > Advanced
- Target Field: Transactions.UsrCustomText (update if you've changed the XML in the package)
- Source Object: Order Data > Order Product > Orders Products Options
- Source Field / Value: Monogram.value ("Monogram" here represents the name of the field label in BigCommerce)
Shopify

- Go to Commerce > Entities
- Select your store
- Select the Sales Order Entity
- Ensure your on the Import Mapping tab
- Add a row
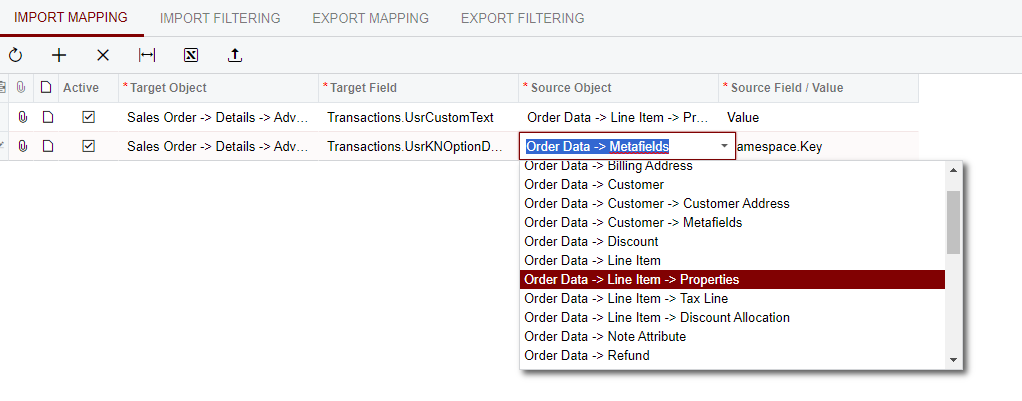
- Target Object: Sales Order > Details > Advanced
- Target Field: Transactions.UsrCustomText (update if you've changed the XML in the package)
- Source Object: Order Data > Line Items > Properties
- Source Field / Value: Value
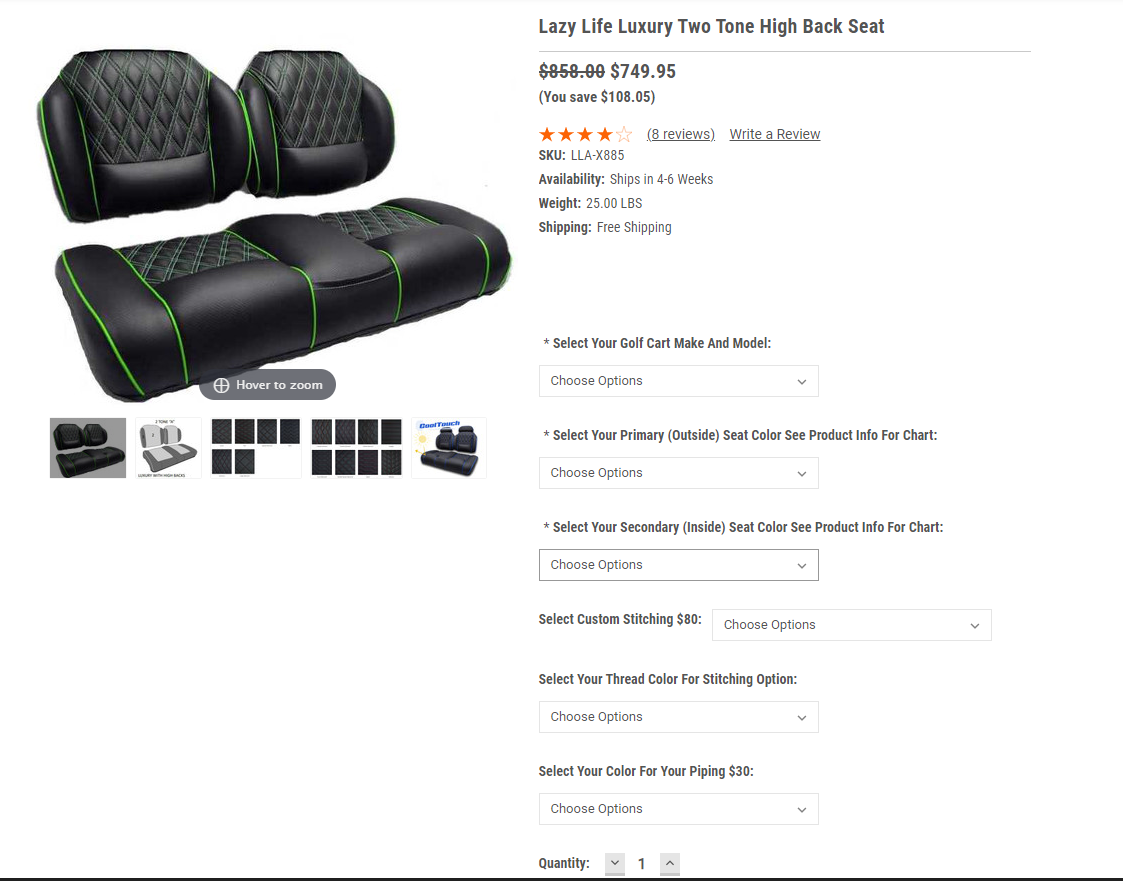
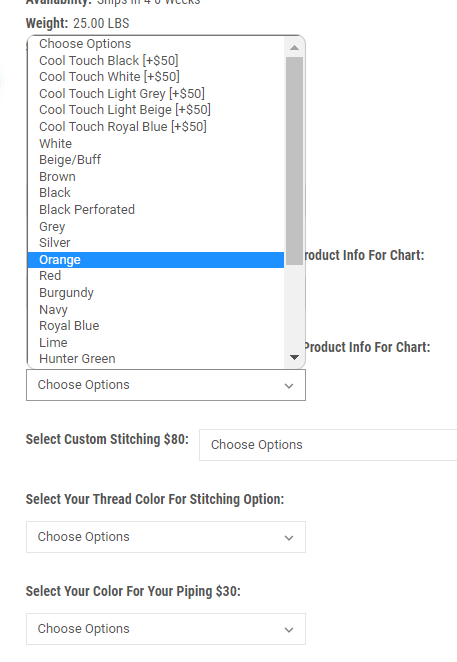

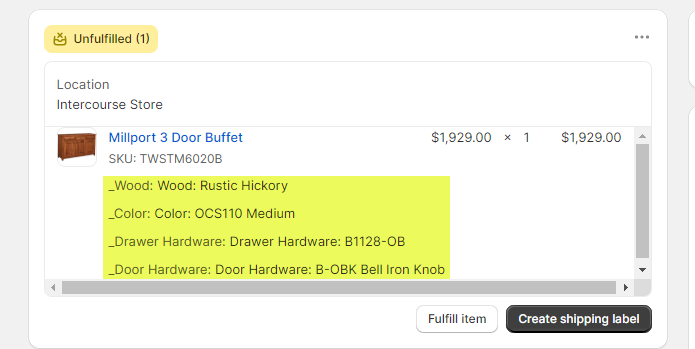
 That should be possible through a customization, not natively - at least, not yet.