I'm looking for a way to customize the app theme so that only the color of the left menu is black, and the text and logos are white, but I'm not sure how to do it. Could anyone help me with this?
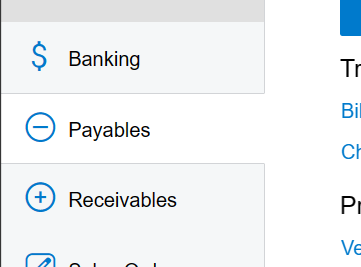
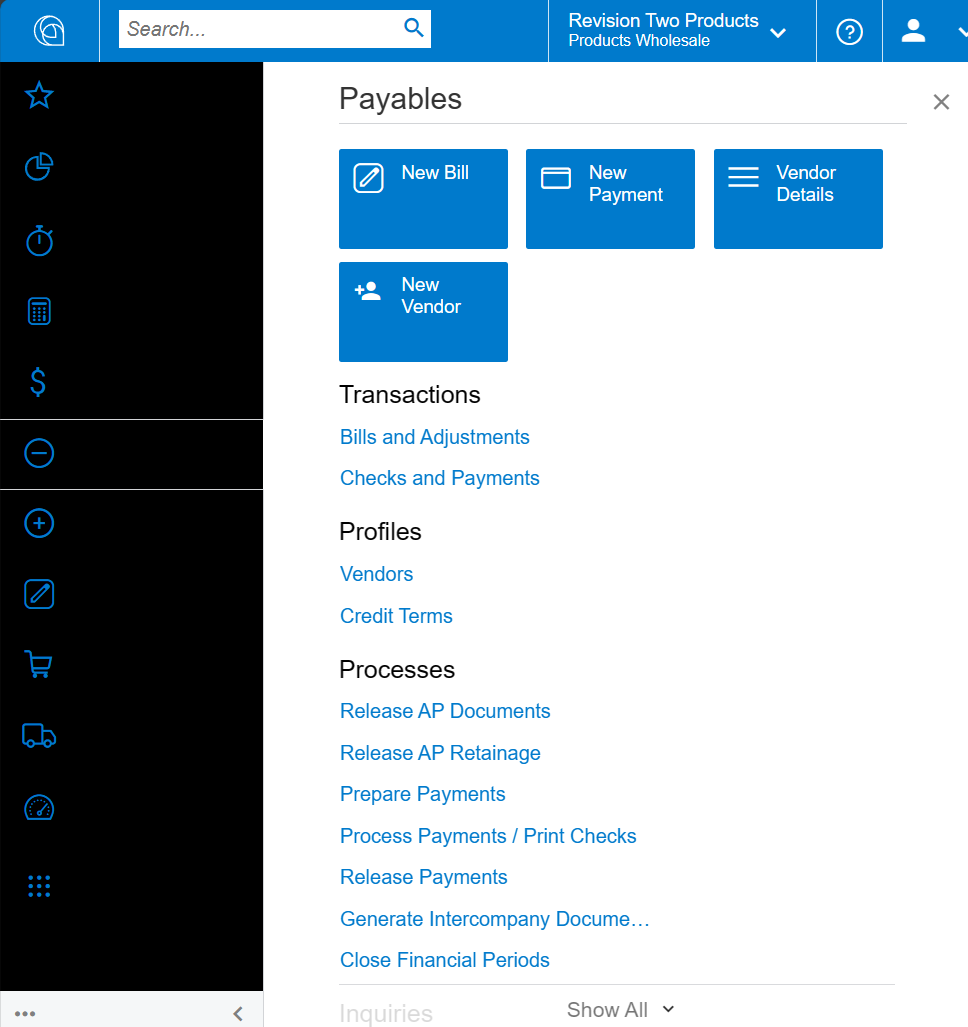
Please see the attached picture where I've highlighted the left bar in green. I want to change this section to black with white text. However, I'm unsure how to modify just this section without altering the background colors of other sections.
Greetings
Best answer by darylbowman
Let me start by saying this gets rather technical and can take a lot of time.
Instead of giving you the answer, I will show you how you can find the answer yourself, in case the customization bug bites you and you wish to push this farther.
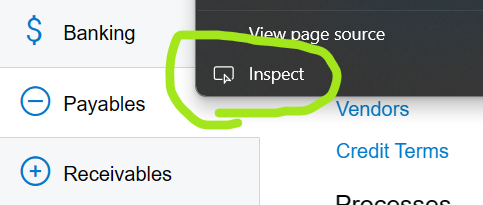
Start by right-clicking the area you wish to change, and select ‘Inspect’ (in Edge or Chrome)
This will open a sidebar in your browser that shows you the code behind the page.
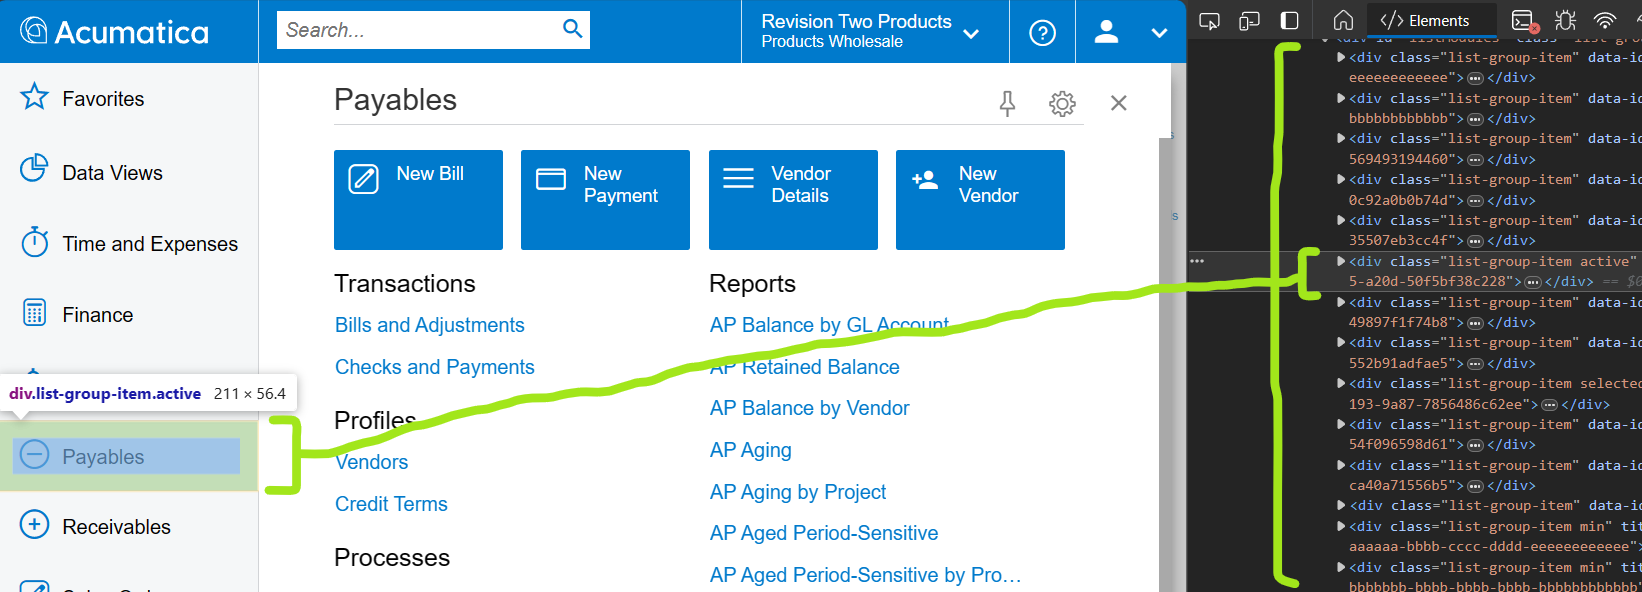
You’ll notice that if you mouse over sections of the code, different sections of the UI will be highlighted. This can be very helpful in finding the appropriate level to begin investigating.
Finding the menu item element
If you expand a section (by clicking the caret), you’ll notice there are elements grouped underneath. If you mouse over a sub-section, the page will again highlight the corresponding section.
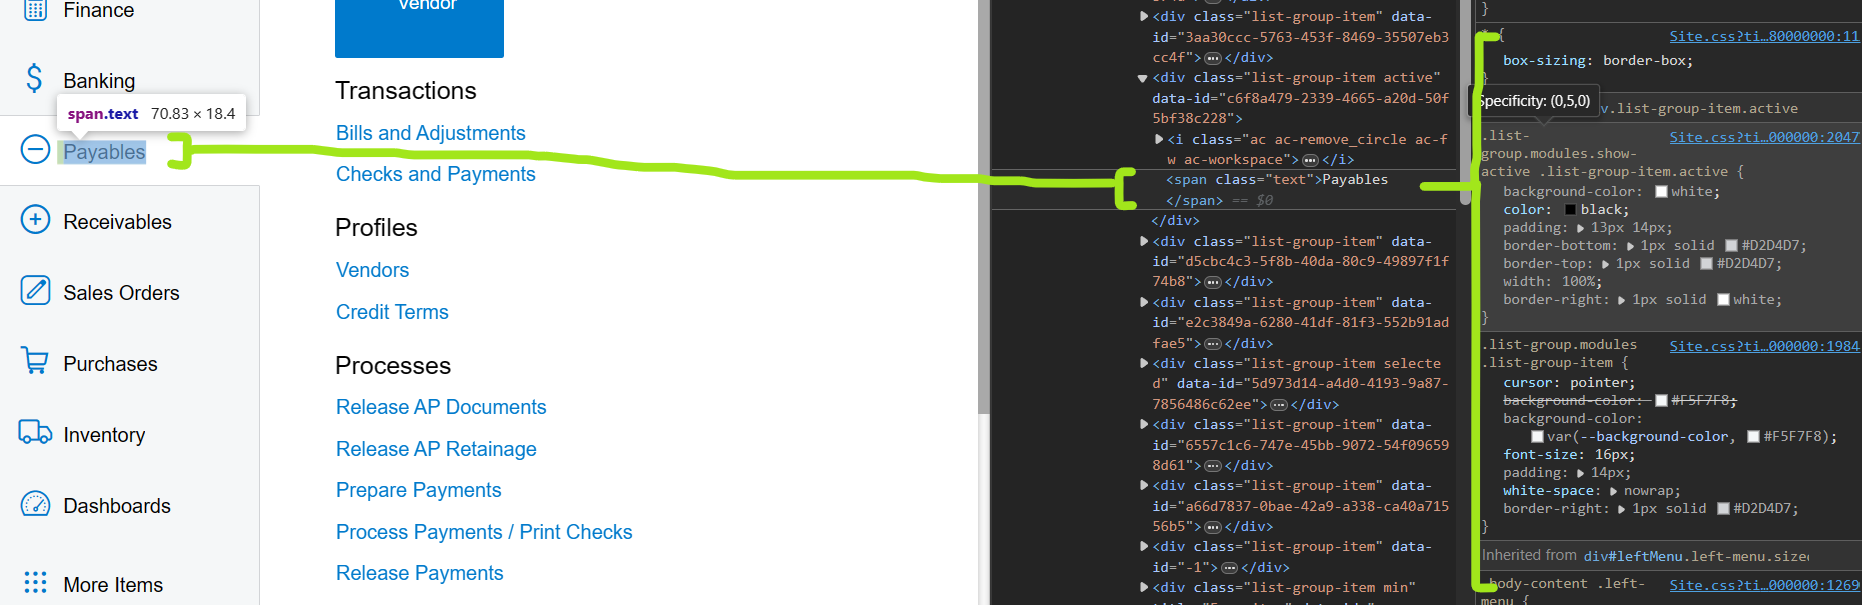
Finding the menu item text element
In this image☝🏼you’ll also notice the right-most section, which will show automatically if you resize the sidebar wide enough for it to show. This has a hierarchy of styles applied to the selected element. If you click on an element in the code pane (to select it), it will display the styles in the styles pane.
This sort of thing will be much easier if you understand a bit about CSS. The most important thing to know is that styles are layered.
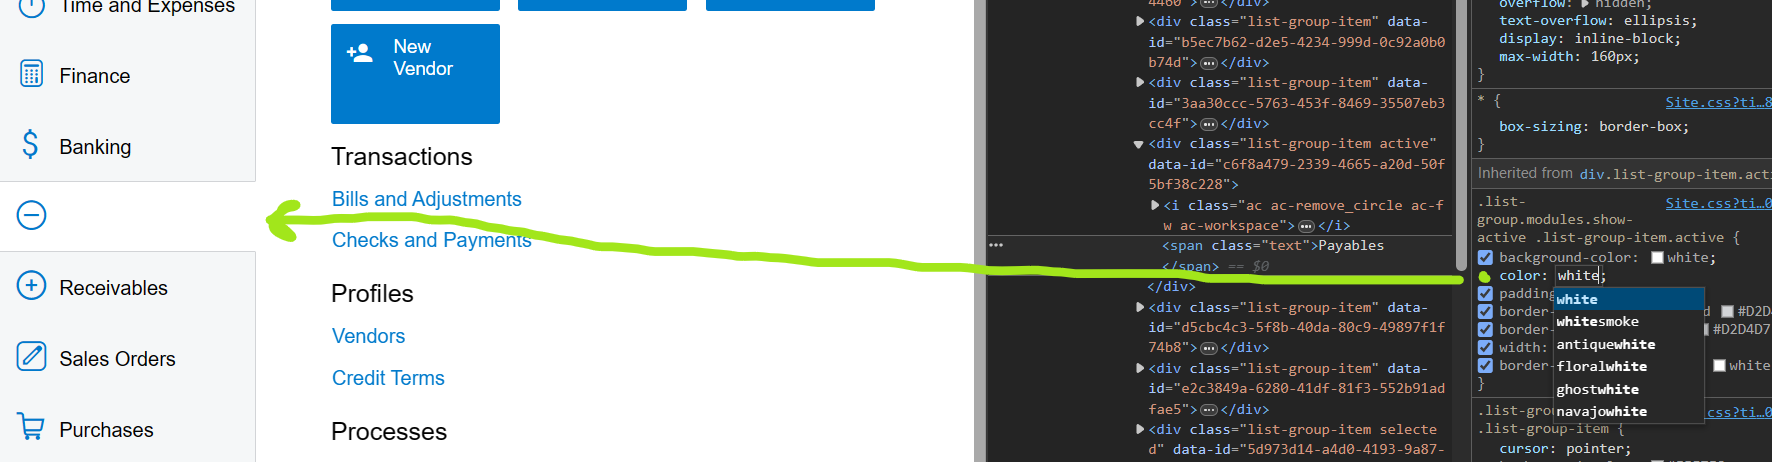
You’ll notice that one of the styles for the ‘Payables’ text element is named .list-group.modules.show-active .list-group-item.active (left of the yellow line).
Using a bit of logic here, it will make sense that the .active portion of this name is the style applied because the ‘Payables’ menu item is the currently selected workspace. You’ll notice it is prominent on the screen, compared to the other workspaces.
One really useful feature of the styles pane is that you can edit the style in realtime by simply changing a value. For instance, you mentioned you’d like the text to be white. So, you can click into the ‘color’ property and change it from ‘black’ to ‘white’ and BAM!
Modifying a style in realtime
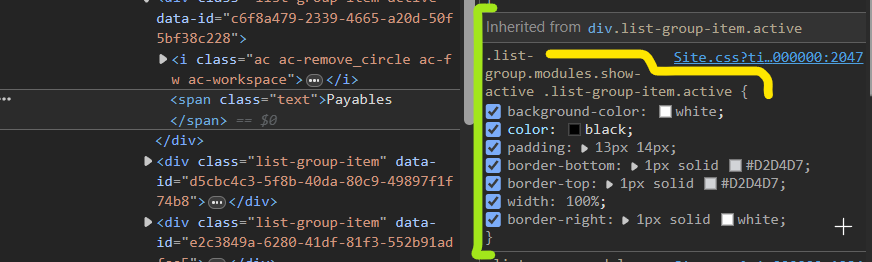
Once you determine the correct style section and property you need to change, in order to make the change permanent, you’ll need to actually open the style file from the website and make the change there. Any changes you make here will be erased as soon as you reload the page.
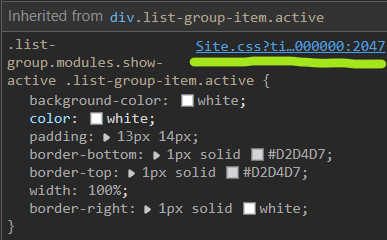
To open the style file, check out the nicely indicated file reference in the upper right corner of the style section:
The Site.css file is located at *siteName*/Content/Site.css
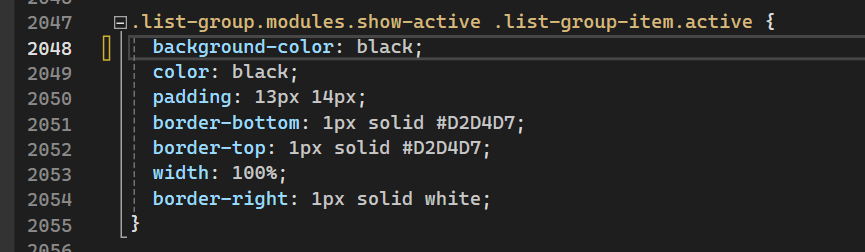
If you open that file with something like Notepad++, you can check the line numbers on the lefthand side against the line number indicated in the same location above - in this case 2047.
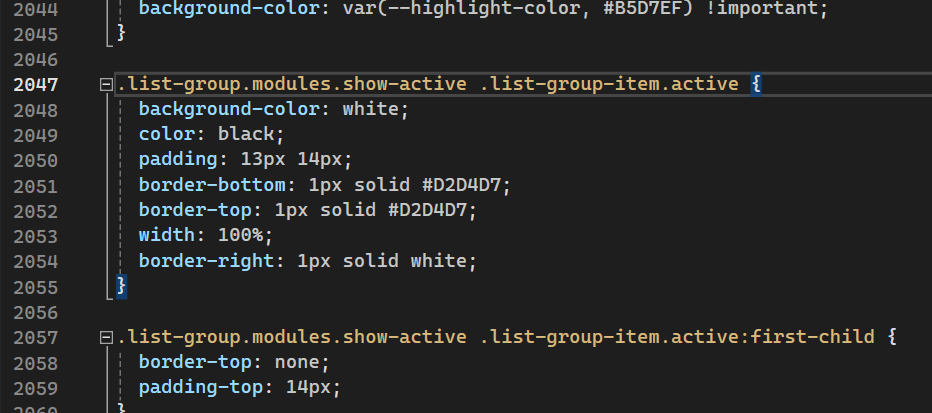
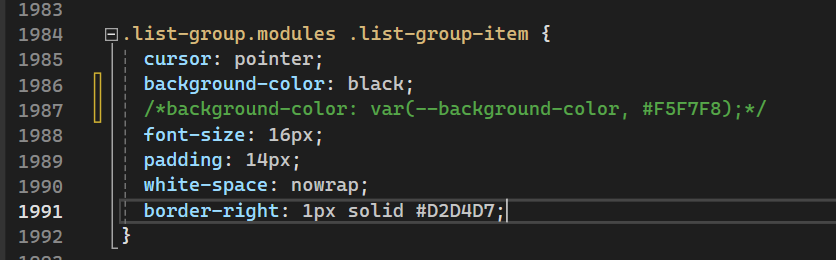
If you make your way to line 2047, in that file, you’ll find this:
Style section of the Site.css file
You’ll notice that the ‘color’ property is ‘black’ like it originally was on the site. If you change this property to ‘white’, save the file, and reload the site, you should see the change now made permanently. Sometimes it is necessary to force a page recache in order to see the changes, which can be done by holding the Shift key on your keyboard while clicking the browser refresh.
As a start, I will tell you that in order to get the menu background to be black, you’ll need to change:
style at line 1215style at line 1984style at line 2047
Let me start by saying this gets rather technical and can take a lot of time.
Instead of giving you the answer, I will show you how you can find the answer yourself, in case the customization bug bites you and you wish to push this farther.
Start by right-clicking the area you wish to change, and select ‘Inspect’ (in Edge or Chrome)
This will open a sidebar in your browser that shows you the code behind the page.
You’ll notice that if you mouse over sections of the code, different sections of the UI will be highlighted. This can be very helpful in finding the appropriate level to begin investigating.
Finding the menu item element
If you expand a section (by clicking the caret), you’ll notice there are elements grouped underneath. If you mouse over a sub-section, the page will again highlight the corresponding section.
Finding the menu item text element
In this image☝🏼you’ll also notice the right-most section, which will show automatically if you resize the sidebar wide enough for it to show. This has a hierarchy of styles applied to the selected element. If you click on an element in the code pane (to select it), it will display the styles in the styles pane.
This sort of thing will be much easier if you understand a bit about CSS. The most important thing to know is that styles are layered.
You’ll notice that one of the styles for the ‘Payables’ text element is named .list-group.modules.show-active .list-group-item.active (left of the yellow line).
Using a bit of logic here, it will make sense that the .active portion of this name is the style applied because the ‘Payables’ menu item is the currently selected workspace. You’ll notice it is prominent on the screen, compared to the other workspaces.
One really useful feature of the styles pane is that you can edit the style in realtime by simply changing a value. For instance, you mentioned you’d like the text to be white. So, you can click into the ‘color’ property and change it from ‘black’ to ‘white’ and BAM!
Modifying a style in realtime
Once you determine the correct style section and property you need to change, in order to make the change permanent, you’ll need to actually open the style file from the website and make the change there. Any changes you make here will be erased as soon as you reload the page.
To open the style file, check out the nicely indicated file reference in the upper right corner of the style section:
The Site.css file is located at *siteName*/Content/Site.css
If you open that file with something like Notepad++, you can check the line numbers on the lefthand side against the line number indicated in the same location above - in this case 2047.
If you make your way to line 2047, in that file, you’ll find this:
Style section of the Site.css file
You’ll notice that the ‘color’ property is ‘black’ like it originally was on the site. If you change this property to ‘white’, save the file, and reload the site, you should see the change now made permanently. Sometimes it is necessary to force a page recache in order to see the changes, which can be done by holding the Shift key on your keyboard while clicking the browser refresh.
As a start, I will tell you that in order to get the menu background to be black, you’ll need to change:
style at line 1215style at line 1984style at line 2047
Thank you for your detailed answer. I've made significant progress with your guidance, but I realized my mistake was thinking I could modify everything within the App_Theme CSS file (00_Controls.css).
However, I have two remaining questions:
When I collapse the menu, it usually displays another icon named "logoMinA" found under the icons/ directory. I've updated the file, restarted the website, etc., but the icon hasn't updated. Do you have any idea why this might be happening?
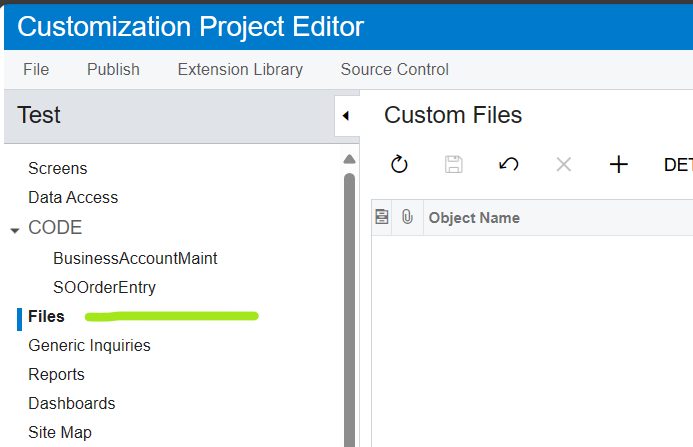
How can I publish these changes to another instance? I've tried selecting the appropriate file within the customization editor, but 'site.css' doesn’t seem to appear in the list.
I don’t exactly know. I have successfully replaced this file with an *.SVG file. Is that what you’re attempting?
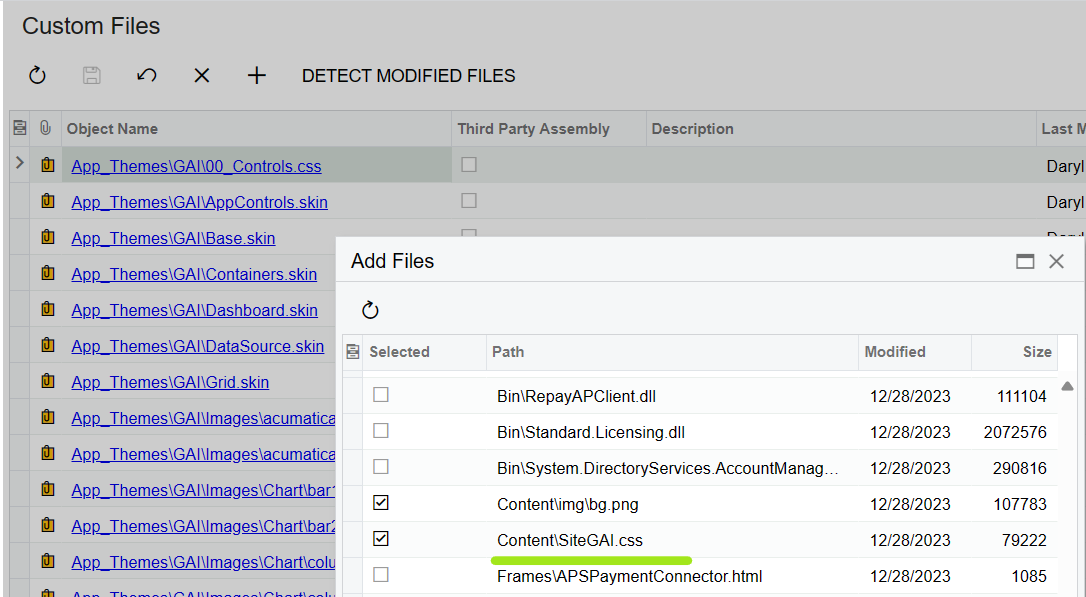
You’re on the right track. If Site.css isn’t available, you could:
Mess around with trying to add the file manually into the customization package (ie: extract, place files appropriately, edit project.xml, compress)
Create a new theme by copying the default theme folder from App_Themes/Default and renaming it to something else; then copying Site.css and renaming it to Site*newName*.css and packaging all of that into the customization package, which should be available:
This is precisely what I was trying to achieve. It turns out the logo was cached. After I cleared all caches—both my own and the website's—the issue was resolved. Thank you.
Thank you for the insights. I was considering that possibility but couldn't figure out how to specify the path or name for the new 'Sitexxx.css' in the new App_Theme. It seems like this might be an automatic process embedded deep in the code if 'App_Themes/SOS' and 'SiteSOS.css' names match.
I don’t exactly know. I have successfully replaced this file with an *.SVG file. Is that what you’re attempting?
You’re on the right track. If Site.css isn’t available, you could:
Mess around with trying to add the file manually into the customization package (ie: extract, place files appropriately, edit project.xml, compress)
Create a new theme by copying the default theme folder from App_Themes/Default and renaming it to something else; then copying Site.css and renaming it to Site*newName*.css and packaging all of that into the customization package, which should be available:
Daryl, I don’t have “Custom Files” in 23R2, is this a newer feature? Or is this a feature only available to self-hosted?
With this line present, I'm unable to import the base.skin via the customization. If I remove it, the customization imports without issue. Do you have any idea why this might be happening or what could be causing the import to fail with this line included?
We are currently using version 23R1. It seems that the Default Theme, or any theme I copy, includes this specific line inside the base.skin file. However, when I try to import this file through customization onto another instance, the validation fails because of this line. I'm a bit confused about why this is happening. I can remove it upon modifying the zip, but it would be interesting to know atleast.
To ensure update stability, we want to minimize changes to the original files and only adjust the values we need to change (mainly RGB or Hex values). Ideally, we want to import the rest from the default theme so that we don't have to check everything with each update. Is there a way to create a file that references the original file (presumably using @import) and then override the values from the imported file? I read that I could copy the block I want to edit from the imported original file and then add !important to it. But is that really the right approach? What happens if the original block in the original file already has !important?
tl;dr: We only want to have our changes in our theme file and reference to everything else using @import