Hello Everyone
I am trying to create a new Purchase Receipt type. Currently we have the default types of Receipt, Return, and Transfer Receipt. I am trying to a new type to this drop down called “DNS Return”. I basically need it to function in the exact same way as the current “Return” type.
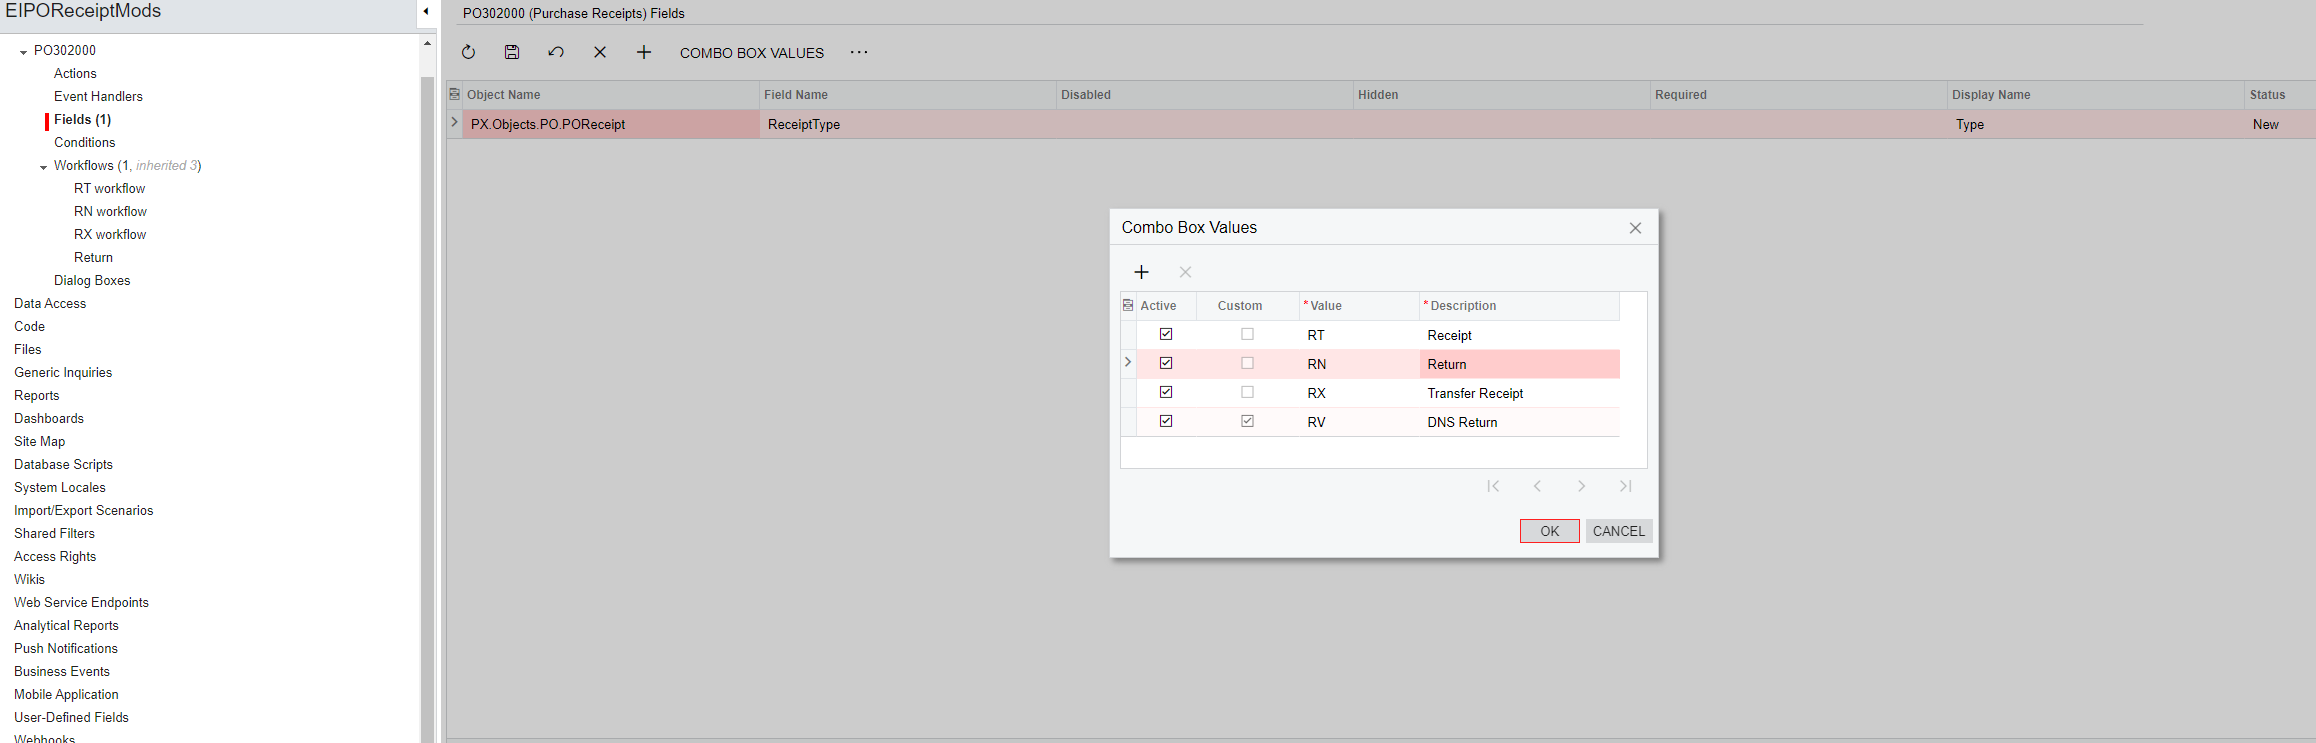
I understand how to add the value to the dropdown via a customization project and adding the new value to the combo box. But what I cant figure out is how I also modify the workflow so it handles this type using the RN workflow as there doesnt seem to be an area to control that in the workflow editor.
For reference, I am on Acumatica 2022 R1.
As always, any and all help is greatly appreciated!
Solved
Create new Purchase Receipt Type

Best answer by Vignesh Ponnusamy
Hi
Interesting question.!
I think the issue with how you are adding the receipt type. Instead of adding the type from the customization project, you can override the DAC definition by creating a custom POReceiptType attribute with the new receipt type.
Then we are just replacing the default POReceiptType attribute with the custom attribute. Example below,
using CRLocation = PX.Objects.CR.Standalone.Location;
using PX.Common;
using PX.Data.BQL.Fluent;
using PX.Data.ReferentialIntegrity.Attributes;
using PX.Data.WorkflowAPI;
using PX.Data;
using PX.Objects.AP;
using PX.Objects.AR;
using PX.Objects.CM.Extensions;
using PX.Objects.Common.Bql;
using PX.Objects.Common.GraphExtensions.Abstract;
using PX.Objects.Common;
using PX.Objects.CR;
using PX.Objects.CS;
using PX.Objects.GL.FinPeriods.TableDefinition;
using PX.Objects.GL;
using PX.Objects.IN;
using PX.Objects.PM;
using PX.Objects.PO;
using PX.Objects;
using PX.TM;
using System.Collections.Generic;
using System.Linq;
using System;
namespace PX.Objects.PO
{
[PXNonInstantiatedExtension]
public class PO_POReceipt_ExistingColumn : PXCacheExtension<PX.Objects.PO.POReceipt>
{
#region ReceiptType
[PXDBString(2, IsFixed = true, IsKey = true, InputMask = "")]
[PXDefault(POReceiptType.POReceipt)]
[PO_POReceipt_ExistingColumn.POReceiptTypeCustom.List()]
[PXUIField(DisplayName = "Type")]
[PX.Data.EP.PXFieldDescription]
public string ReceiptType { get; set; }
#endregion
public class POReceiptTypeCustom
{
public const string All = "AL";
public const string TransferReceipt = "RX";
public const string POReceipt = "RT";
public const string POReturn = "RN";
public const string DReturn = "DN";
public class ListAttribute : PXStringListAttribute
{
private static (string, string)[] ValuesToLabels = new[]
{
(POReceipt, Messages.PurchaseReceipt),
(POReturn, Messages.PurchaseReturn),
(TransferReceipt, Messages.TransferReceipt),
(DReturn, "DNS Return")
};
public ListAttribute() : this(false) { }
protected ListAttribute(bool all) : base(
all
? (new[] { (All, Messages.All) }).Concat(ValuesToLabels).ToArray()
: ValuesToLabels)
{ }
internal bool TryGetValue(string label, out string value)
{
var index = Array.IndexOf(_AllowedLabels, label);
if (index >= 0)
{
value = _AllowedValues[index];
return true;
}
value = null;
return false;
}
public class WithAll : ListAttribute
{
public WithAll() : base(true) { }
}
}
}
}
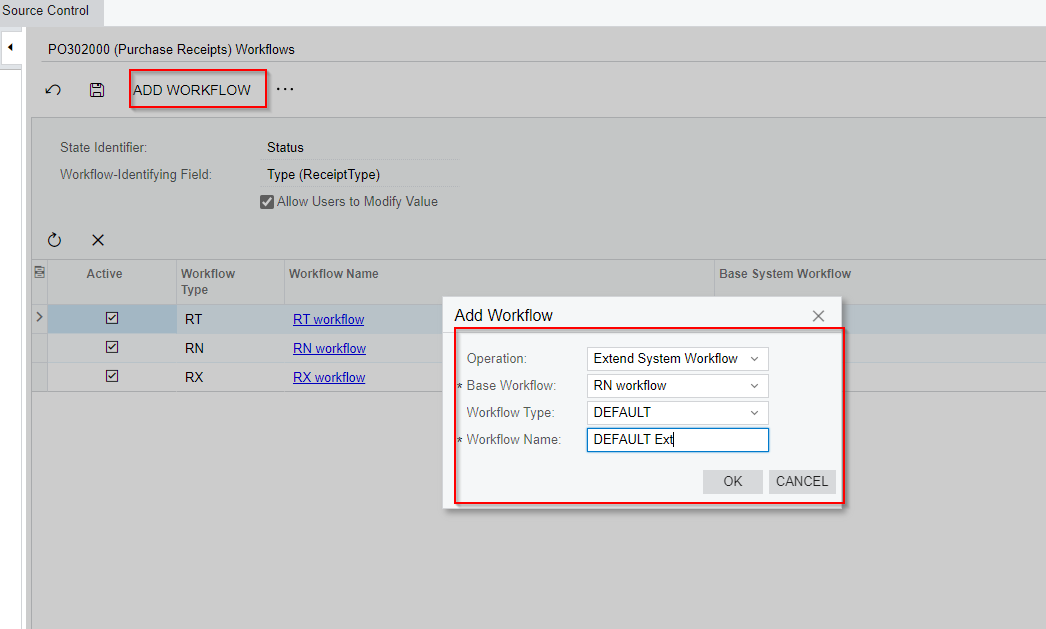
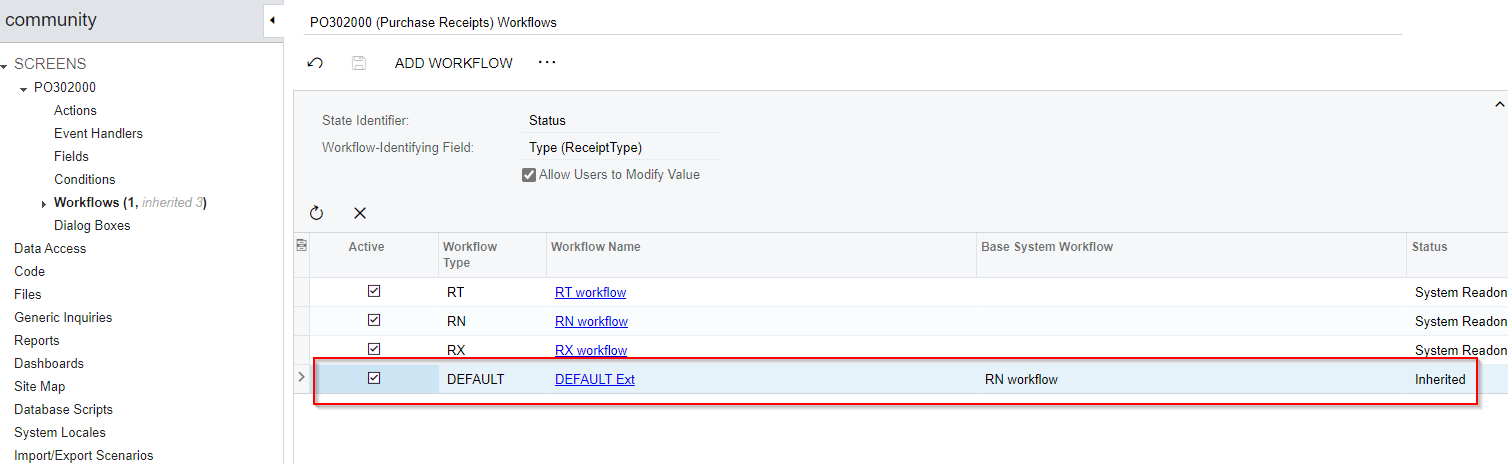
}Publish the customization project, then the new receipt type should show-up in the Workflow Type to which you can use RN Workflow
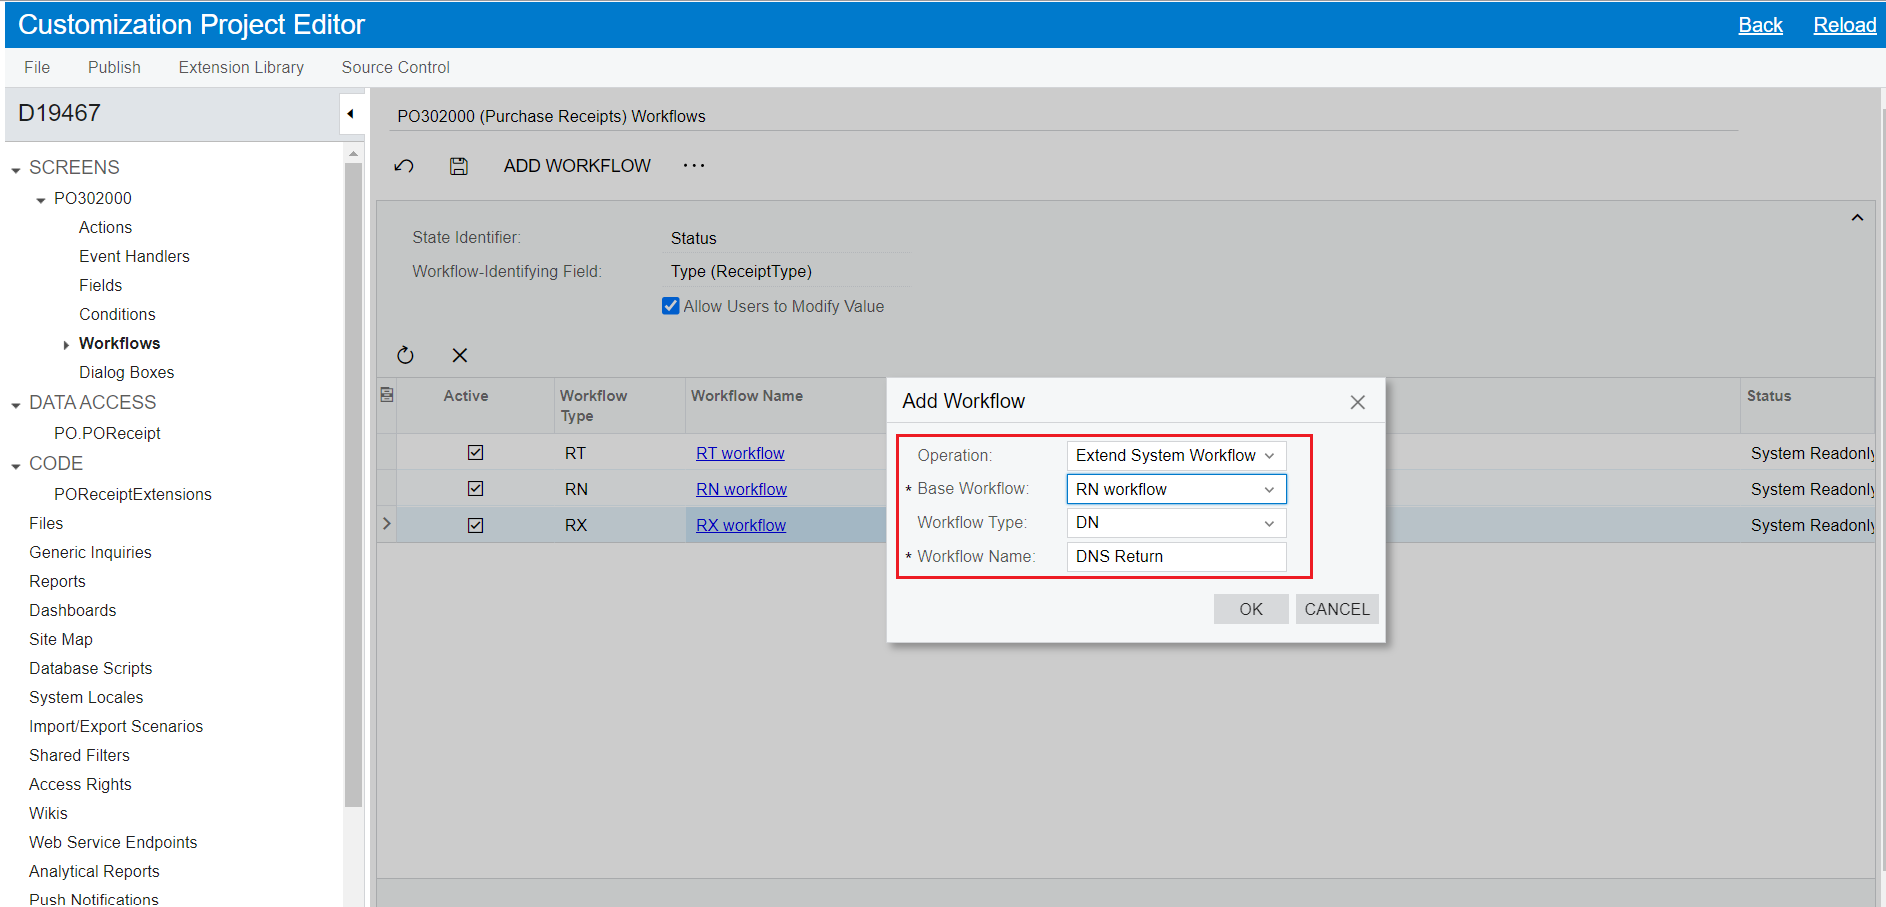
Once you add the workflow for the new type, you can Activate and publish it. I have attached the customization project you could try, I am not sure if the workflow is completely functional. But I think that should give some lead towards the solution.
Good Luck.!

Login to the community
No account yet? Create an account
Social Login
Login with your Acumatica accountEnter your E-mail address. We'll send you an e-mail with instructions to reset your password.