Is there a way to add the Case Packaging Dimension by UOM in the Packaging Tab under Stock Item
We have full cases at a specific dimension and weight then we have single items at its own dimension and weight.
Is there a way to add the Case Packaging Dimension by UOM in the Packaging Tab under Stock Item
We have full cases at a specific dimension and weight then we have single items at its own dimension and weight.
Best answer by chris49
Hi
Ok great, please see steps & screenshots below. Hopefully I understood your requirements correctly.
I must point out though that at the time of shipping label generation, specific item dimensions isn’t available as far as I can recall. Instead the package information is available, which are representations of the Boxes (CS207600) screen - I might be wrong though, so don’t take my work for it 😉
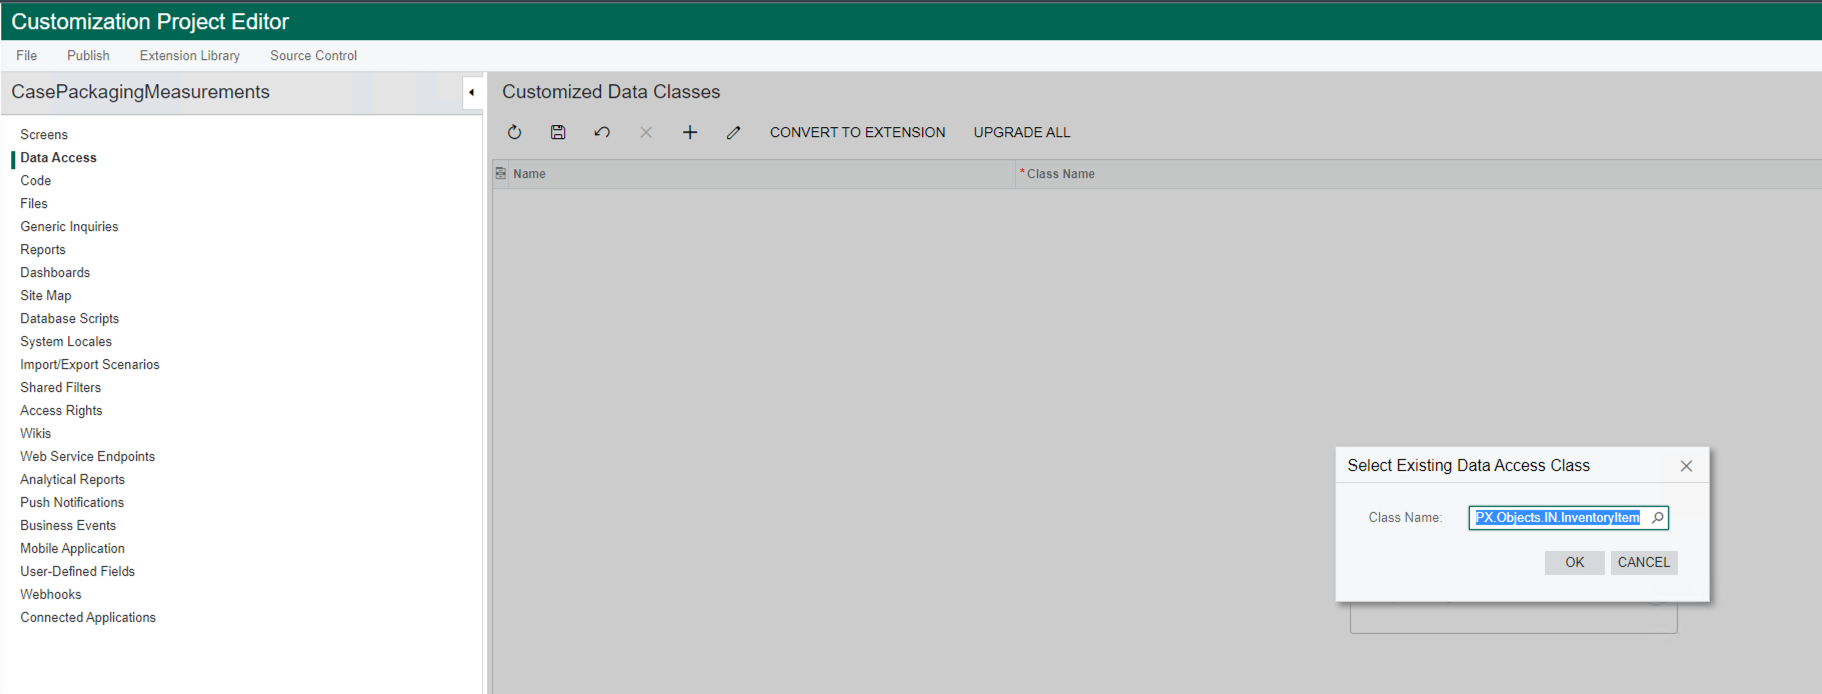
Create a new customization package on the Customization Projects screen

Click on the Data Access item, and then the + button. This will open a prompt to select an existing Data Access Class. You will need to select the InventoryItem dataclass as shown:
Next, click on the Create New Field button. This will open up the Create New Field prompt. Refer to the respective screenshots for guidance on what values to enter.

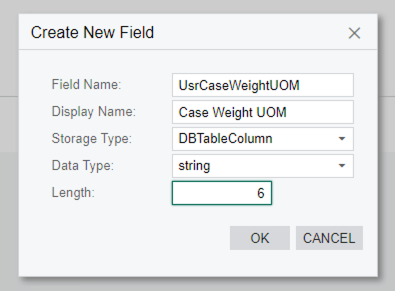
Note that the Usr prefixes are required and not optional.
You will see that there is a section for each attribute with some code. Update each one’s value respectively. This is to take care of default values, display formating, etc.
Weight Type Fields:
[PXDBQuantity(6, typeof (InventoryItem.weightUOM), typeof (InventoryItem.baseWeight), HandleEmptyKey = true)]
[PXDefault(TypeCode.Decimal, "0.0")]
[PXUIField(DisplayName="Case Weight")]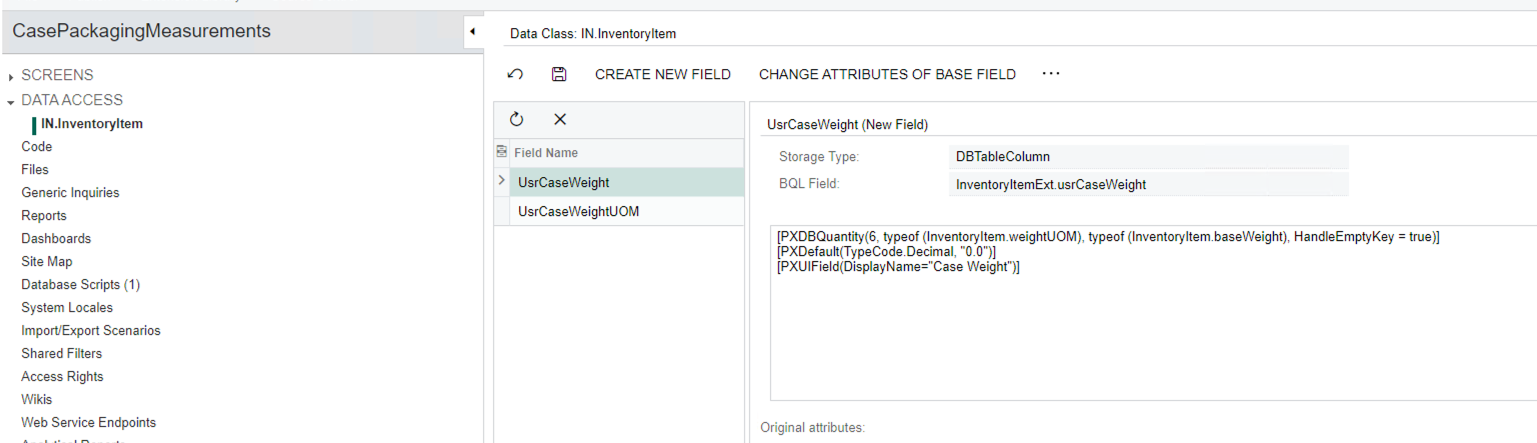
UOM Type Fields:
[INUnit(null, typeof (CommonSetup.weightUOM), DisplayName = "Case Weight UOM")]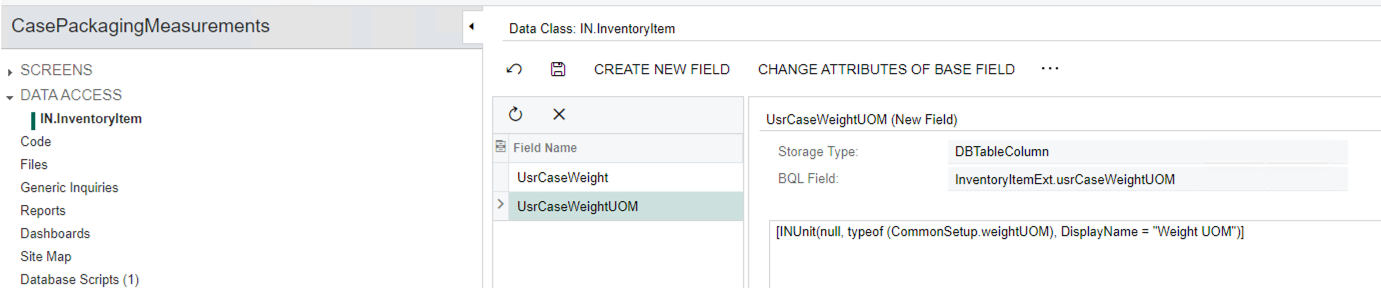
I’ve only created the above 2 fields, you might want to add more fields, but this should give you a good enough idea.
After you’ve done this, you will need to publish the customization, so that we can use the new fields on the next section.
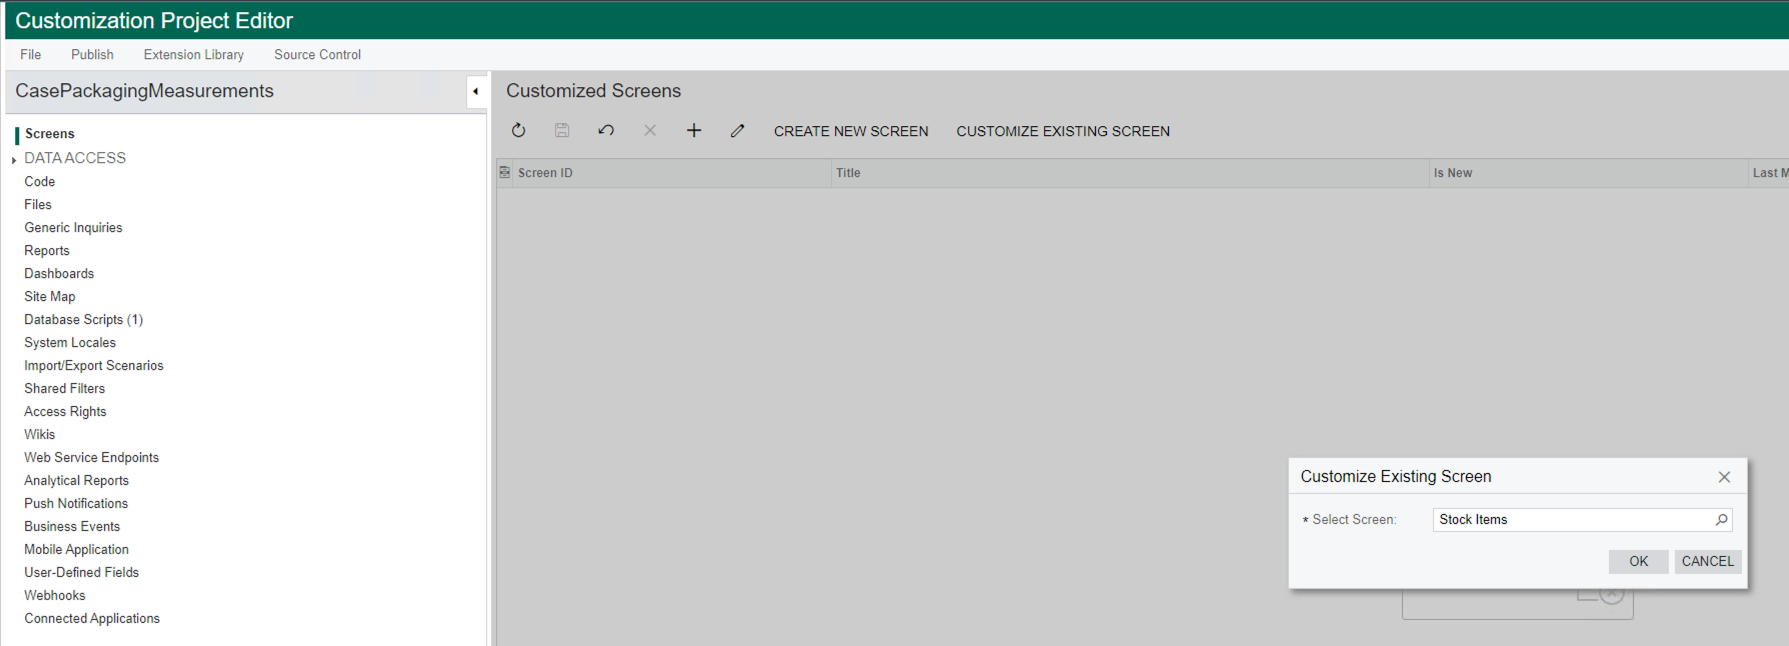
In order to make these new fields appear on the Stock Items form, we need to customise the existing screen. Do this by clicking on the Screens option, and then the Customize Existing Screen button. Select the Stock Items screen.
Next you’re going to want to add a new group in the applicable sction of the Packaging tab. Make sure your navigation tree looks like the below screenshot. Then drag the Group option to be just under the first group option:
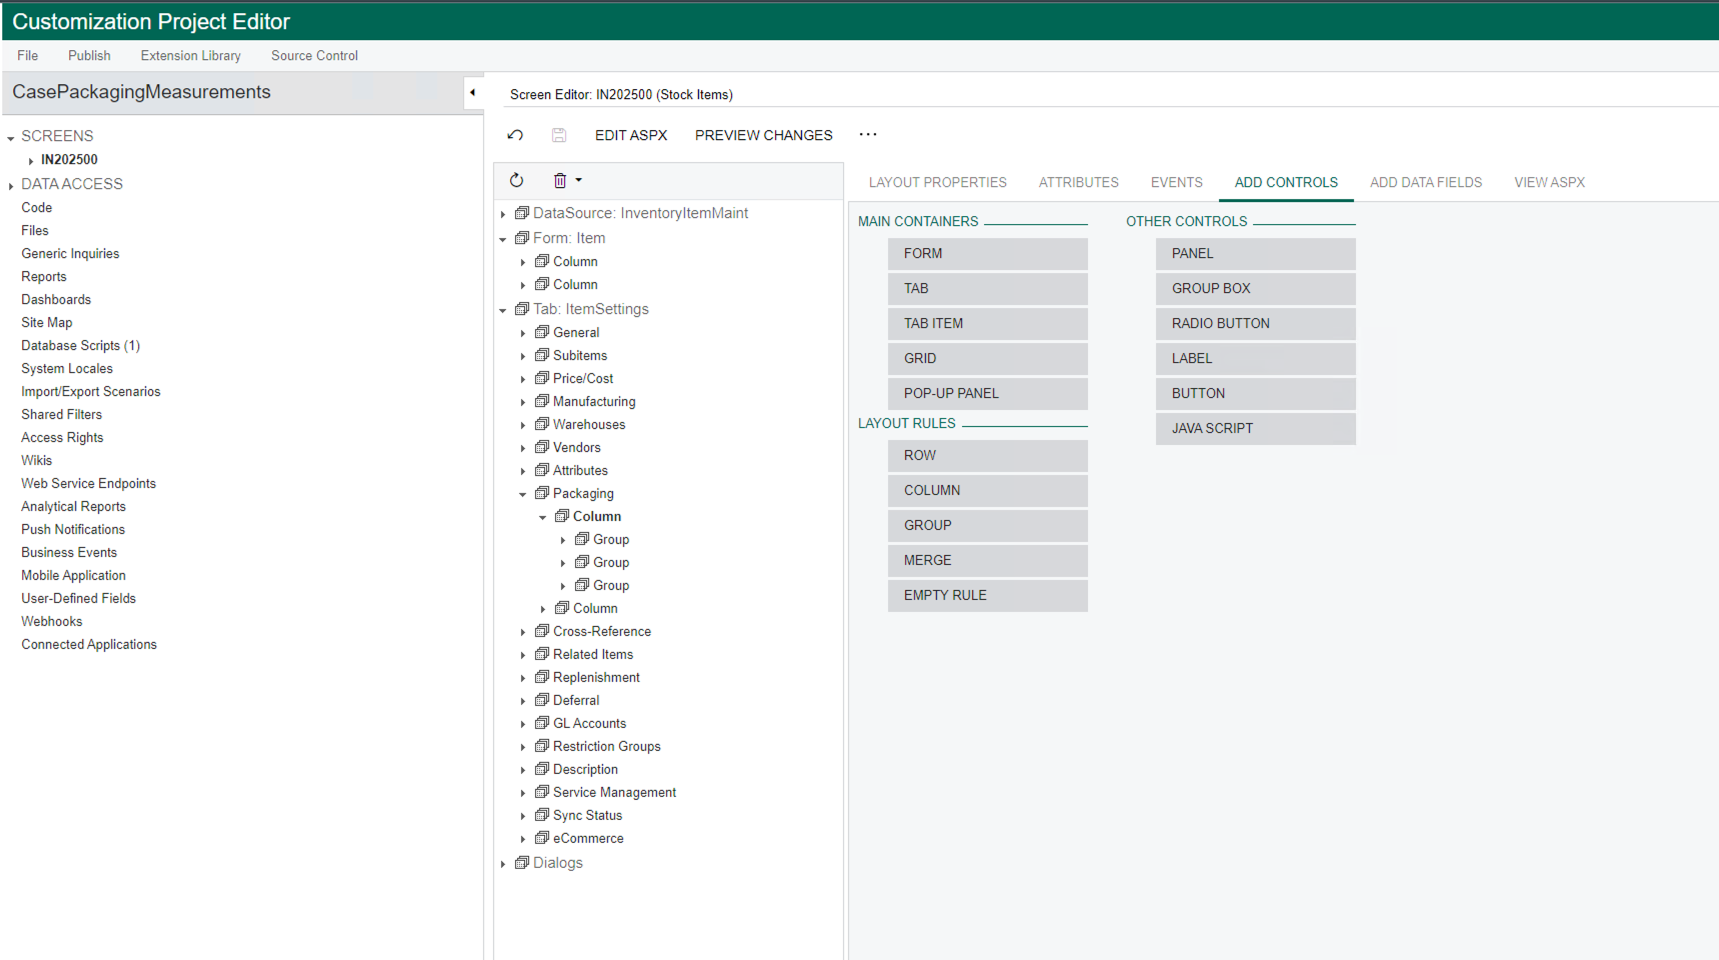
This will add a new group, under which we can add the new custom fields. PS. I’ve chosen to add a group, so that we’re able to give the new fields their own caption. If you don’t need this, you can just select the applicable item in the navigation tree where you’d like to add the new fields.
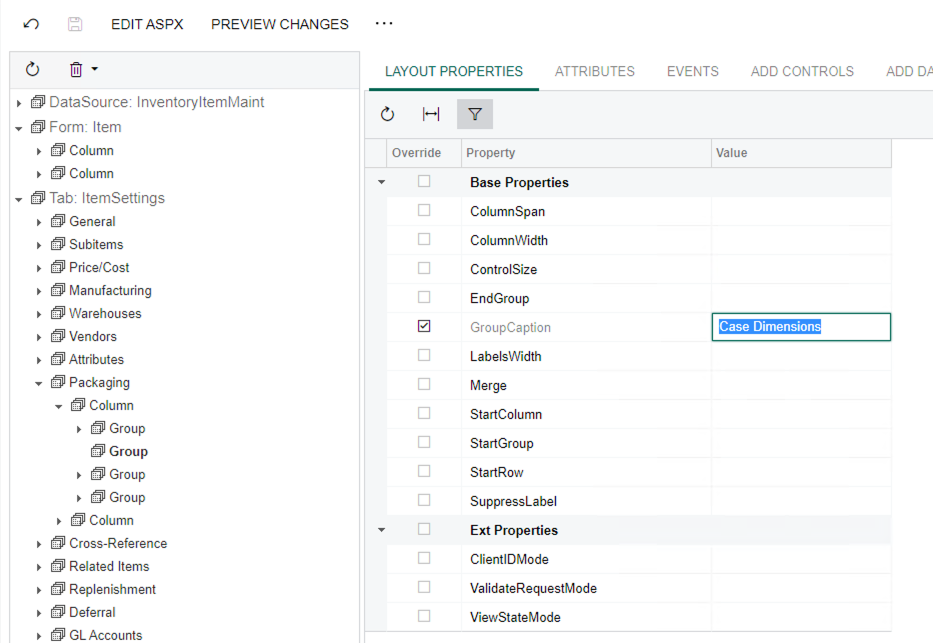
Select the group that was just created, and give it a custom caption
Now that the group has been added, click the save button next to the Edit ASPX button.
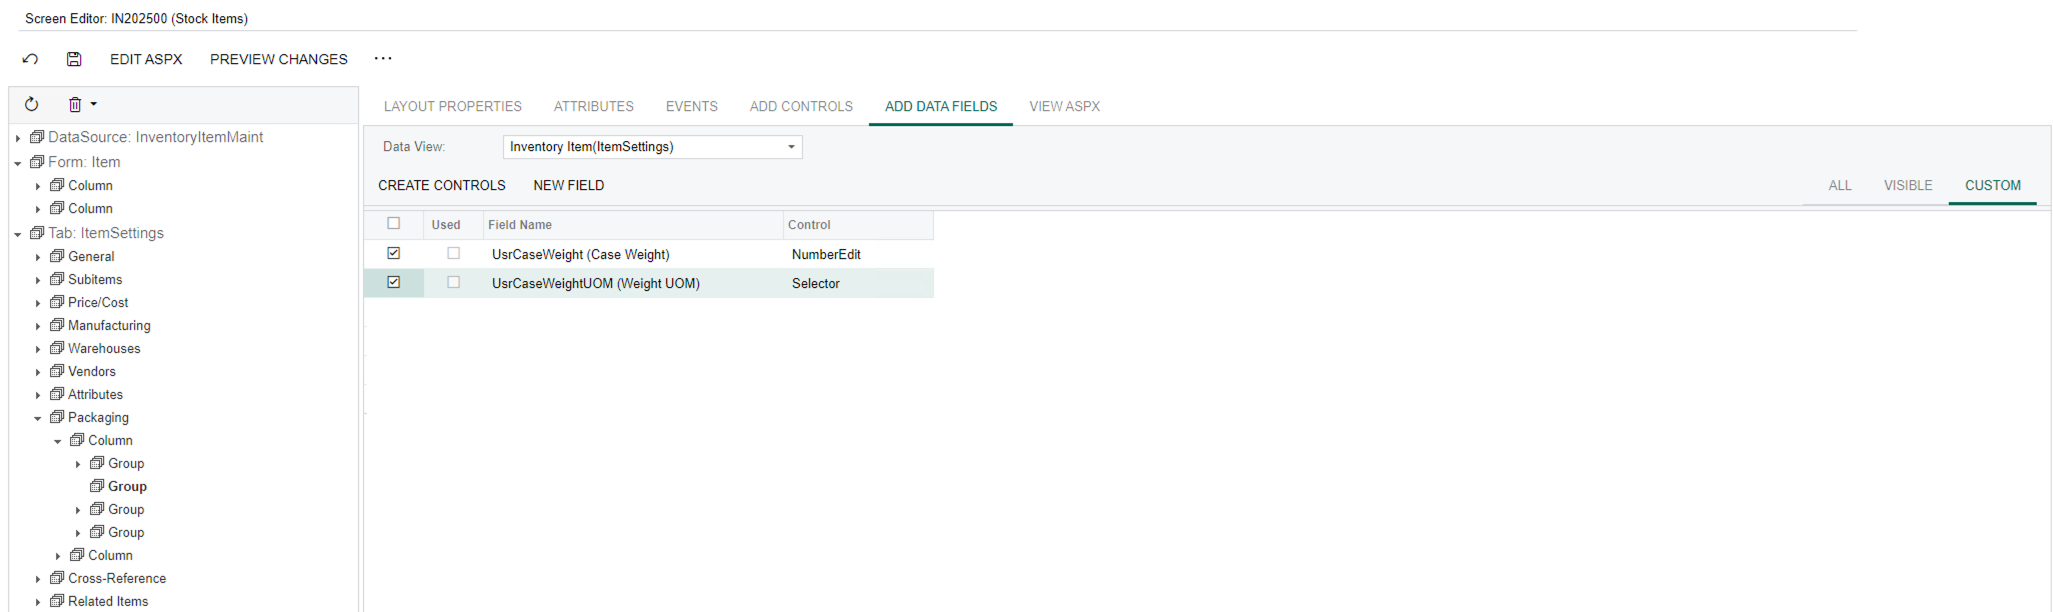
Make sure that you’ve still selected the group item you’ve added, and click on the Add Data Fields button. Click the Custom tab, which will only show the custom fields you’ve created. Select both and then click on the Create Controls button.
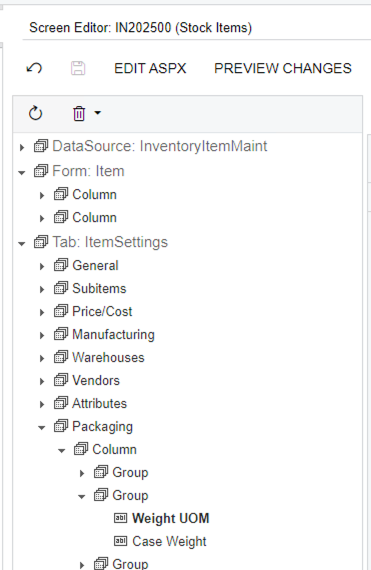
You will see that the fields now appear in the navigation tree
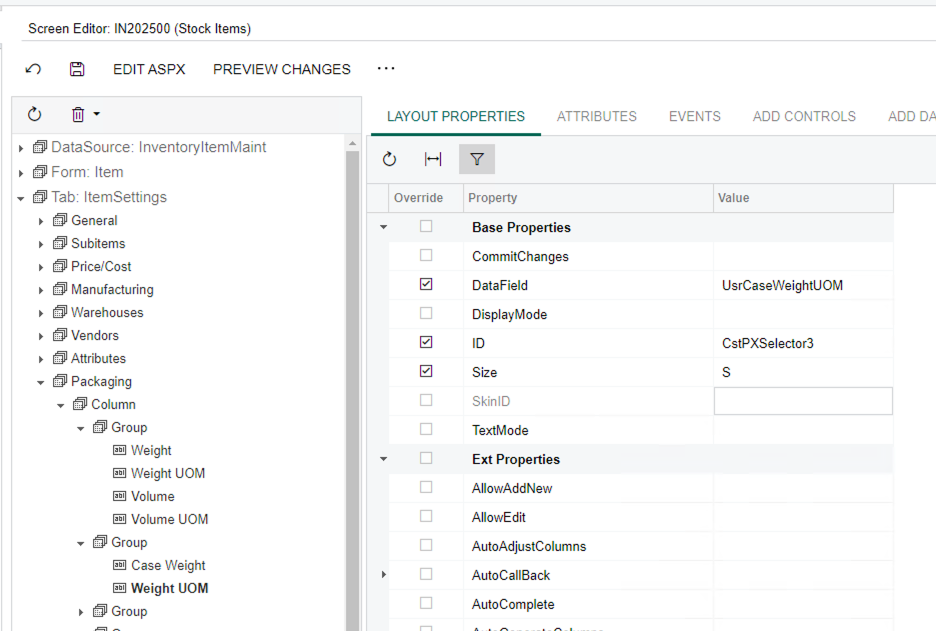
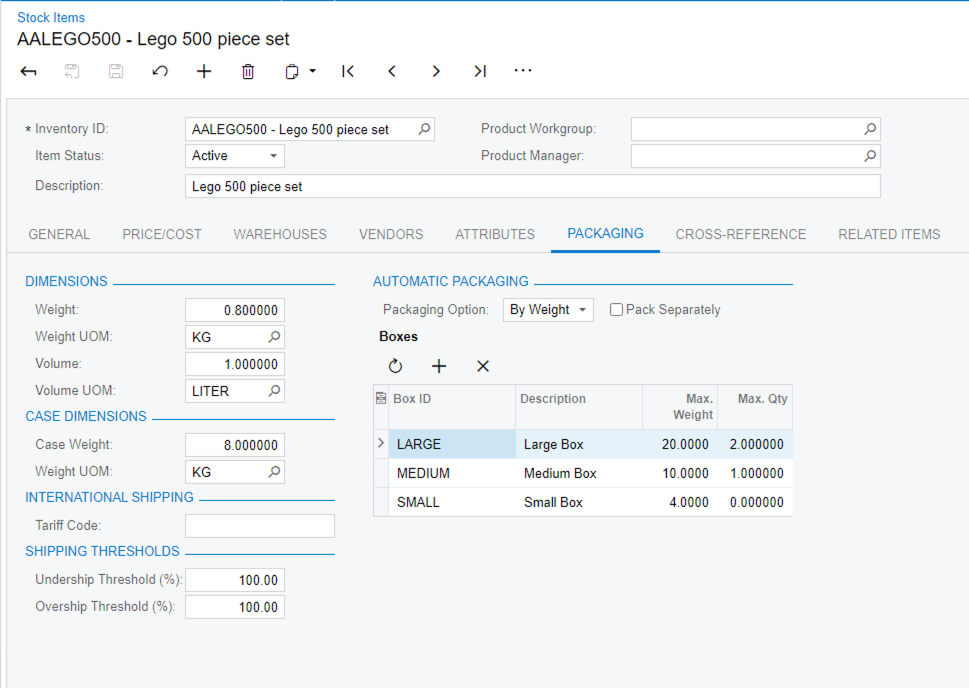
For the Case Weight UOM (in screenshot it shows as Weight UOM - I made a typo), you might want to change the control’s size, so that it lines up with the other input fields.
Save the changes, and then once again, publish the customization screen. Now you should be able to navigate to the Stock Items screen, and should see something similar to this:
For more information on the Customization screens, see the help documentation here. In particular, the sections around Customizing Elements of the User Interface & Customizing the Database Schema.
Just as a side note (and not that there’s anything wrong in doing it the way I have shown here), Acumatica actually recommends adding your own custom fields to your own custom database table. This way data is kept clean & seperate from core tables, etc. which helps with future upgradeability. But that requires a much deeper understanding of the customization process, as well as coding knowledge.
No account yet? Create an account
Enter your E-mail address. We'll send you an e-mail with instructions to reset your password.