Customization beginner here. 
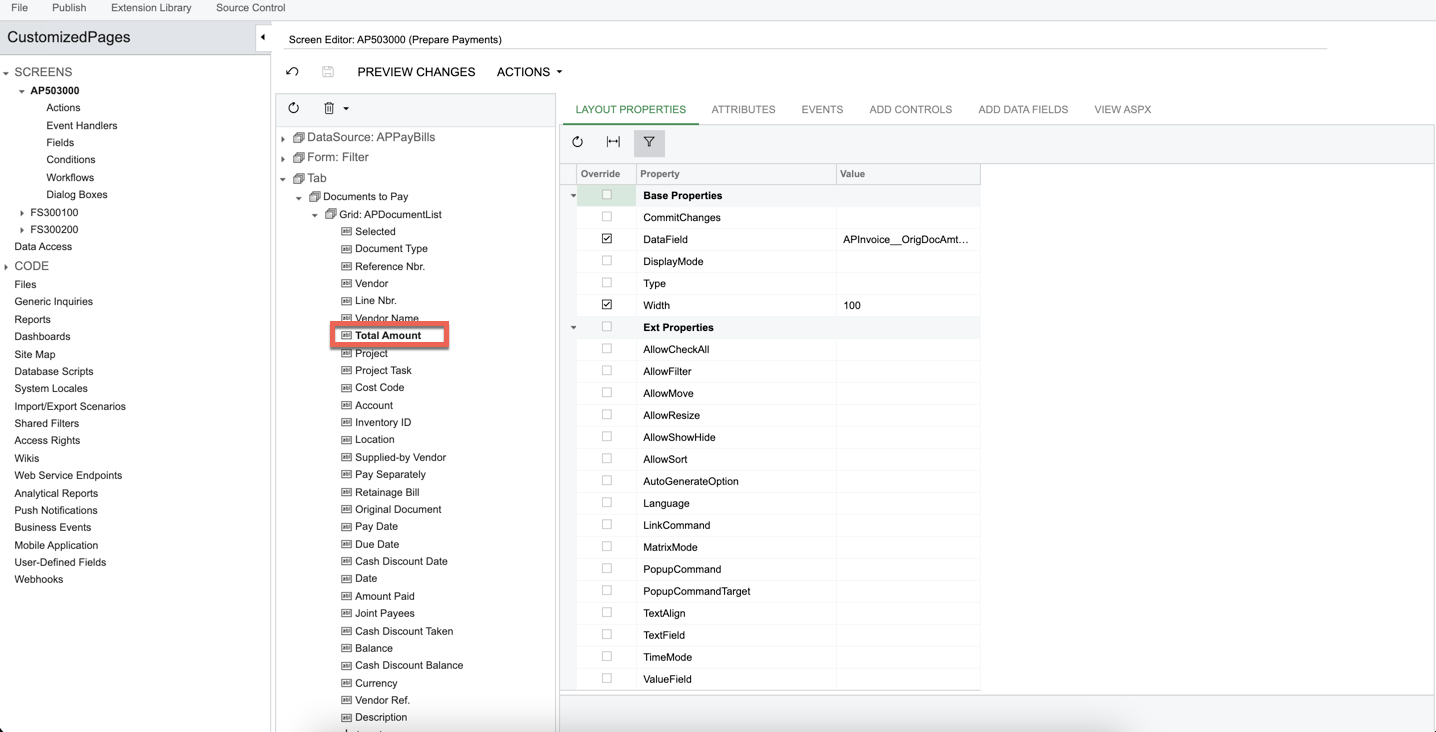
How do I rename a data field on a screen? Looks like some changes were made from previous versions where this was done. In the example below, I simply want to rename this filed from the screen editor.
 

@jlowry40 by rename, you mean change “Total Amount” to something else? There are two possible approaches:

Approach 1: Customization

This is the track you’re in right now - the caption/column names are derived from the attributes of the field; in this case the field is APInvoice.OrigDocAmnt. This can be overridden a few different ways:

  • Via a graph-extension (using the _CacheAttached technique) -- this will apply to the Prepare Payments Page Only. 
  • By adding a DAC extension, and overriding the attributes there. 
  • From the Data Access section -- this ultimately generates a DAC extension for you, it just has a nice UI :grinning:  

Was this renamed/changed by someone,? I would suggest checking in the Code section of the customization project for anything that appear to alter this -- the original name I see on my side is “Amount”


Approach 2: Translation

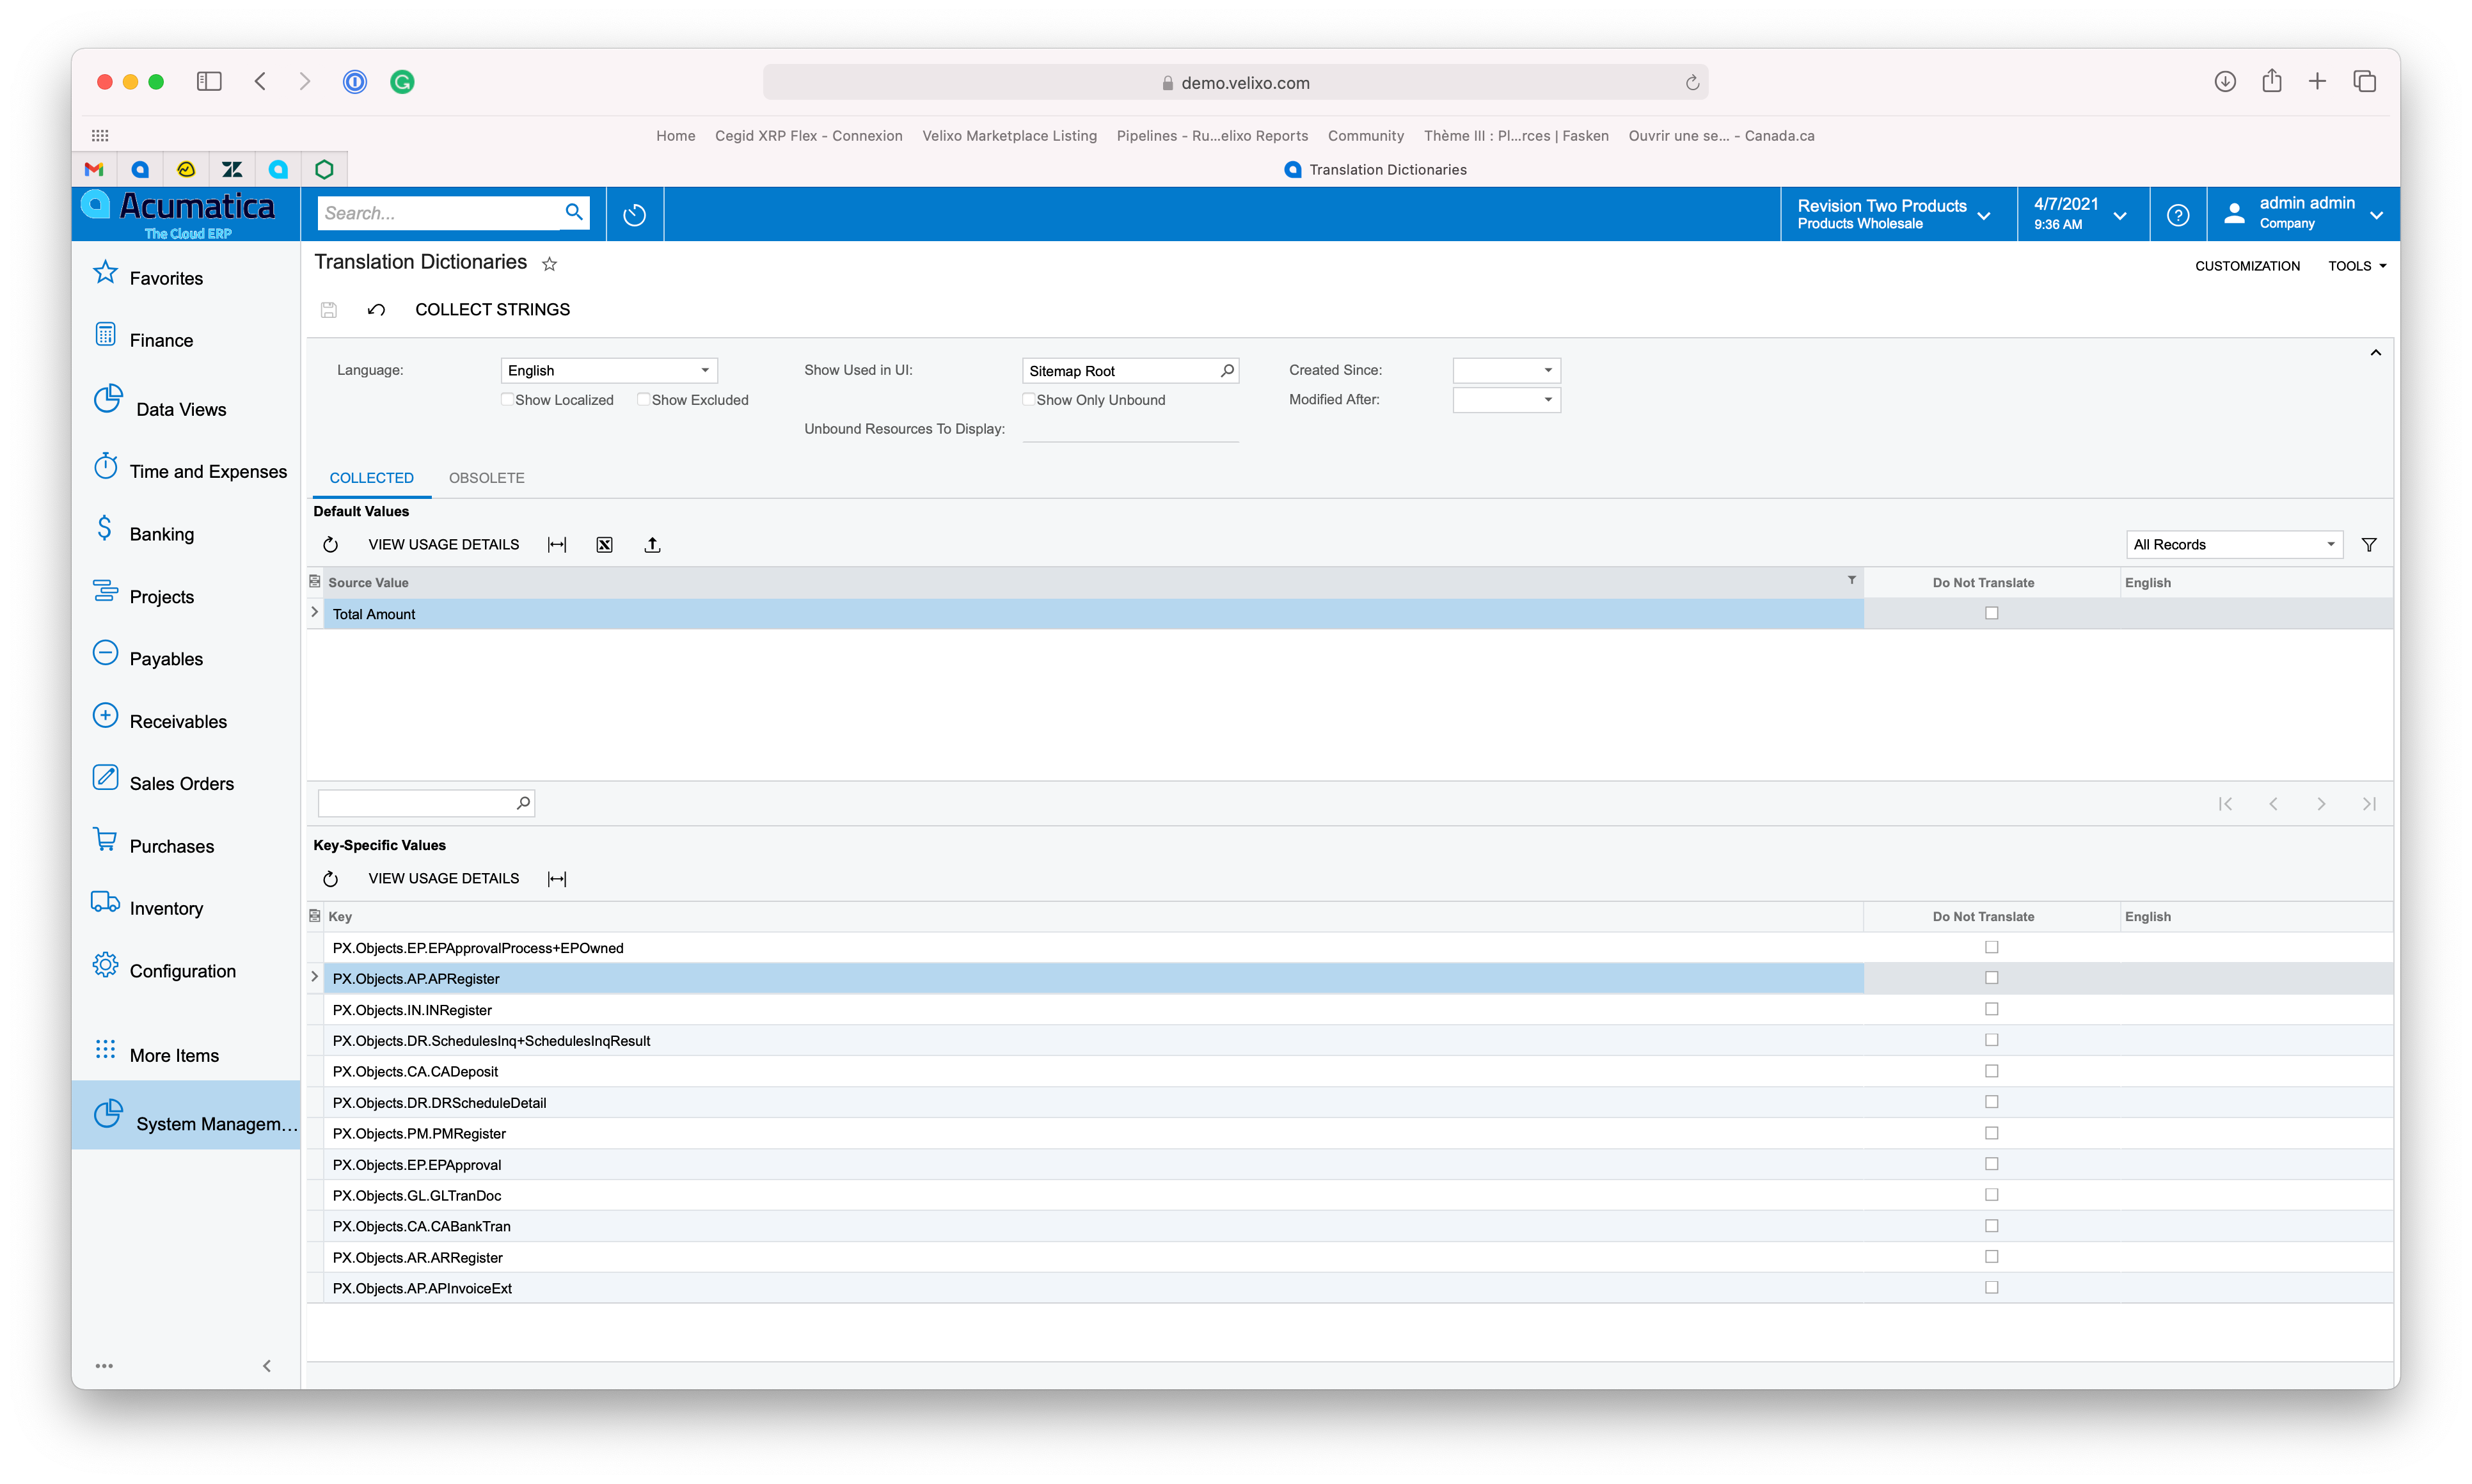
By using the same tools available to translate the application in another language, you can make alterations to the English labels and messages. Go to Translation Dictionaries (SM200540), pick english and search the label or message you want to translate:


@Gabriel Michaud

I added the data field to the column to reflect the Original Document Amount (APInvoice__OrigDocAmtWithRetainageTotal). The default label is Total Amount in my system. 

I assume that this is what you meant by the Data Access Section? And just change the label here?


That’s what the Data Access section look like:


When you click add, you’ll be prompted to select the class name. Since APInvoice inherits from APRegister, it will automatically revert back to APRegister (this is fine). Click Add Field->Change Attributes of Base Field and pick the OrigDocAmtWithRetainageTotal field.

You simply need to add the following attribute and enter the display name you want:

/PXUIField(DisplayName = ”Total with Retainage", FieldClass = nameof(FeaturesSet.Retainage))]


It will apply to every screen where this field is used. Here’s the result on my system:


@Gabriel Michaud

This is great!! Thanks!


There is an article (a bit dated) with some additional screen shots here: https://www.acumatica.com/blog/technical-tuesday-changing-field-labels-in-acumatica/


@Doug Johnson thanks… I remembered reading this a while back and actually searched online before writing my reply, if I had found your post I would have linked to it directly :)


Reply