Want to share with you the way to handle Made-To-Order Products with BigCommerce Connector.
Made-To-Order products are special types of products where each item may have a specific unique attributes like text, or painting, or style. I will show you an example of gift spoons with special graving.
Step 1: We have we need to create a new Stock-Item that will represent the spoon in Acumatica.
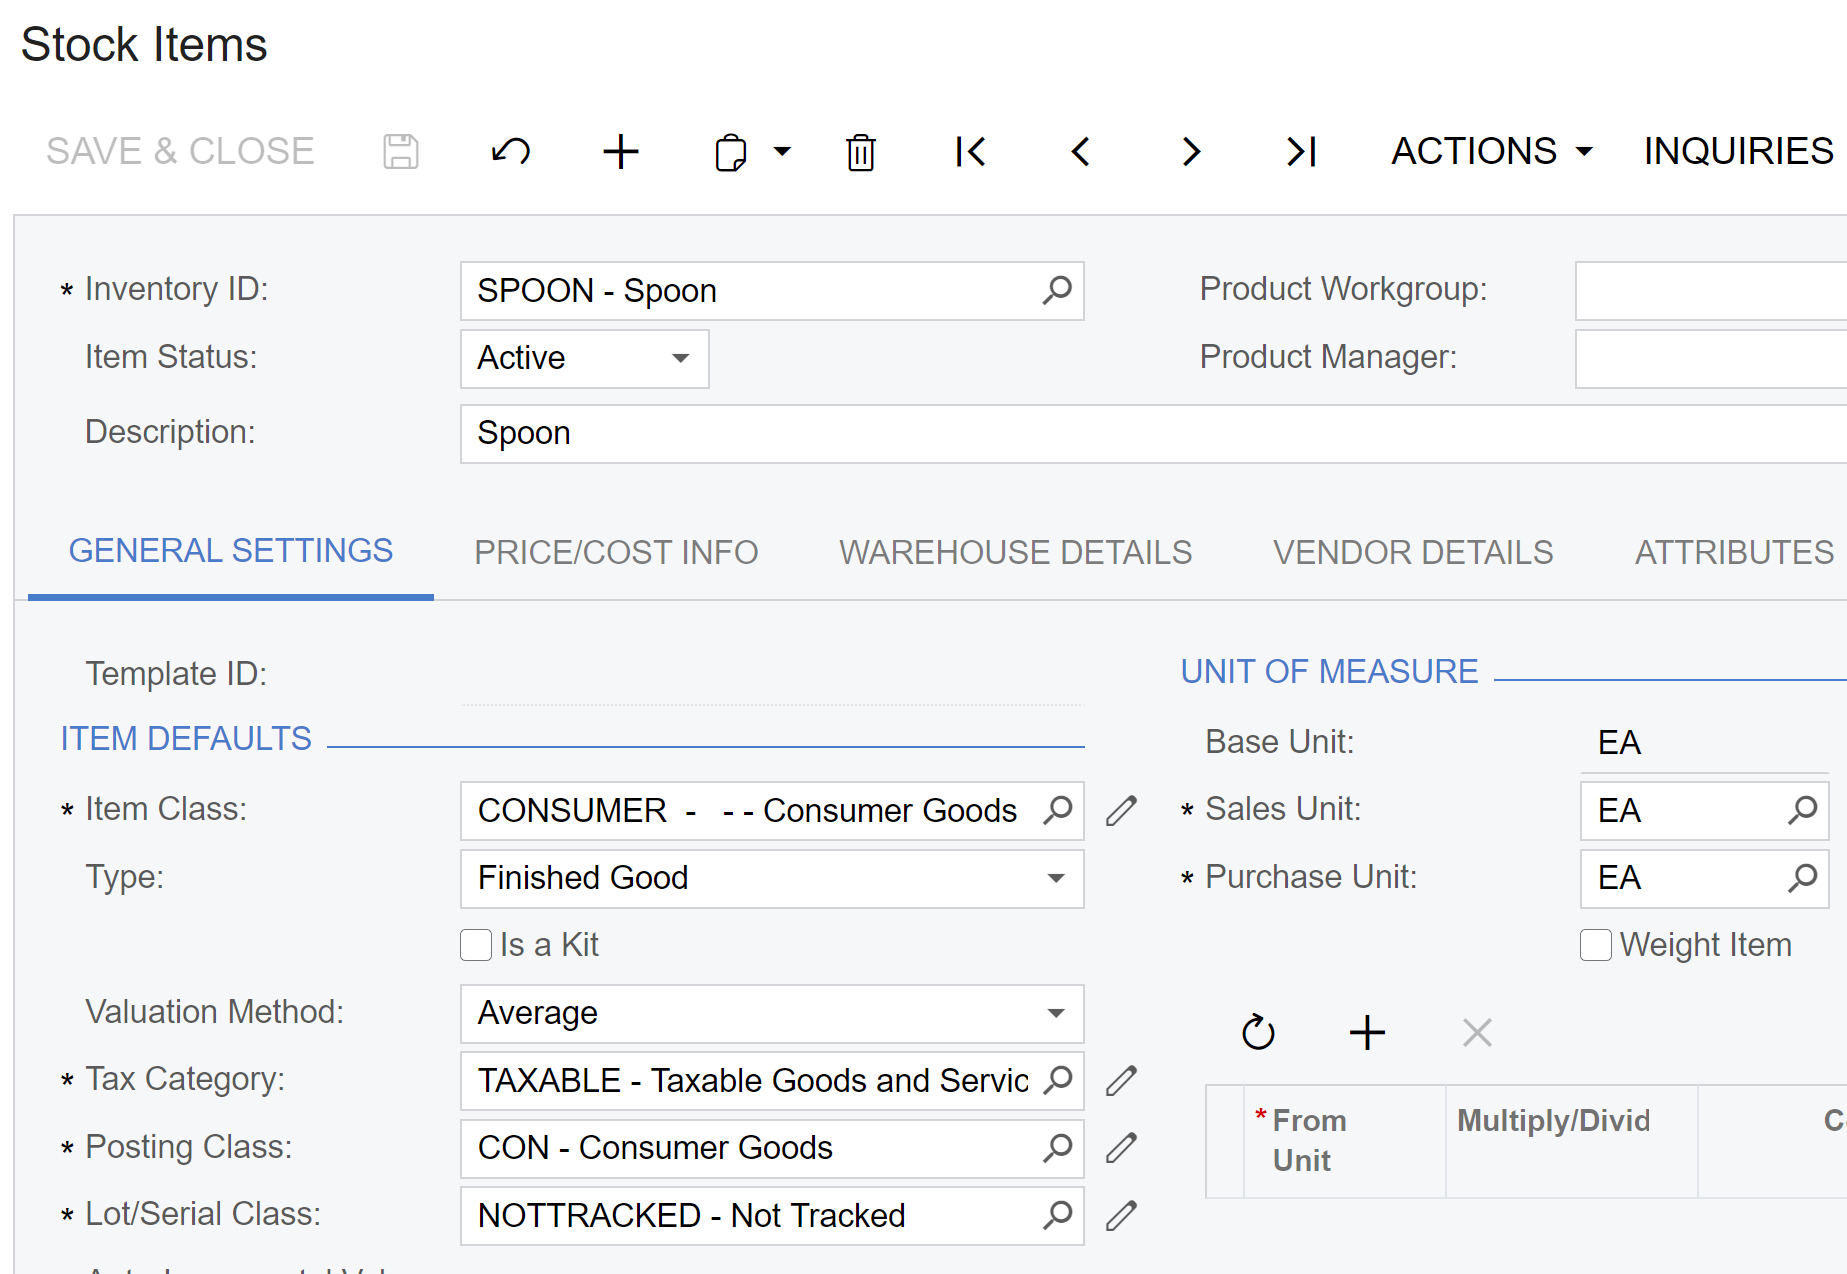
For testing purpose you can receive a couple of spoons on your warehouse using the Inventory Receipts form (IN301000).
Step 2: Prepare and Export Stock Items to your BigCommerce instance. If you manage images/availability in Acumatica, you should also Prepare and Export Availability and Images entities.
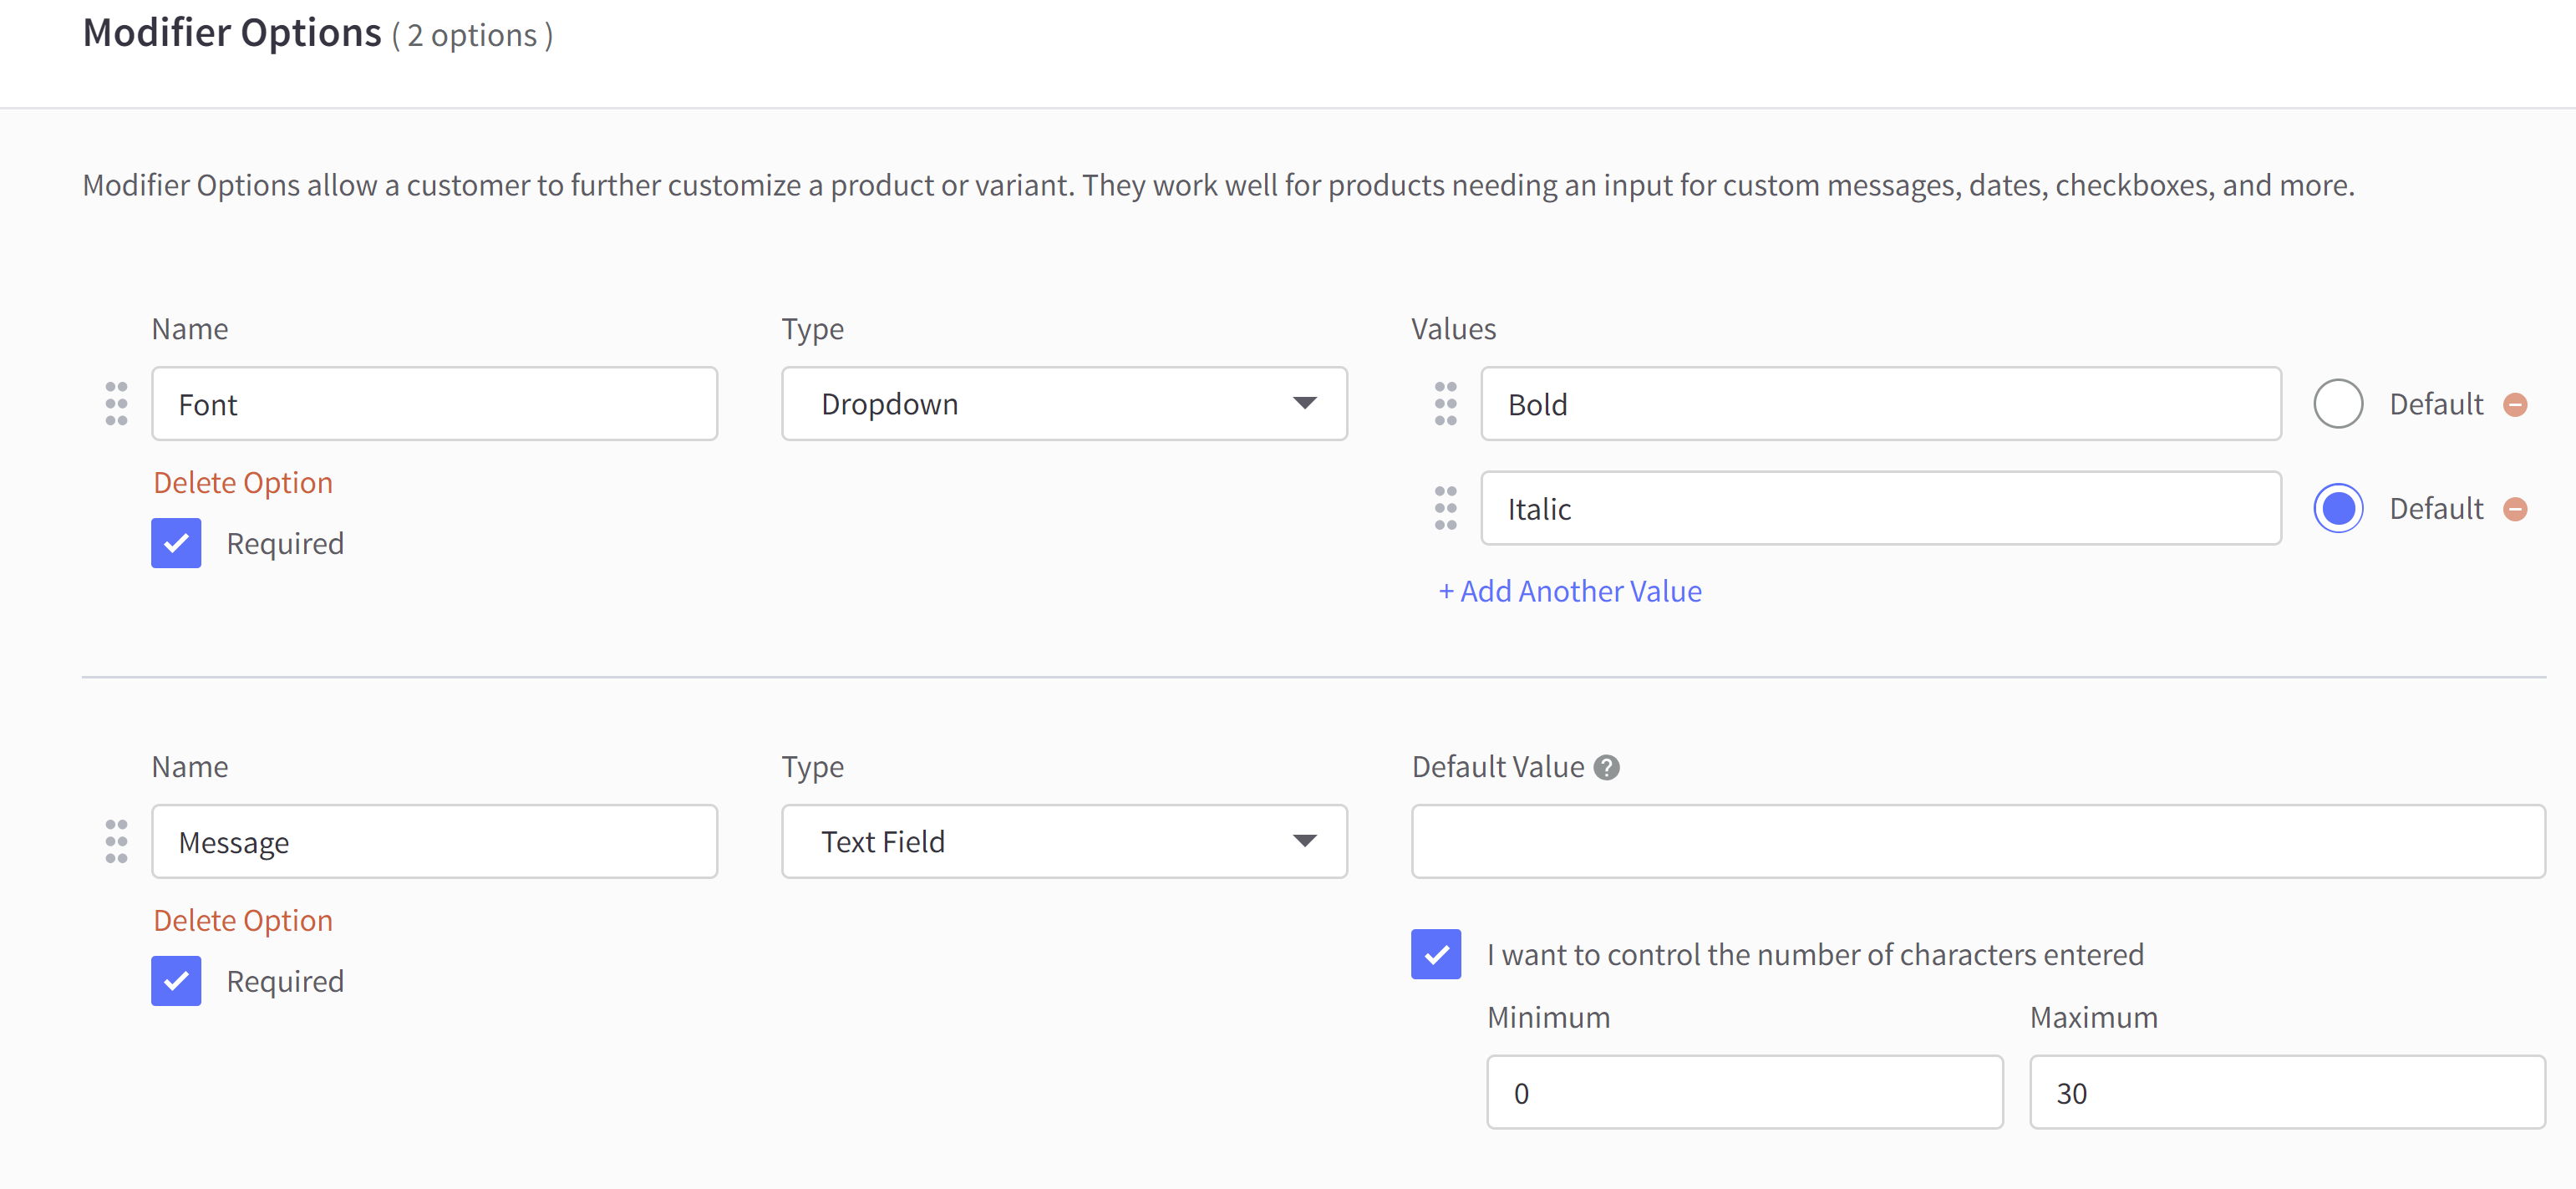
Step 3: Since Acumatica-BigCommerce Connector cannot manage Product Modifiers, we should go and configure Made-To-Order product in BigCommerce directly. There we want to create Product Modifier Options with allowed values and combinations. For my spoon, I want to allow 2 fields: Message Font and Message Text.
Step 4: We should prepare Acumatica to store these values too. As Acumatica does not allow to have User Defined Fields or Attributes at the Sales Order Line level, we have to create custom fields - One for Message and one for Font:
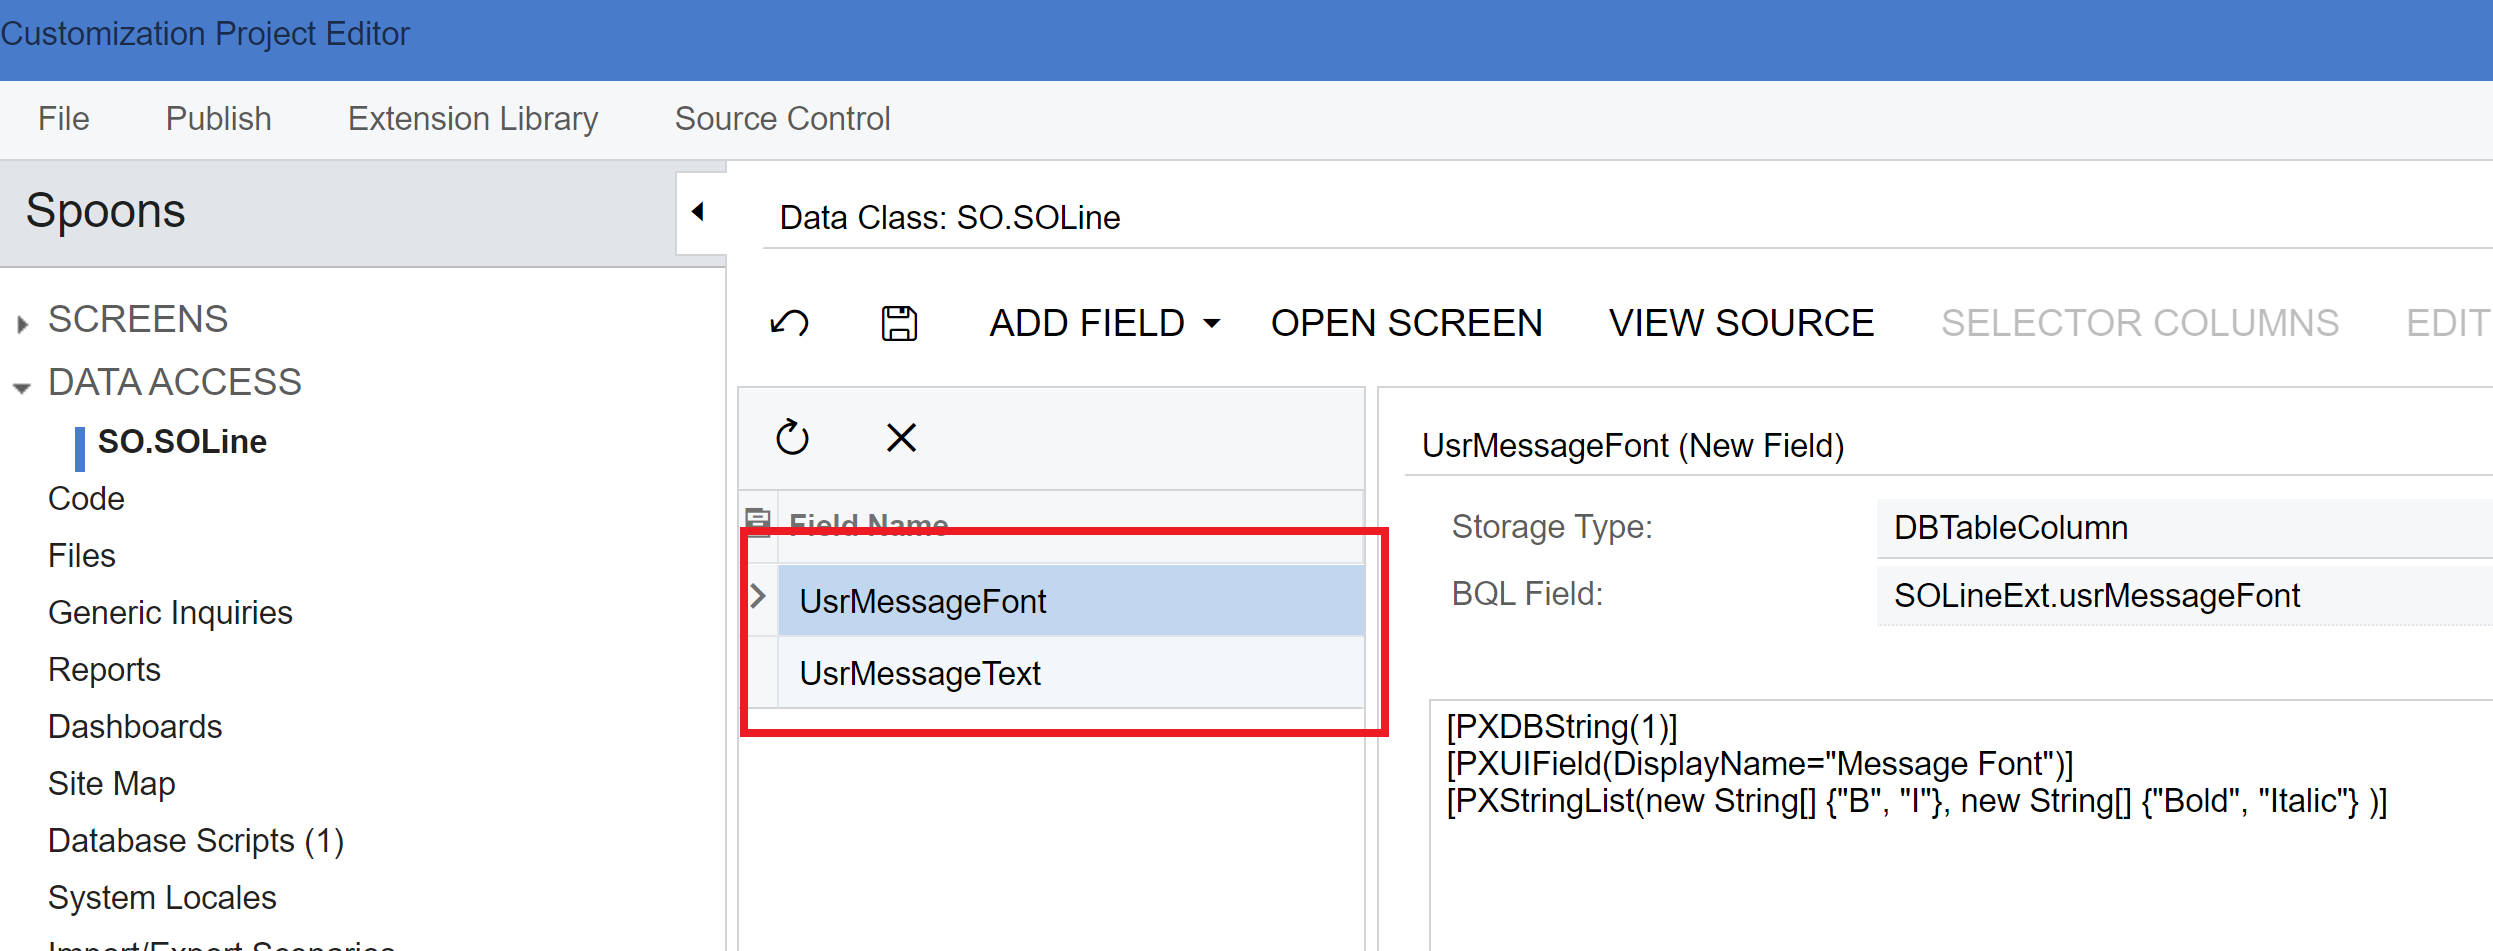
You can use any date type you like, but please note that if you use Drop Down values, you should make sure that Labels in Acumatica and BigCommerce are the same, otherwise the code below will not work. My example works based on the assumption that labels are the same in both places.
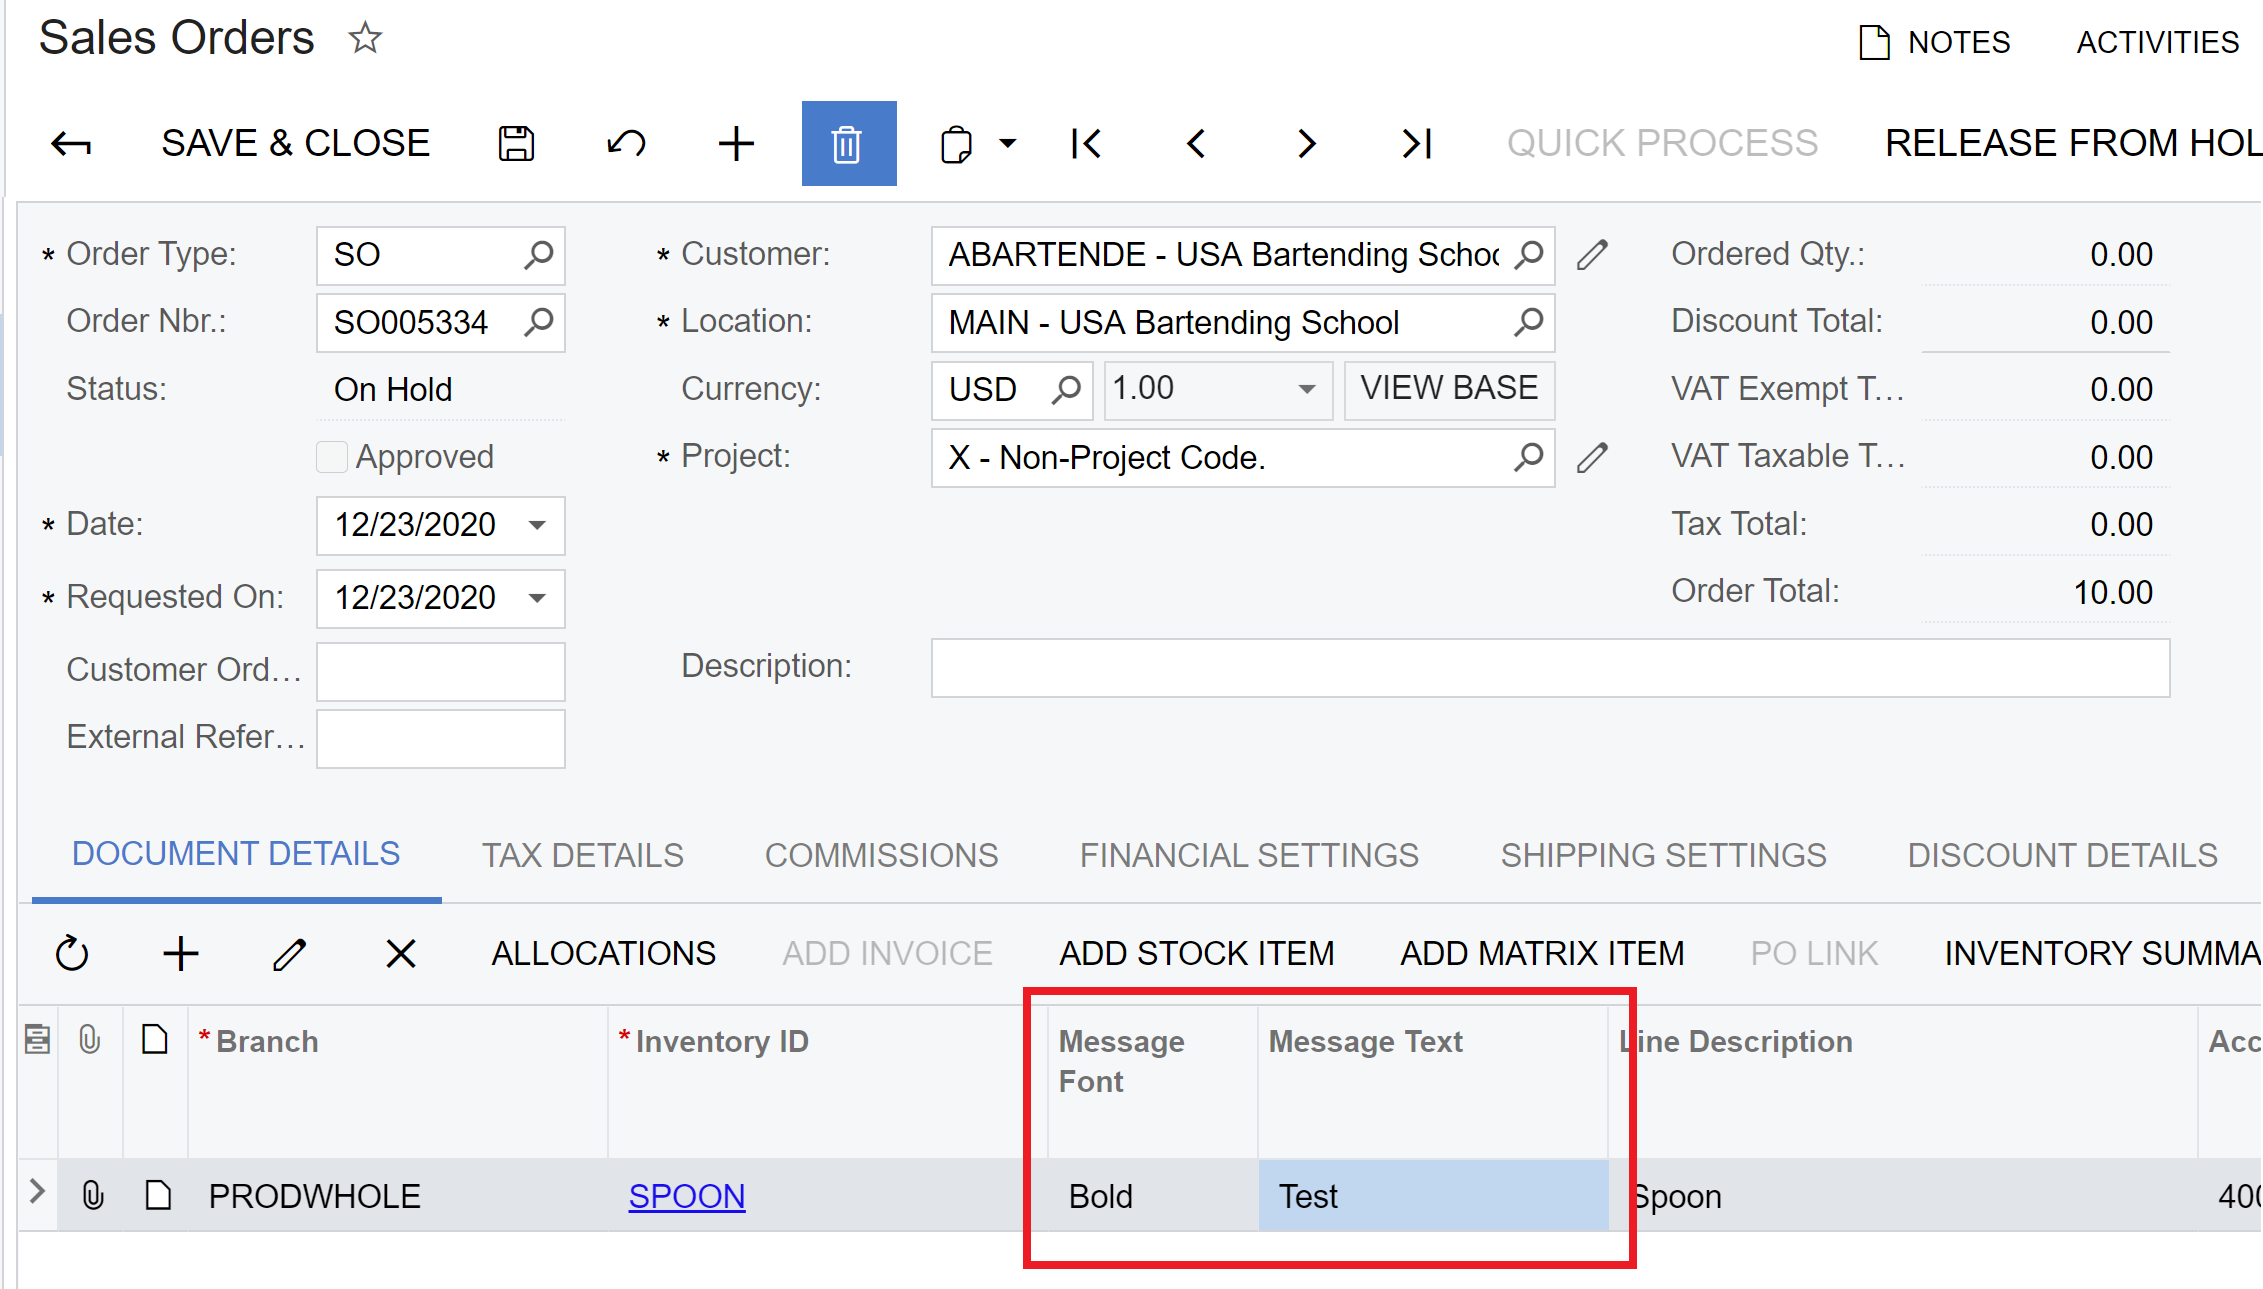
Also don’t forget that you should add the fields in the UI of the Sales Orders (SO301000) form. When you add it, you can test the fields manually to make sure that they work properly:
Step 5: As I have mentioned before, Acumatica-BigCommerce does not handle the Product Modifiers, so we have to write the code that will handle if for us. We should go to the Customization Project Browser and create a new GraphExtension to modify synchronization:
using System;
using System.Collections.Generic;
using System.Linq;
using PX.Data;
using PX.Objects.Common;
using PX.Common;
using PX.Api.ContractBased.Models;
using PX.Commerce.BigCommerce.API.REST;
using PX.Commerce.Core;
using PX.Commerce.Core.API;
using PX.Commerce.Objects;
using PX.Commerce.BigCommerce;

namespace Spoons
{
  public class BCSalesOrderProcessorExt : PXGraphExtension<BCSalesOrderProcessor>
  {
    public delegate void SaveBucketImportDelegate(BCSalesOrderBucket bucket, IMappedEntity existing, String operation);

    [PXOverride]
    public virtual void SaveBucketImport(BCSalesOrderBucket bucket, IMappedEntity existing, String operation, SaveBucketImportDelegate baseMethod)
    {
      MappedOrder order = bucket.Order; //Object of the sales order

      //Extern is the API Object from BigCommerce
      for (int i = 0; i < (order.Extern.OrderProducts?.Count ?? 0); i++)
      {
        OrdersProductData data = order.Extern.OrderProducts[i];
        //Local is the API Object from Acumatica
        SalesOrderDetail detail = order.Local.Details.Where(x => x.Delete != true).Skip(i).Take(1).FirstOrDefault();
        if(detail != null)
        {
          List<CustomField> fields = new List<CustomField>();
          GetCustomField(fields, data, "Message", "Transactions", "UsrMessageText"); //UsrMessageText is the name of the custom field
          GetCustomField(fields, data, "Font", "Transactions", "UsrMessageFont"); //UsrMessageFontis the name of the custom field

          if (fields.Count > 0) detail.Custom = fields; //Here we place custom fields to Acumatica API object. Rest well be handled automatically.
        }
      }

      baseMethod(bucket, existing, operation); // calling the base met
    }

    public virtual void GetCustomField(List<CustomField> result, OrdersProductData data, String optionName, String objectName, String fieldName)
    {
      if (data?.ProductOptions != null)
      {
        foreach (var option in data.ProductOptions) //BigCommerce Object already contains options, we just need to go thought them
        {
          if (option.DisplayName == optionName && option.DisplayValue != null)
          {
            CustomStringField field = new CustomStringField()
            {
              ViewName = objectName, //Dataview name for the sales order details
              FieldName = fieldName, //Custom field name
              Value = new StringValue() { Value = option.DisplayValue } // Custom field value
            };
            result.Add(field);
          }
        }
      }
    }
  }
}
Please note the comments in the code. Especially important to look at “UsrMessageText” and “UsrMessageFont” - these are the custom fields that we have created on the step 4. If you have more fields, or if you have different names, you have to change these lines.
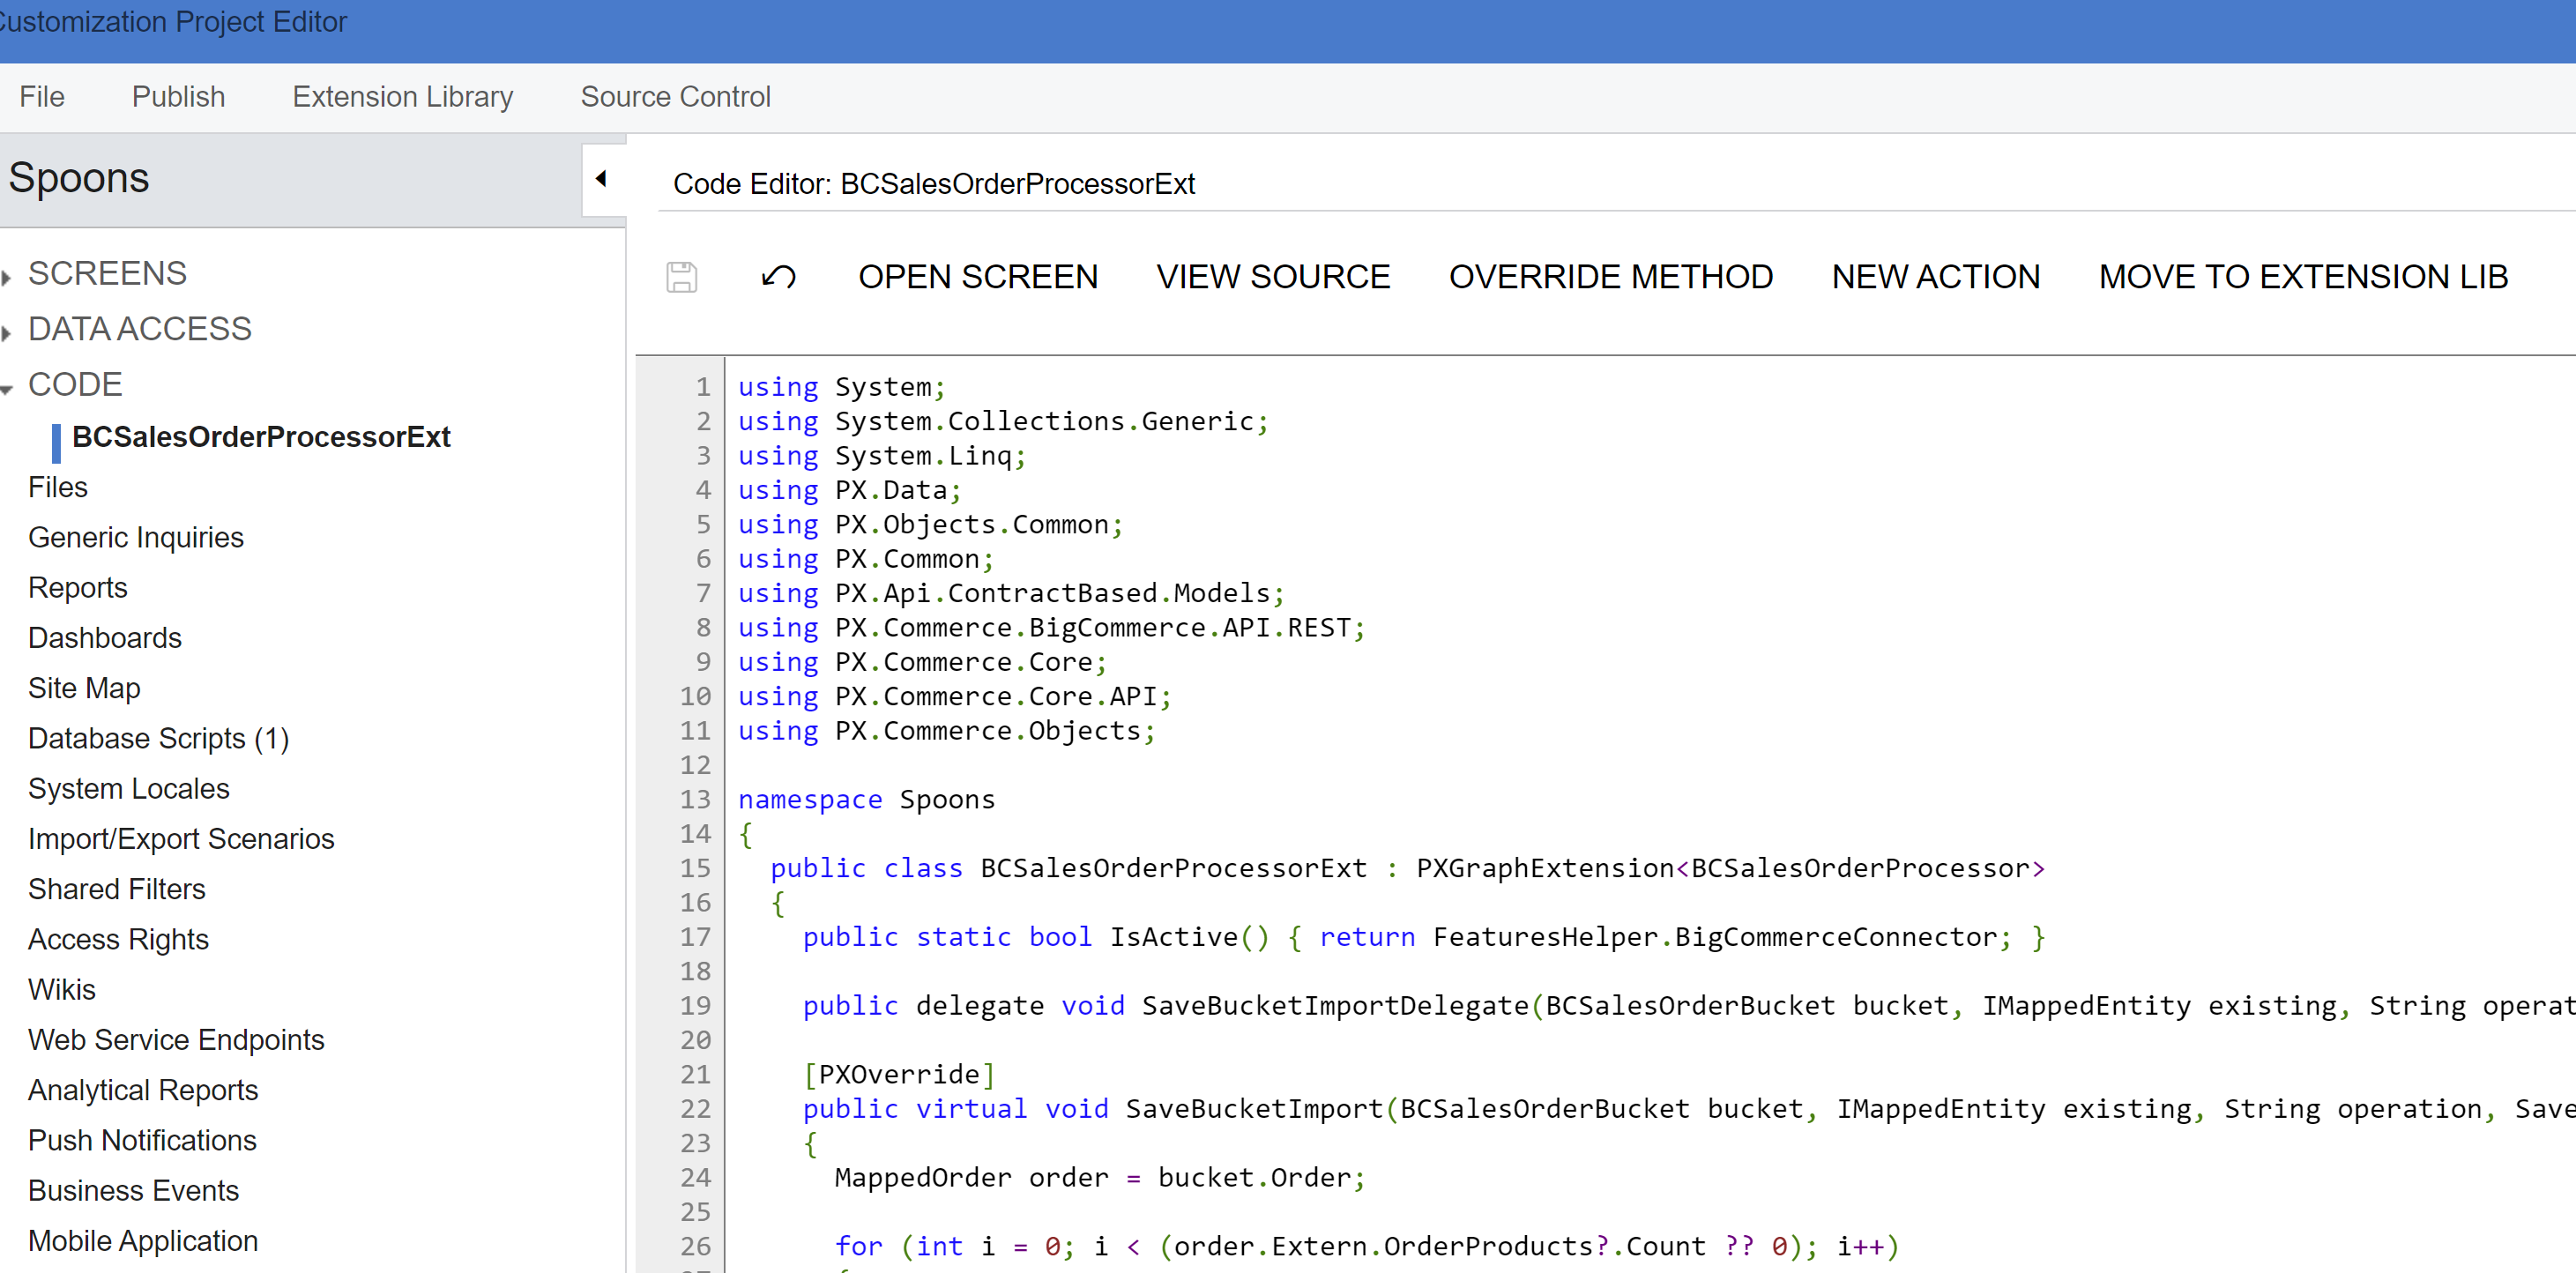
The code should be placed or modified here:
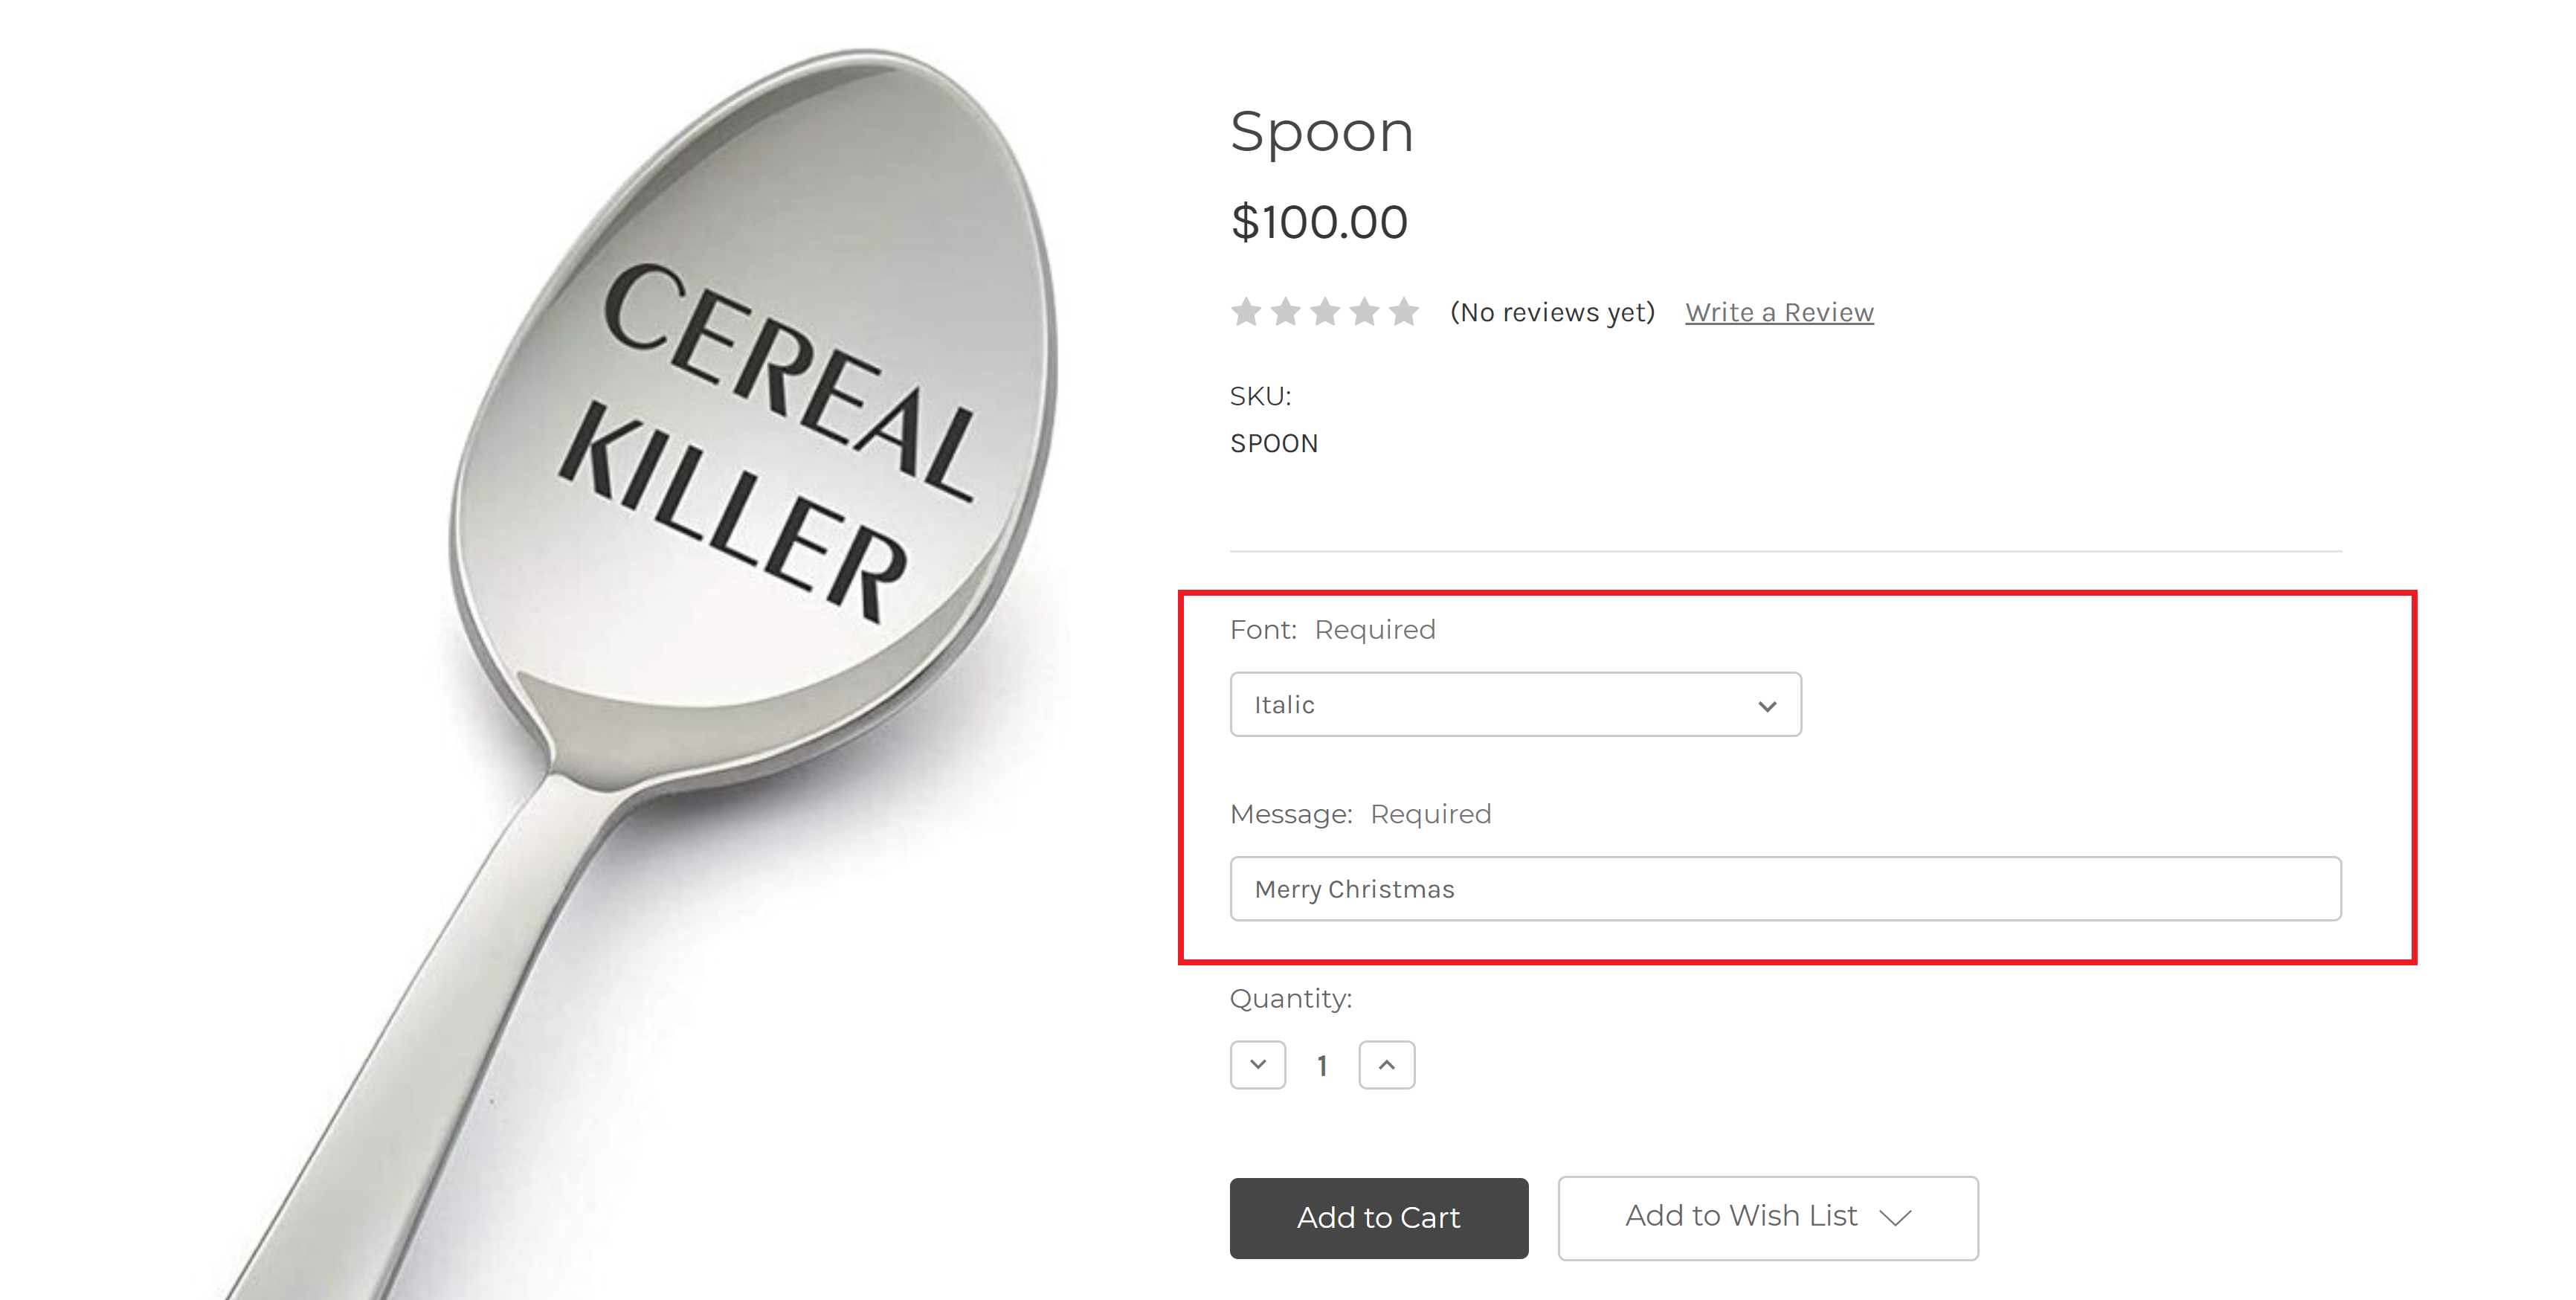
Step 6: Now we can place an order with modifier in BigCommerce. See that I can choose the options and these options do not affect the price of the product:
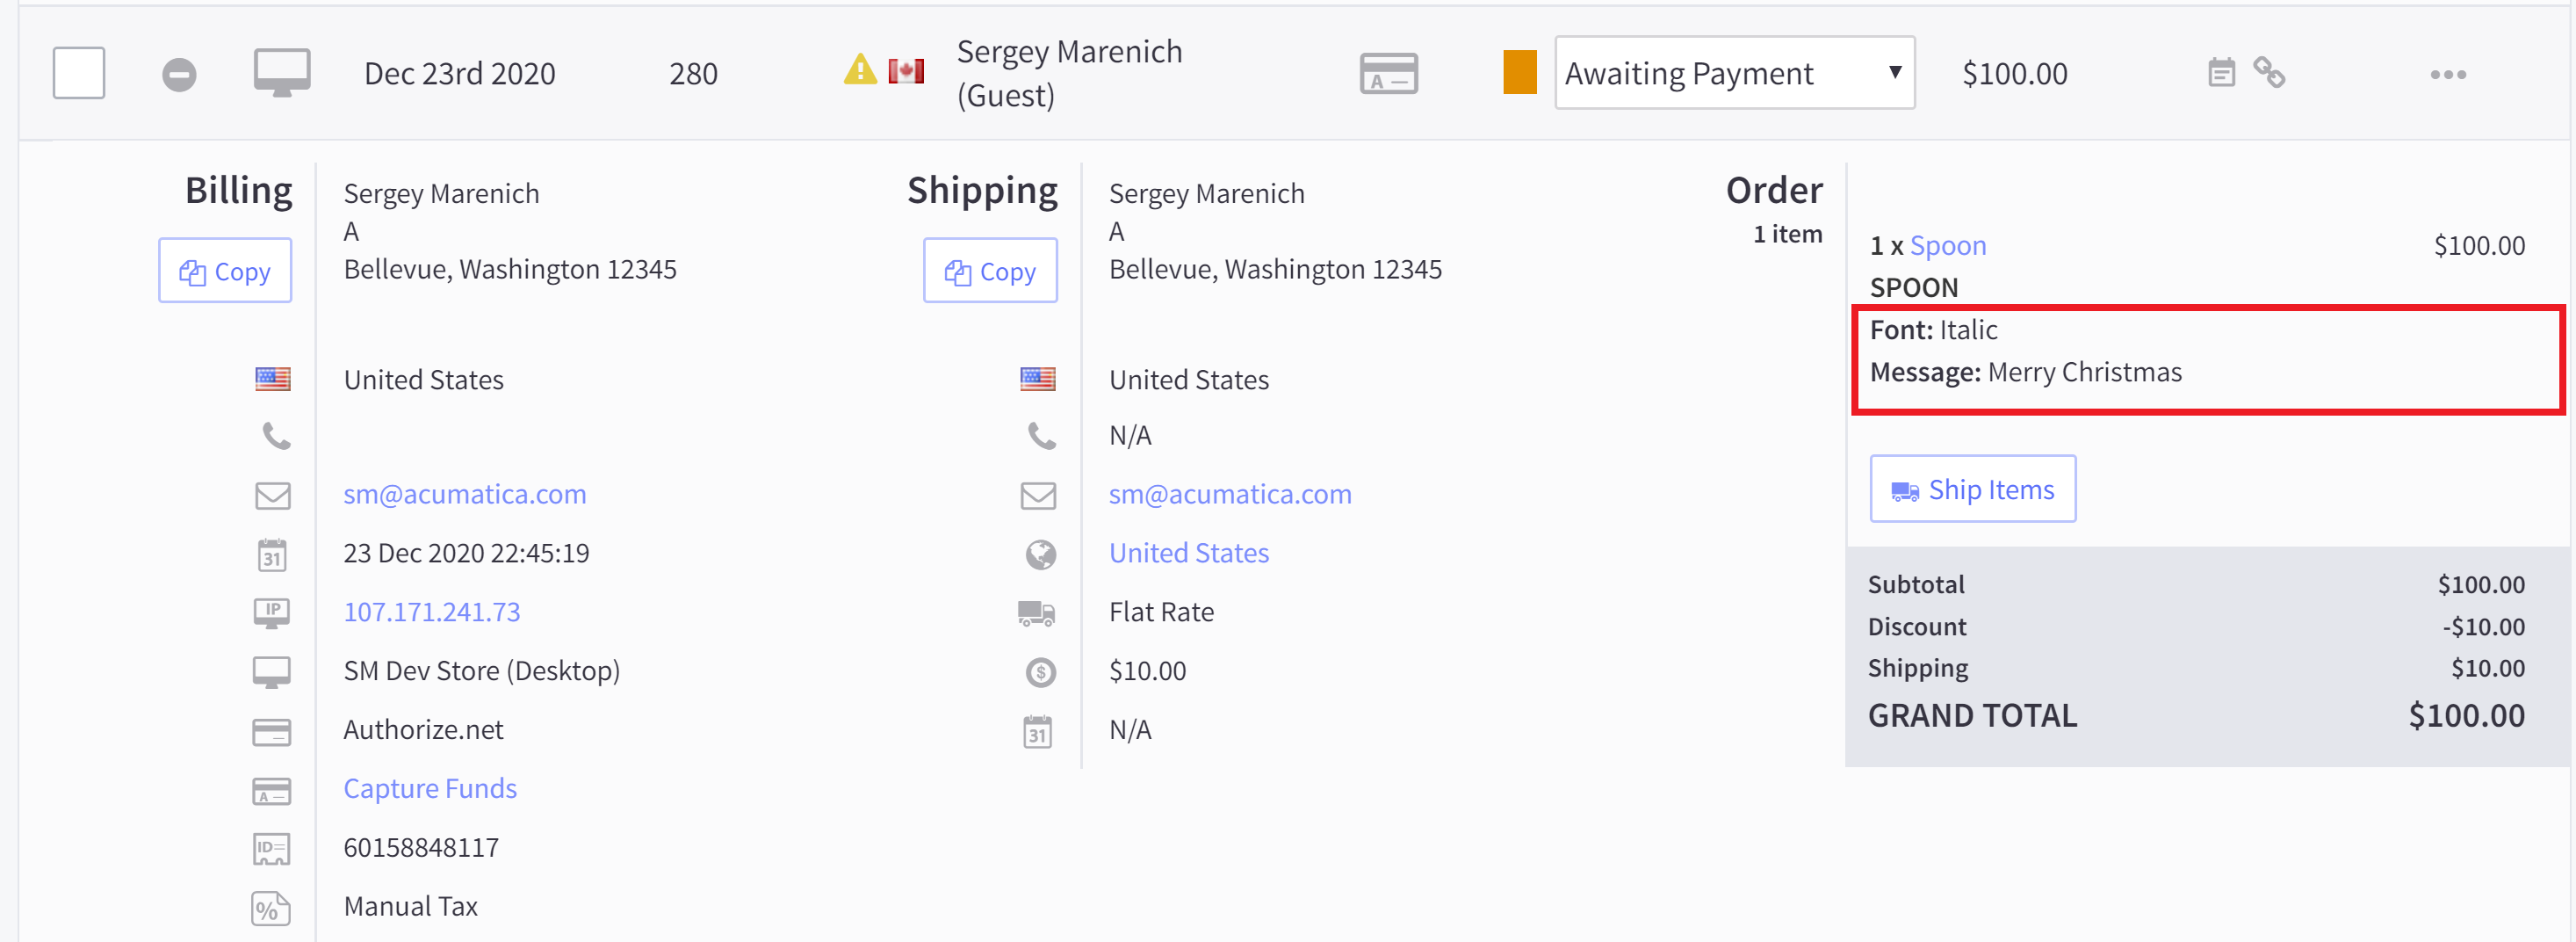
This is how order looks from the BigCommerce admin panel:
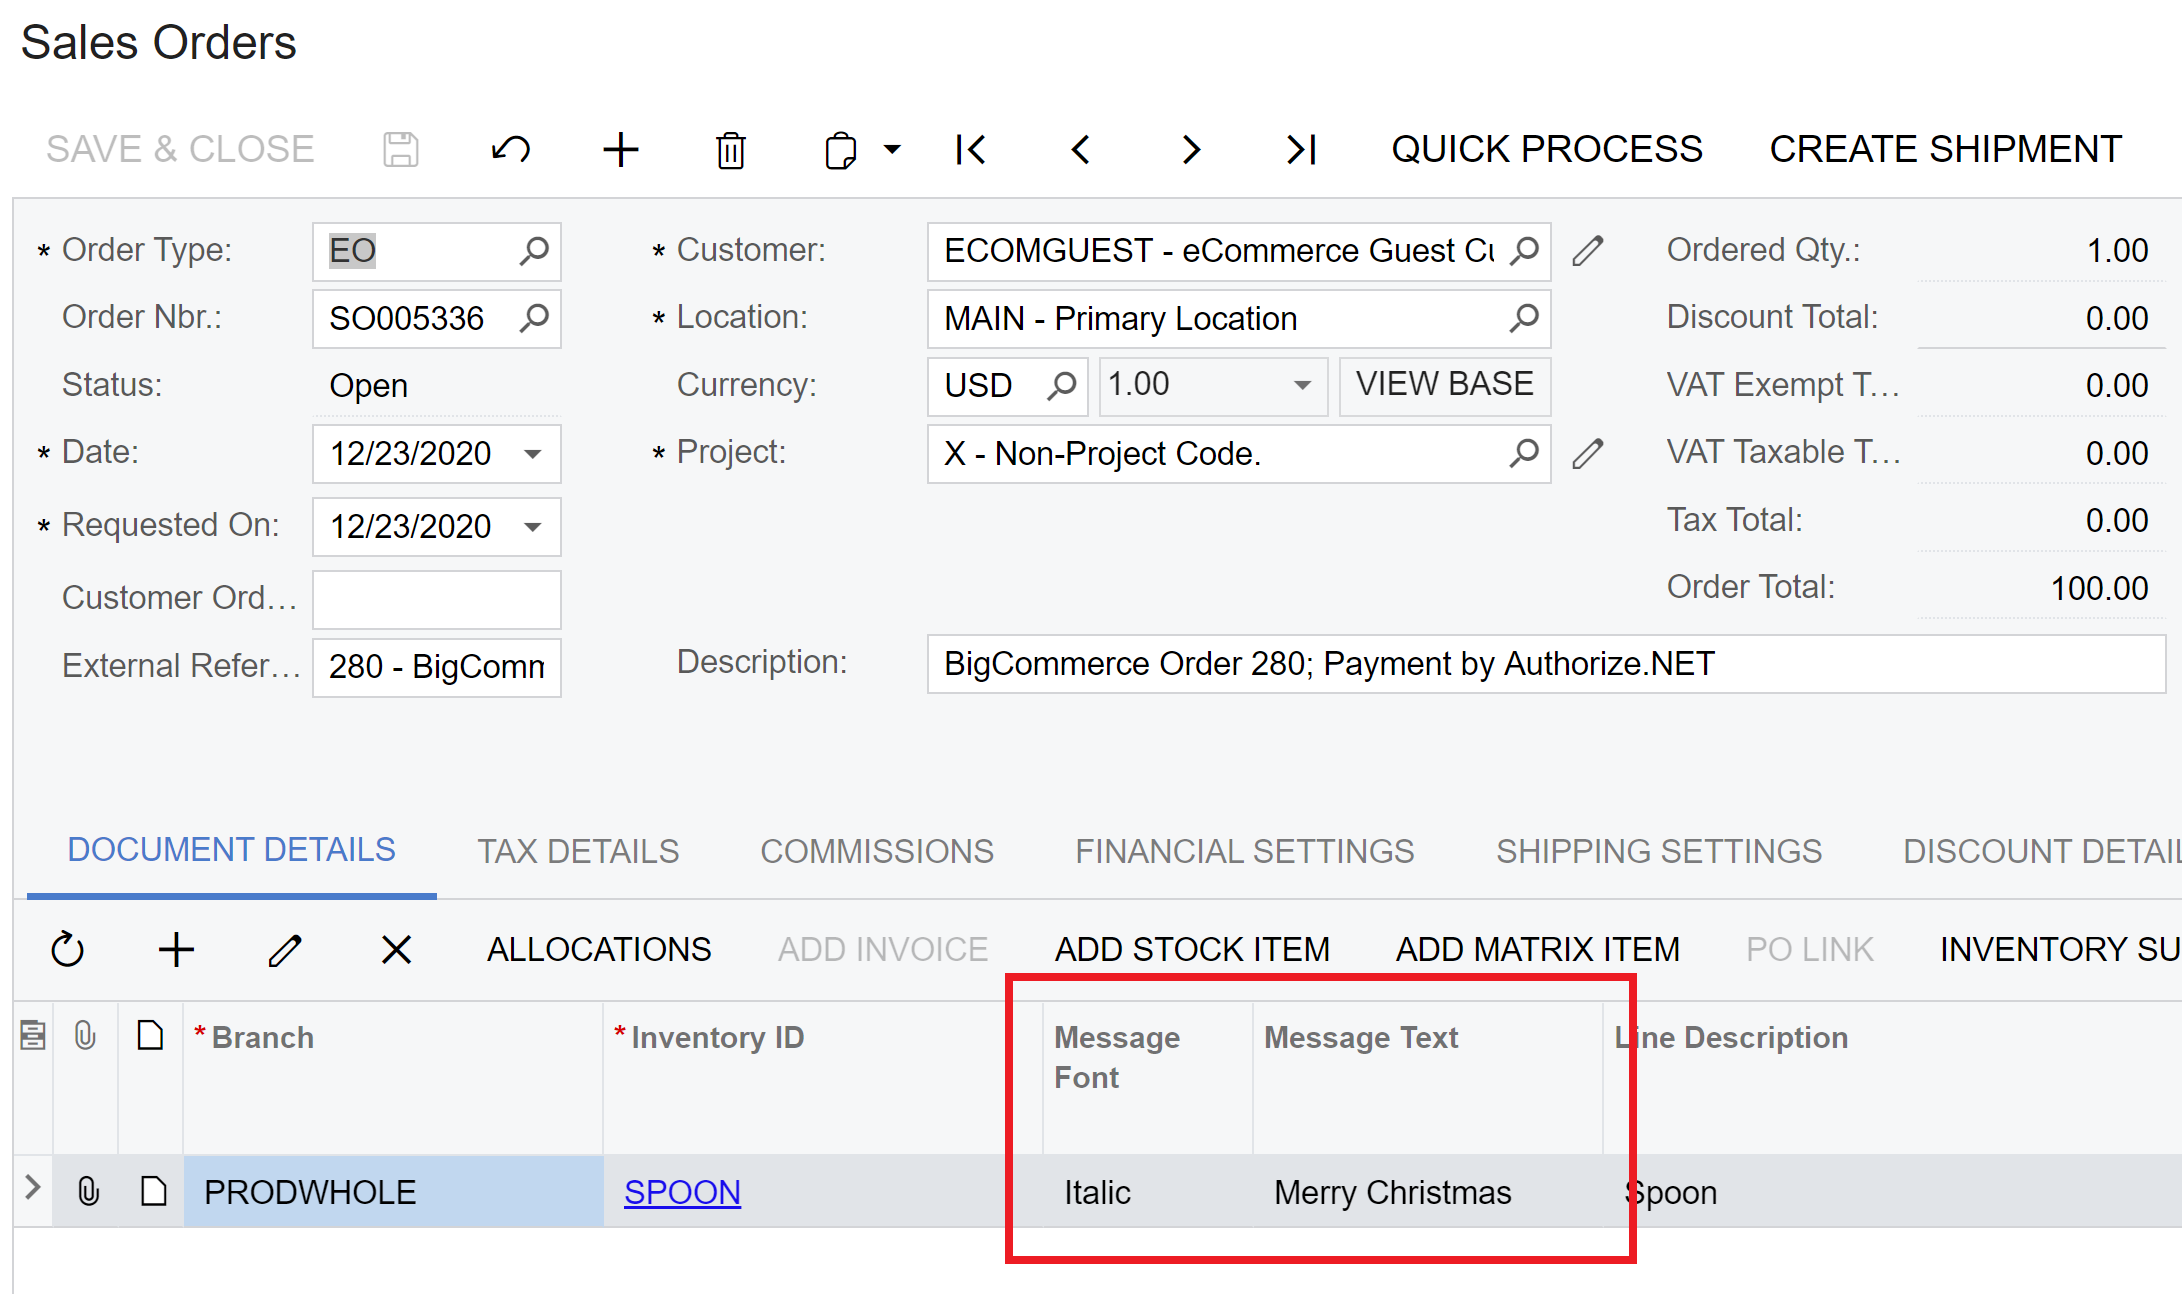
Step 7: Now we can Prepare & Process the Order. If everything is done correctly, you will see the custom values in your Sales Order. Here is the order synchronized by my setup:
Here on the bottom of this article, you can find the customization project package that I have used for this article. Feel free to use it!
Hope it helps!


