Experimenting with importing BOM Steps but unable to get anything to populate. Not sure what I’m doing wrong.
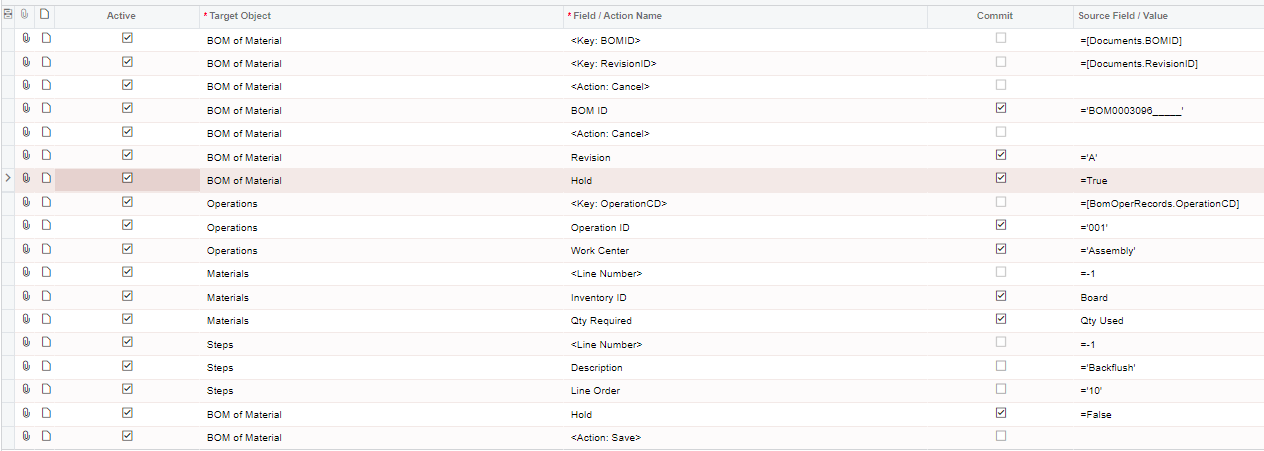
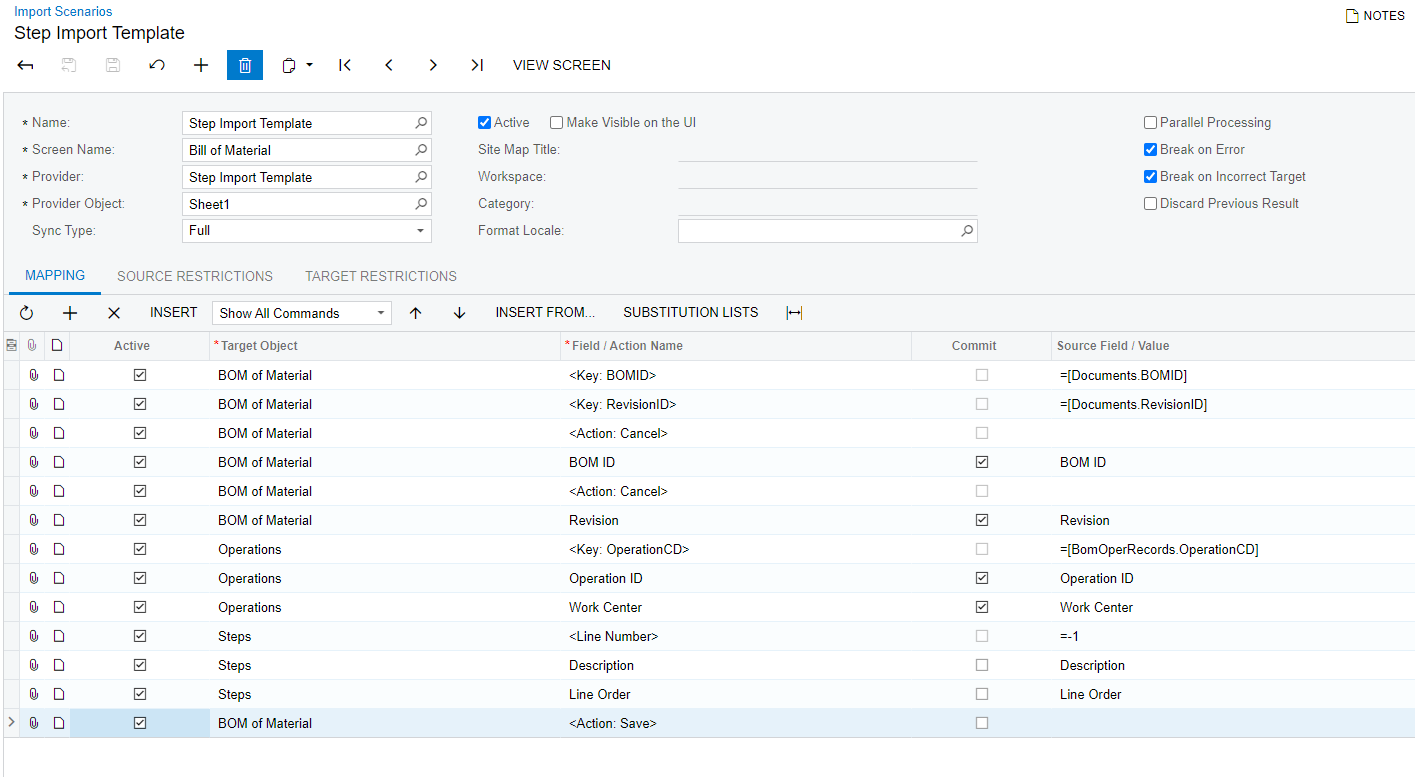
Just trying to populate a single line in Steps like this, after I’ve added the material (or before - but within same scenario):
Experimenting with importing BOM Steps but unable to get anything to populate. Not sure what I’m doing wrong.
Just trying to populate a single line in Steps like this, after I’ve added the material (or before - but within same scenario):
Best answer by jharris
Well it was worth a shot! Haha…. If you want to delete a line, you first have to instruct Acumatica to find the line, and then you can specify the command to delete it.
Here's an example I was able to find:

Let's take a look at what is going on here:
The @@InventoryID line, deactivated <LineNumber> (=-1), and the mapping of the InventoryID field is matched (i.e. Matching Records at the Line Level). These three changes instruct Acumatica to find a specific line with an InventoryID equal to ACON (notice we are using a formula to specify the value we want to find instead of using a field - you could use a field from the source if desired).
Another <LineNumber> field is added at the end of the "Document Details" section, this time specifying a value of =-2. This instructs Acumatica to delete the line.
So to delete lines from a transaction, you first follow the step to setup the Import Scenario to find the matching line, and then you add a <LineNumber> =-2 at the end to instruct Acumatica to delete the line it found. This Import Scenario will find an Invoice using the "Customer Order Nbr" (notice the lookup "->" on the Reference Nbr. field), and then it will delete the line containing the "ACON" Inventory ID. If you wanted to, you could skip the lookup using the @@ field and just set the <Line Number> to the number of the line you wish to delete. Then add the additional <Line Number> mapping with a value of -2 to delete the selected line.
The same exact concept applies if you want to delete lines from other tabs on records. For example, if you wanted to delete Cross Reference Bar Codes from Stock Items, you would first export a list of all items and barcodes to generate a file containing Bar Codes you want to delete, and then you would setup an Import Scenario like this:
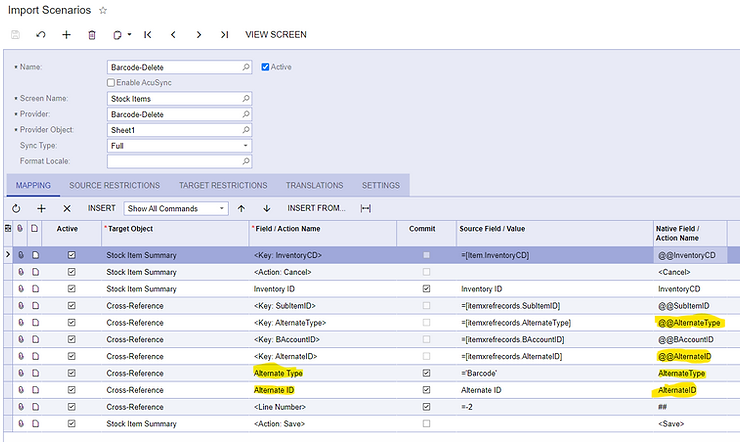
Let's examine what is going on here:
We are looking for a Stock Item with a specific Inventory ID (as specified in the file).
We are then looking for a Cross-Reference having an Alternate Type = 'BarCode' and the Alternate ID from our file of bar codes we wish to delete.
At the end of the Cross Reference section, we add a <LineNumber> =-2 to instruct Acumatica to delete the line.
Notice in this import Scenario there is no need to disable the <LineNumber> =-1 line. This is because Acumatica doesn't have Line Numbers for this type of line data, but instead has key fields. So as soon as we add the "Alternate Type" and "Alternate ID" fields, the <Key:> fields show up automatically. Take a close look at the Native Field/Action name of a key field. Notice how it starts with @@ followed by the key field database name? This is identical to us manually adding a line and typing in @@AlternateType and @@AlternateID to find the bar code we wish to delete. In this case, Acumatica automatically adds these fields for us, so no need to manually add them ourselves like we did earlier with the InventoryID. It is not necessary for us to set values for @@BAccountID or @@SubItemID because in our use case, these fields are not required for us to identify the line we wish to delete (in other use cases values may be required for these fields).
No account yet? Create an account
Enter your E-mail address. We'll send you an e-mail with instructions to reset your password.