Solved

How can I add another workspace from the option button (Three Dots)?

  • 9 September 2022
  • 4 replies
  • 323 views

Userlevel 3
Badge

Hi all,


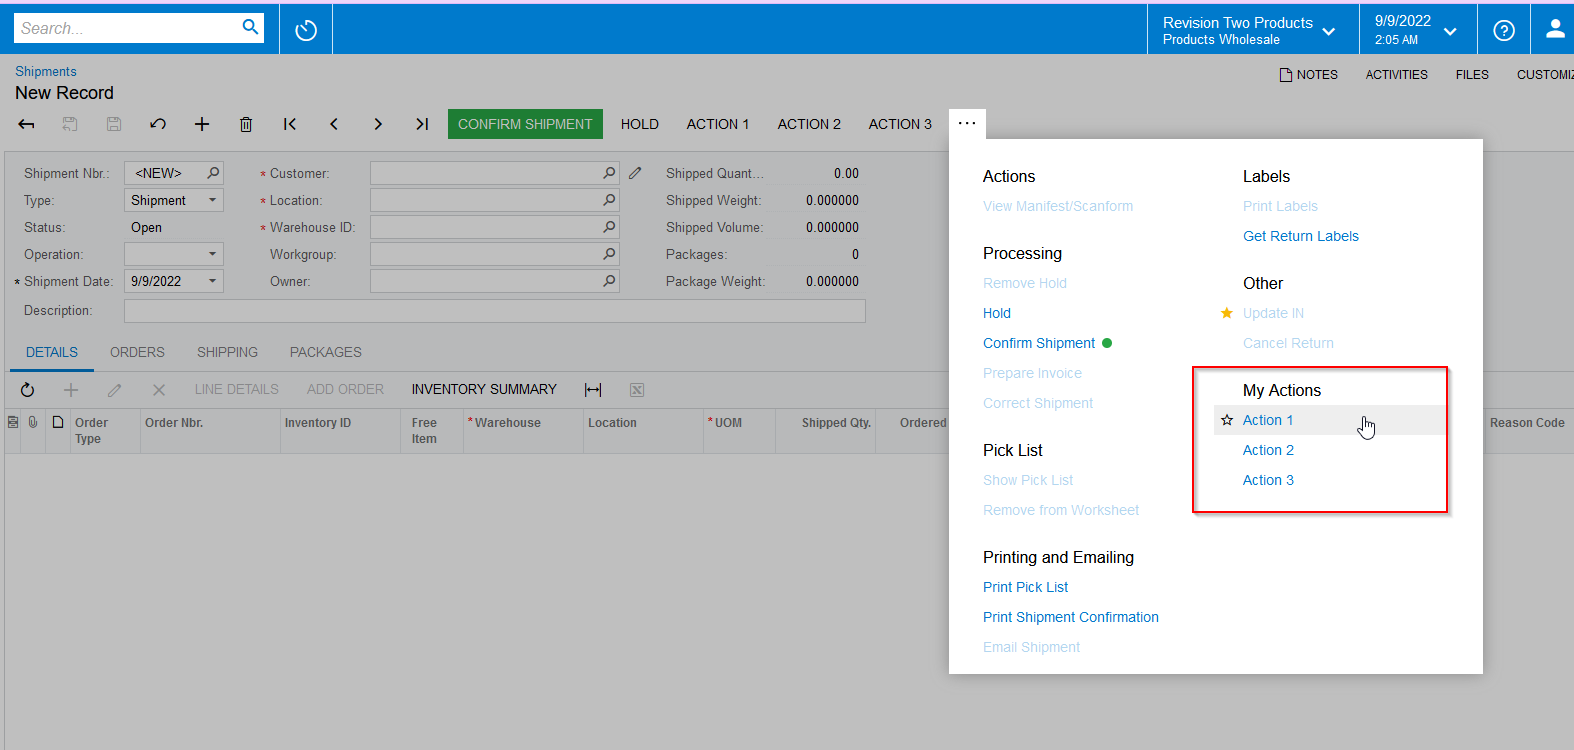
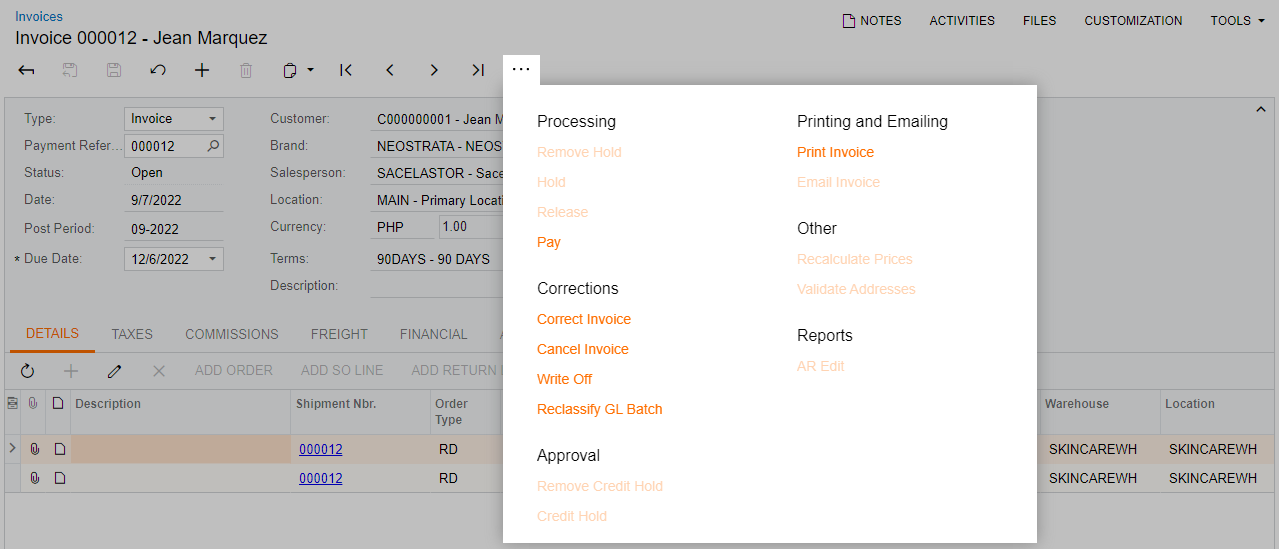
Can you help me about my concern, I want to add the specific module from workspace in the three dots (...) option menu

Like this:


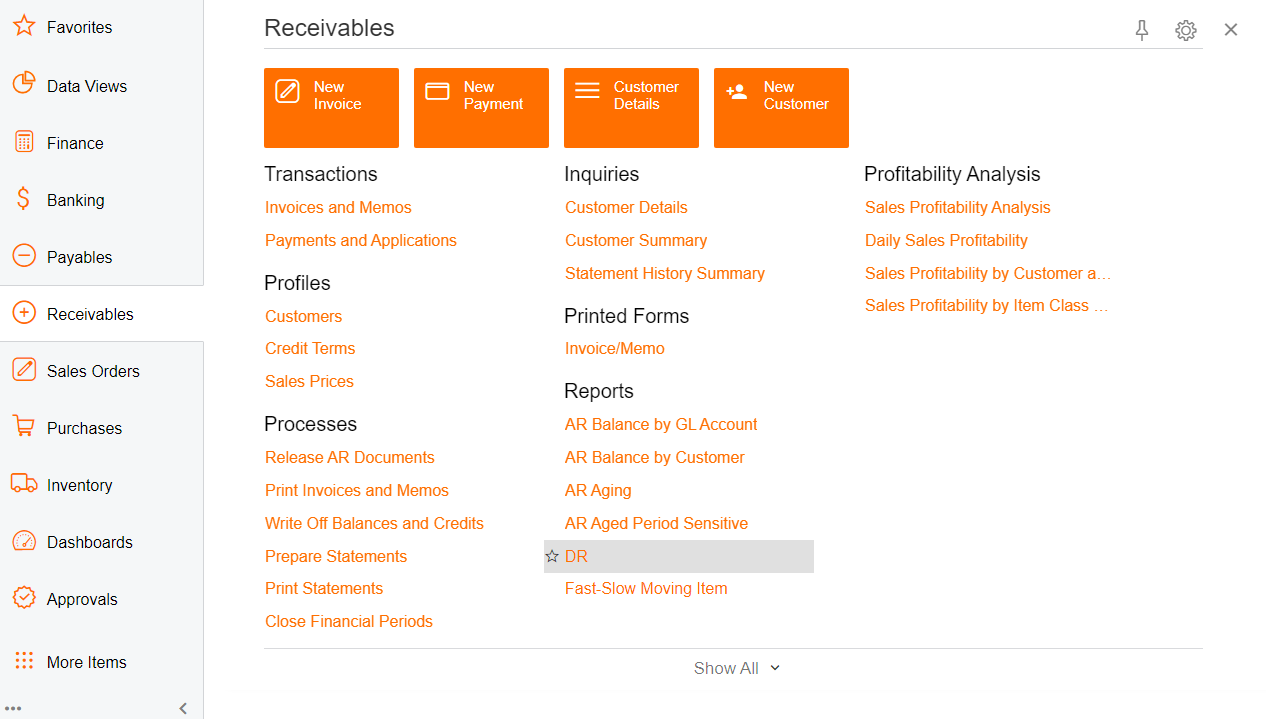
and I want to add in the three dots this (DR) in Receivables - Reports


Thanks

icon

Best answer by manikantad18 9 September 2022, 11:03

View original

4 replies

Userlevel 7
Badge +12

Hi @acumaticapm182 


Could you please confirm if you are looking to add a report under Actions ( 3dots).

 @rhooper91

How to Add a Report in Acumatica

Step 1: Report Designer

On the Report Designer, open the report to which you want to add the form and make sure that it contains parameters required to run the report (for example, OrderType and OrderNbr for a sales order).

Step 2: New Customization Project

On the Customization Projects form, create a new customization project, and open it in the Customization Project Editor.

Step 3: Customize Existing Screen

Click Screens in the navigation pane to open the Customized Screens page. On the page toolbar, click Add Screen > Customize Existing Screen and select the correct form (in this case, Sales Orders).

Step 4: Action Properties

In the navigation pane, for whatever screen you’re using, click Actions. In the right panel, click Add New Record > Create New:

  • The Action Properties dialog box will open; then enter the values for the Action Name and Display Name boxes.
  • Select the report needed (SO641000, in our example) in the Destination Screen lookup box.
  • In the Toolbar Folder drop-down list, select Reports.
  • On the Navigation Parameters tab, add parameters required to run the report.
  • Click OK to close the Action Properties dialog box and save changes.

Adding Reports to any Screen in Acumatica

Step 5: Add the Action to Workflow

Add the newly created action to the desired workflow screen states. In this example, we will add it to the On Hold state as follows:

In the navigation pane of the Customization Project Editor, click Workflows under the screen node you want to customize. The Workflows page will open. You can customize a predefined workflow using the changes you have made in the previous versions or you can copy the system workflow instead of extending it or create a simple workflow.

In the Actions tab of the workflow, create a new action by clicking Create Action.

Select the action created in Step 1.

Adding Reports to any Screen in Acumatica

Step 6: Publish the Customization Project

Publish the customization project by clicking Publish > Publish Current Project in the Customization Project Editor.

Adding Reports to any Screen in Acumatica

Results

And just like that: a new report has been added to the Reports drop-down list.

Adding Reports to any Screen in Acumatica

OK, so maybe it wasn’t easy but it is certainly something that anyone can do by following those simple stepsuser-mention widget

Userlevel 7
Badge +17

Hi @acumaticapm182  Here is the sample example to add the workspace in the …dots and please find the sample code for reference.


 public class SOShipmentEntryExt : PXGraphExtension<SOShipmentEntry>
{
public override void Initialize()
{
base.Initialize();
this.KNMyActions.MenuAutoOpen = true;
this.KNMyActions.AddMenuAction(KNAction1);
this.KNMyActions.AddMenuAction(KNAction2);
this.KNMyActions.AddMenuAction(KNAction3);

}

public PXAction<SOShipment> KNMyActions;
public PXAction<SOShipment> KNAction1;
public PXAction<SOShipment> KNAction2;
public PXAction<SOShipment> KNAction3;

[PXUIField(DisplayName = "My Actions", MapEnableRights = PXCacheRights.Select)]
[PXButton(SpecialType = PXSpecialButtonType.ActionsFolder)]
protected virtual IEnumerable kNMyActions(PXAdapter adapter, [PXString()] string ActionName)
{
if (!string.IsNullOrEmpty(ActionName))
{
PXAction action = Base.Actions[ActionName];
if (action != null)
{
Base.Save.Press();
List<object> result = new List<object>();
foreach (object data in action.Press(adapter))
{
result.Add(data);
}
return result;
}
}
return adapter.Get();
}


[PXButton()]
[PXUIField(DisplayName = "Action 1")]
protected virtual IEnumerable kNAction1(PXAdapter adapter)
{
return adapter.Get();
}
[PXButton()]
[PXUIField(DisplayName = "Action 2")]
protected virtual IEnumerable kNAction2(PXAdapter adapter)
{
return adapter.Get();
}

[PXButton()]
[PXUIField(DisplayName = "Action 3")]
protected virtual IEnumerable kNAction3(PXAdapter adapter)
{
return adapter.Get();
}
}


Userlevel 7
Badge +4

@acumaticapm182 There is a KB article on this process:

Looks like @manikantad18 has copied and pasted some of the text off this page but if you haven’t already read over it there could be more information in here.

Userlevel 2
Badge

Hi @acumaticapm182  Here is the sample example to add the workspace in the …dots and please find the sample code for reference.


 public class SOShipmentEntryExt : PXGraphExtension<SOShipmentEntry>
{
public override void Initialize()
{
base.Initialize();
this.KNMyActions.MenuAutoOpen = true;
this.KNMyActions.AddMenuAction(KNAction1);
this.KNMyActions.AddMenuAction(KNAction2);
this.KNMyActions.AddMenuAction(KNAction3);

}

public PXAction<SOShipment> KNMyActions;
public PXAction<SOShipment> KNAction1;
public PXAction<SOShipment> KNAction2;
public PXAction<SOShipment> KNAction3;

[PXUIField(DisplayName = "My Actions", MapEnableRights = PXCacheRights.Select)]
[PXButton(SpecialType = PXSpecialButtonType.ActionsFolder)]
protected virtual IEnumerable kNMyActions(PXAdapter adapter, [PXString()] string ActionName)
{
if (!string.IsNullOrEmpty(ActionName))
{
PXAction action = Base.Actions[ActionName];
if (action != null)
{
Base.Save.Press();
List<object> result = new List<object>();
foreach (object data in action.Press(adapter))
{
result.Add(data);
}
return result;
}
}
return adapter.Get();
}


[PXButton()]
[PXUIField(DisplayName = "Action 1")]
protected virtual IEnumerable kNAction1(PXAdapter adapter)
{
return adapter.Get();
}
[PXButton()]
[PXUIField(DisplayName = "Action 2")]
protected virtual IEnumerable kNAction2(PXAdapter adapter)
{
return adapter.Get();
}

[PXButton()]
[PXUIField(DisplayName = "Action 3")]
protected virtual IEnumerable kNAction3(PXAdapter adapter)
{
return adapter.Get();
}
}


Hello,

I see that ACTION1 ACTION2 and ACTION3 appear both on the toolbar, and they are also visible in the 3 dots menu under “My Actions” section.

Is it possible to have ACTION1 ACTION2 and ACTION3 appear only in the 3 dots menu, but not appear on the toolbar (and only appear there if user marks an action with the “star” as a favorite action)?

Reply


About Acumatica ERP system
Acumatica Cloud ERP provides the best business management solution for transforming your company to thrive in the new digital economy. Built on a future-proof platform with open architecture for rapid integrations, scalability, and ease of use, Acumatica delivers unparalleled value to small and midmarket organizations. Connected Business. Delivered.
© 2008 — 2024  Acumatica, Inc. All rights reserved